apijam
Publishing APIs : Publish documentation
Duration : 20 mins
Persona : API Team
Use case
You have an API Proxy that you would like to share with App Developers. You want to enable developers to learn about, register for, and begin using your API Proxy.
How can Apigee Edge help?
Apigee Edge provides multiple options for your Developer Portal. There is a lightweight integrated portal that supports branding and customization of much of the site, such as theme, logos, and page content. The lightweight portal can be published in seconds, directly from the management UI. Some organizations use a Drupal-based portal instead, allowing fuller control and leveraging of any of the hundreds of Drupal modules available in the Drupal Market. This lab focuses on the lightweight integrated Apigee Developer Portal.
In this lab, you will create a Developer Portal and publish an OpenAPI specification for your API that can be used by developers.
Pre-requisites
For this lab, you will need:
-
An OpenAPI specification for your API. This specification is not the same as the backend API specification. You will use the backend OpenAPI Specification used during the lab API Design : Create a Reverse Proxy with OpenAPI Specification as a starting point.
-
An API Product that contains the API Proxy related to the above OpenAPI Specification. If you have not created an API Product, revisit the lab API Security: Securing APIs with API Keys and then return here to complete these steps.
Instructions
Create your OpenAPI Specification
-
Go to https://apigee.com/edge and log in. This is the Edge management UI
-
Select Develop → Specs and open the existing Employee Backend specification.
-
Note that this API specification is for the API’s backend, not the Edge proxy API itself. For example, the documented Base URL is for the backend, and the specification does not include the API keys we use in our API. We will use the backend OpenAPI specification as the starting point for our API specification.
-
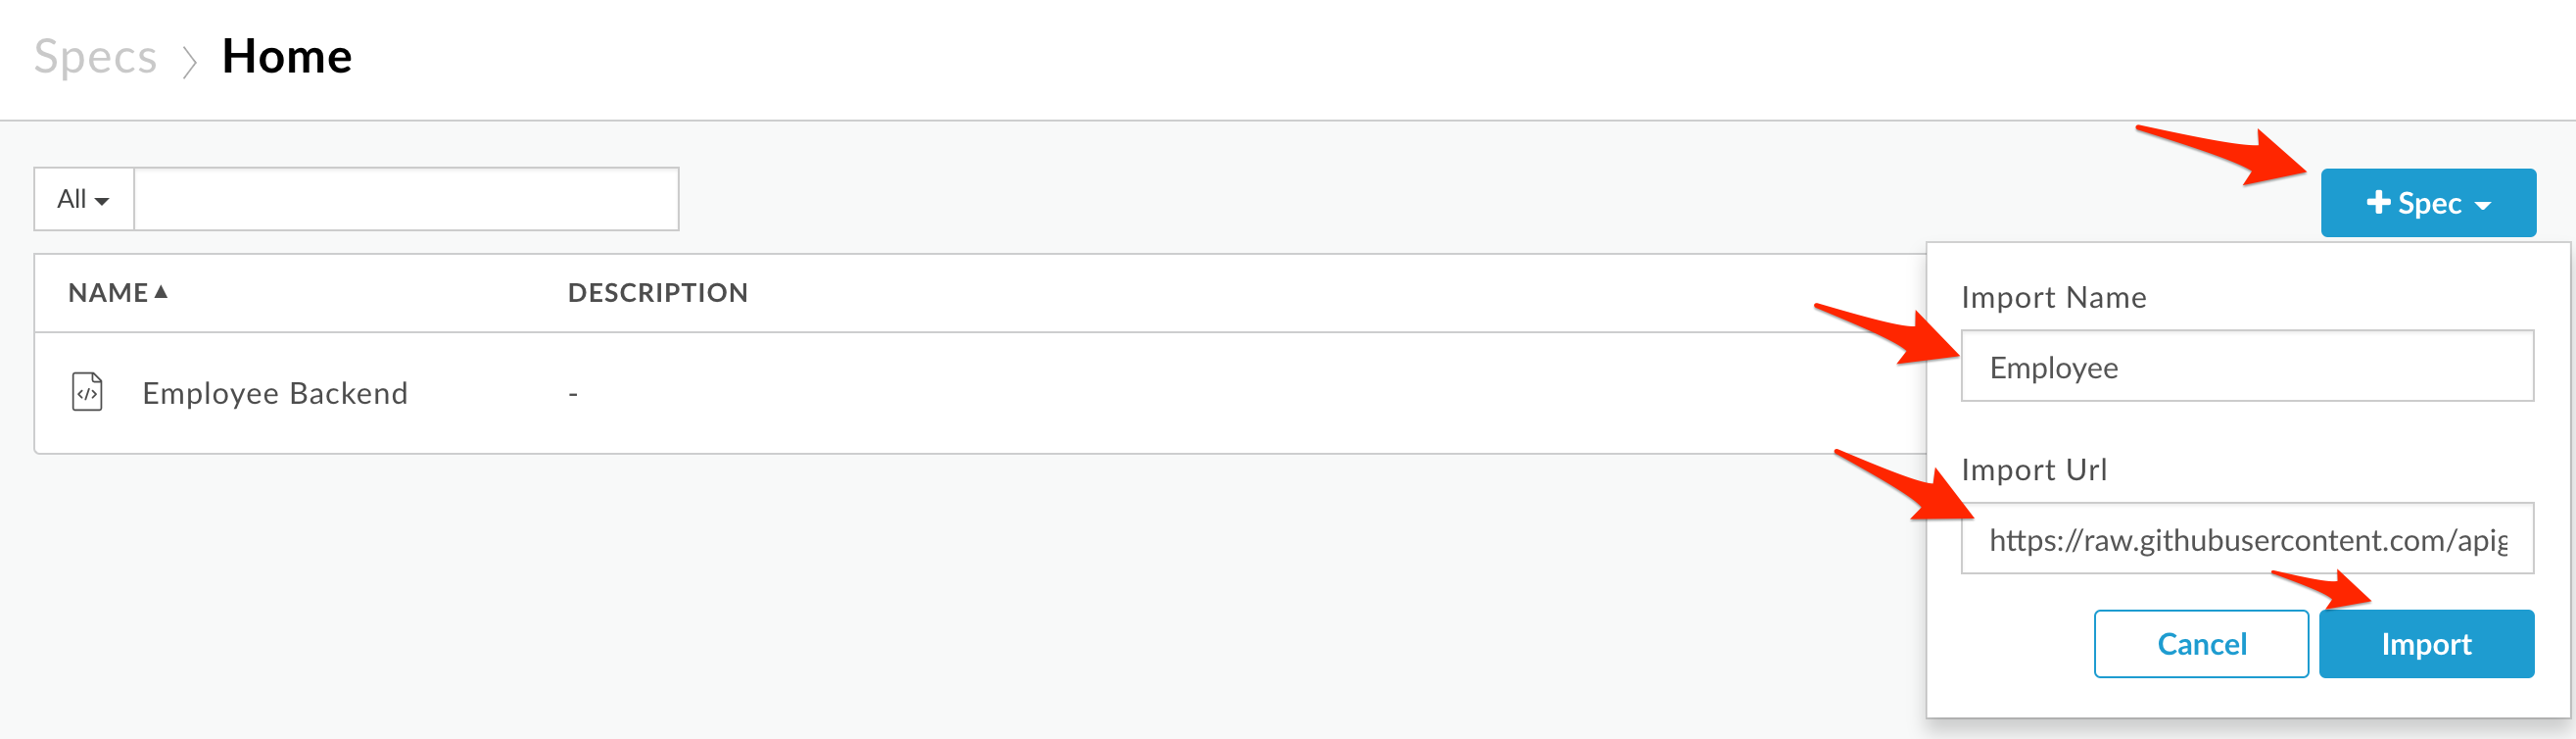
Return to the Specs page (Develop → Specs) and click +Spec. Click on Import URL to add a new spec from existing source.
-
Enter spec details for our API proxy. We will use the same starting spec we used for the backend specification.
-
File Name: Acme Employee
-
URL: https://raw.githubusercontent.com/apigee/apijam/master/Resources/employee-openapi-spec.yaml
-
Now we’ll modify the API spec to represent our API proxy, instead of our backend.
-
Title: Rename the API.
-
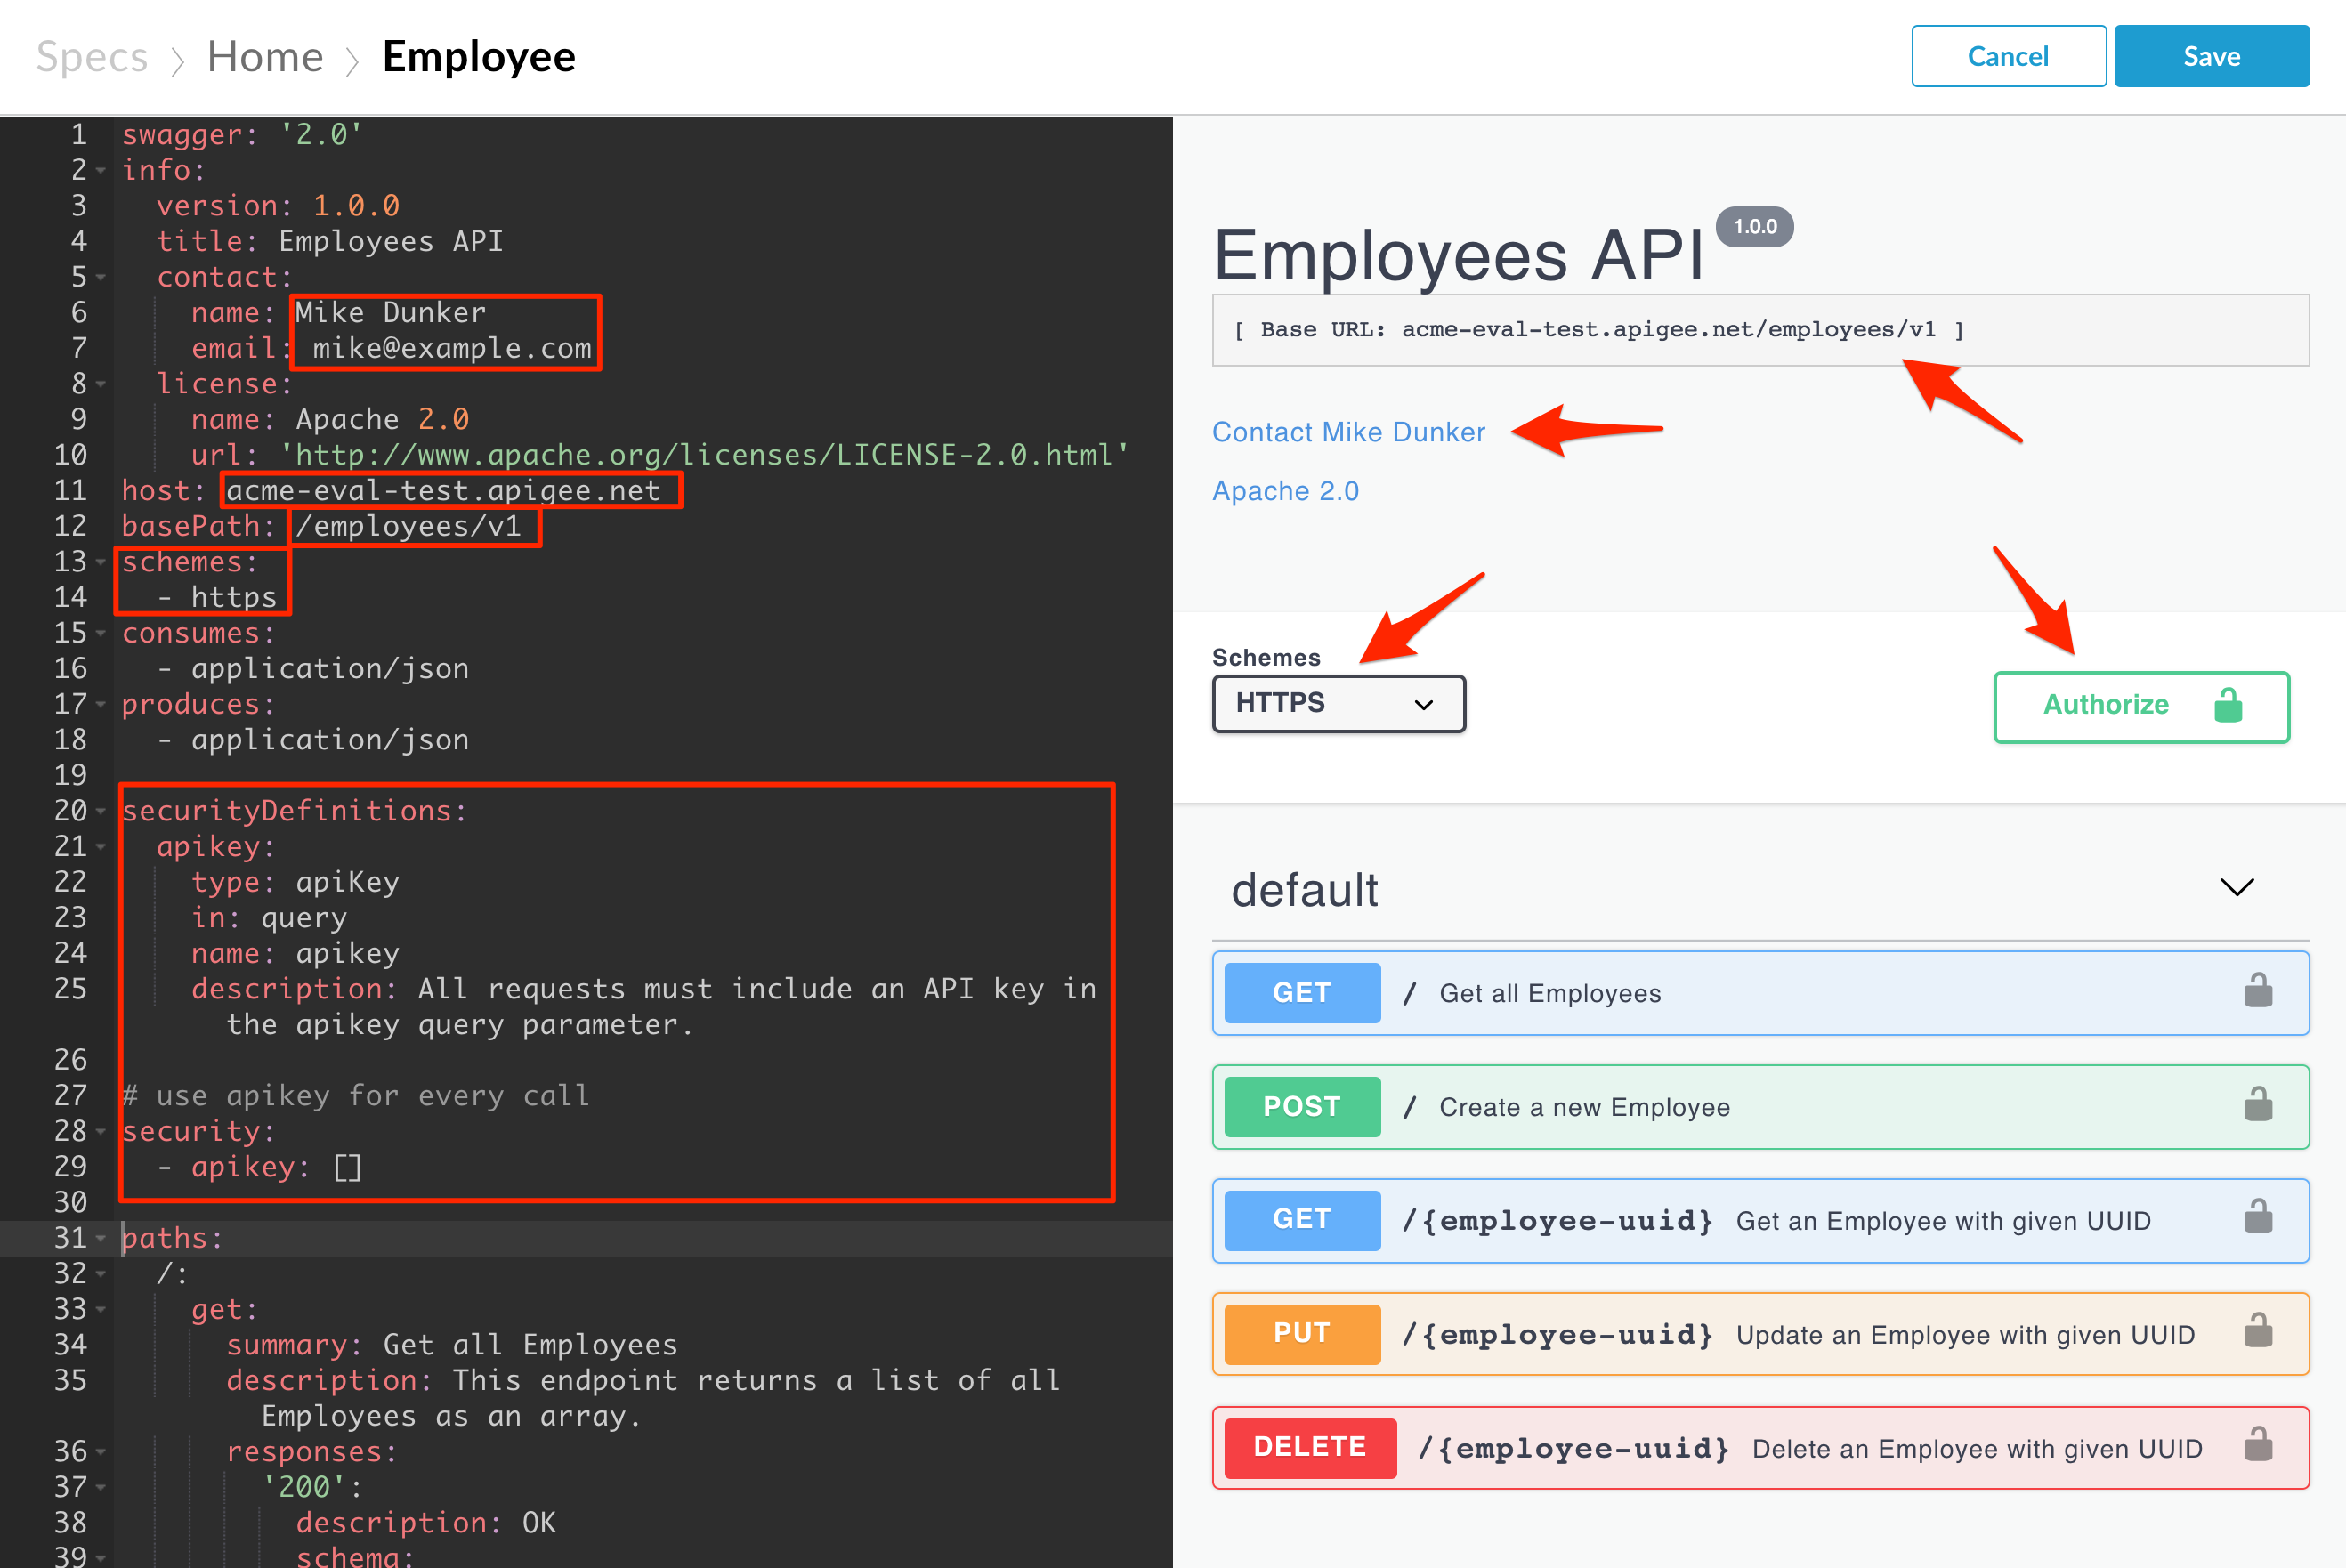
Contact information: This should represent the contact information for your API proxy. Replace the name and email address with your name and email address.
-
Host: Change the hostname to point to your Edge organization ({orgname}-test.apigee.net).
-
BasePath: Change the basepath to match the basepath used for your API proxy (/employees/v1).
-
Schemes: Remove the http scheme. We made our API available only via https.
-
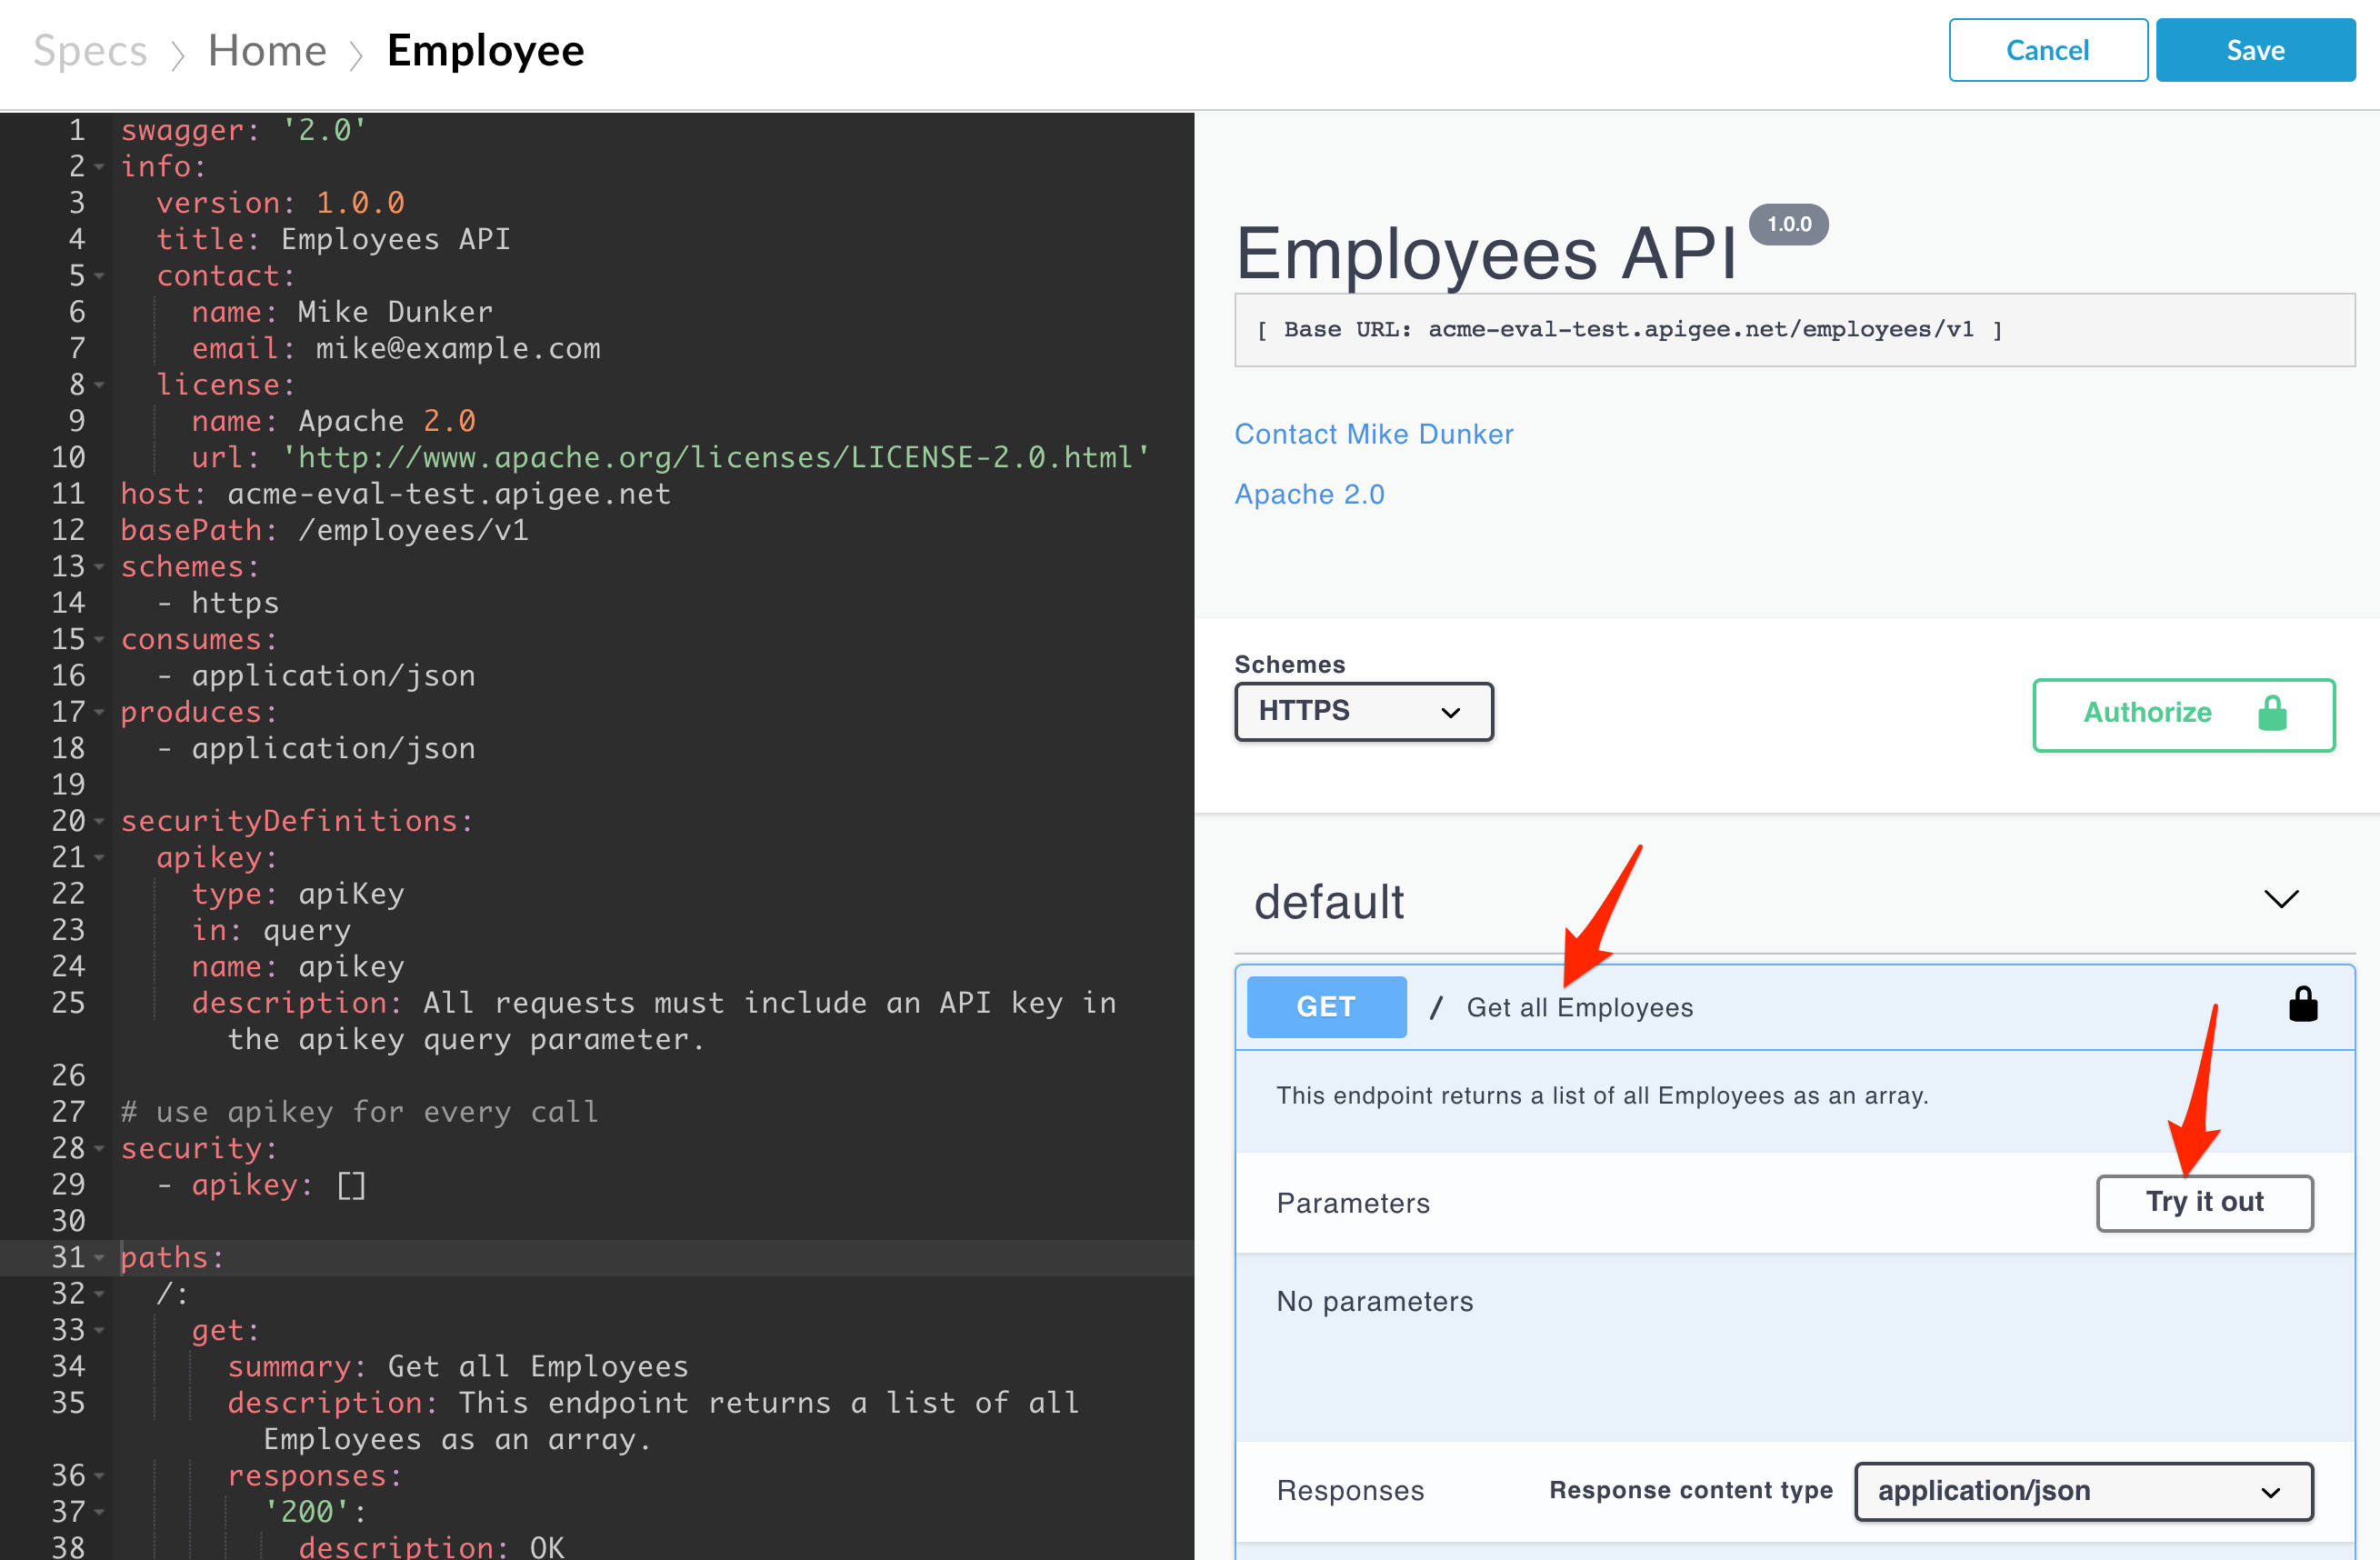
We also need to add the API key as a security feature of our APIs. We’ll do this by adding a security requirement object and definition to the root of our OpenAPI spec. The securityDefinitions section specifies the types of security we use. The security section is used to apply the security. By providing an empty apikey security array, we are applying the API key security to all calls. Note the new Authorize button toward the top of the right pane.
securityDefinitions:
  apikey:
    type: apiKey
    in: query
    name: apikey
    description: All requests must include an API key in the apikey query parameter.

# use apikey for every call
security:
  - apikey: []
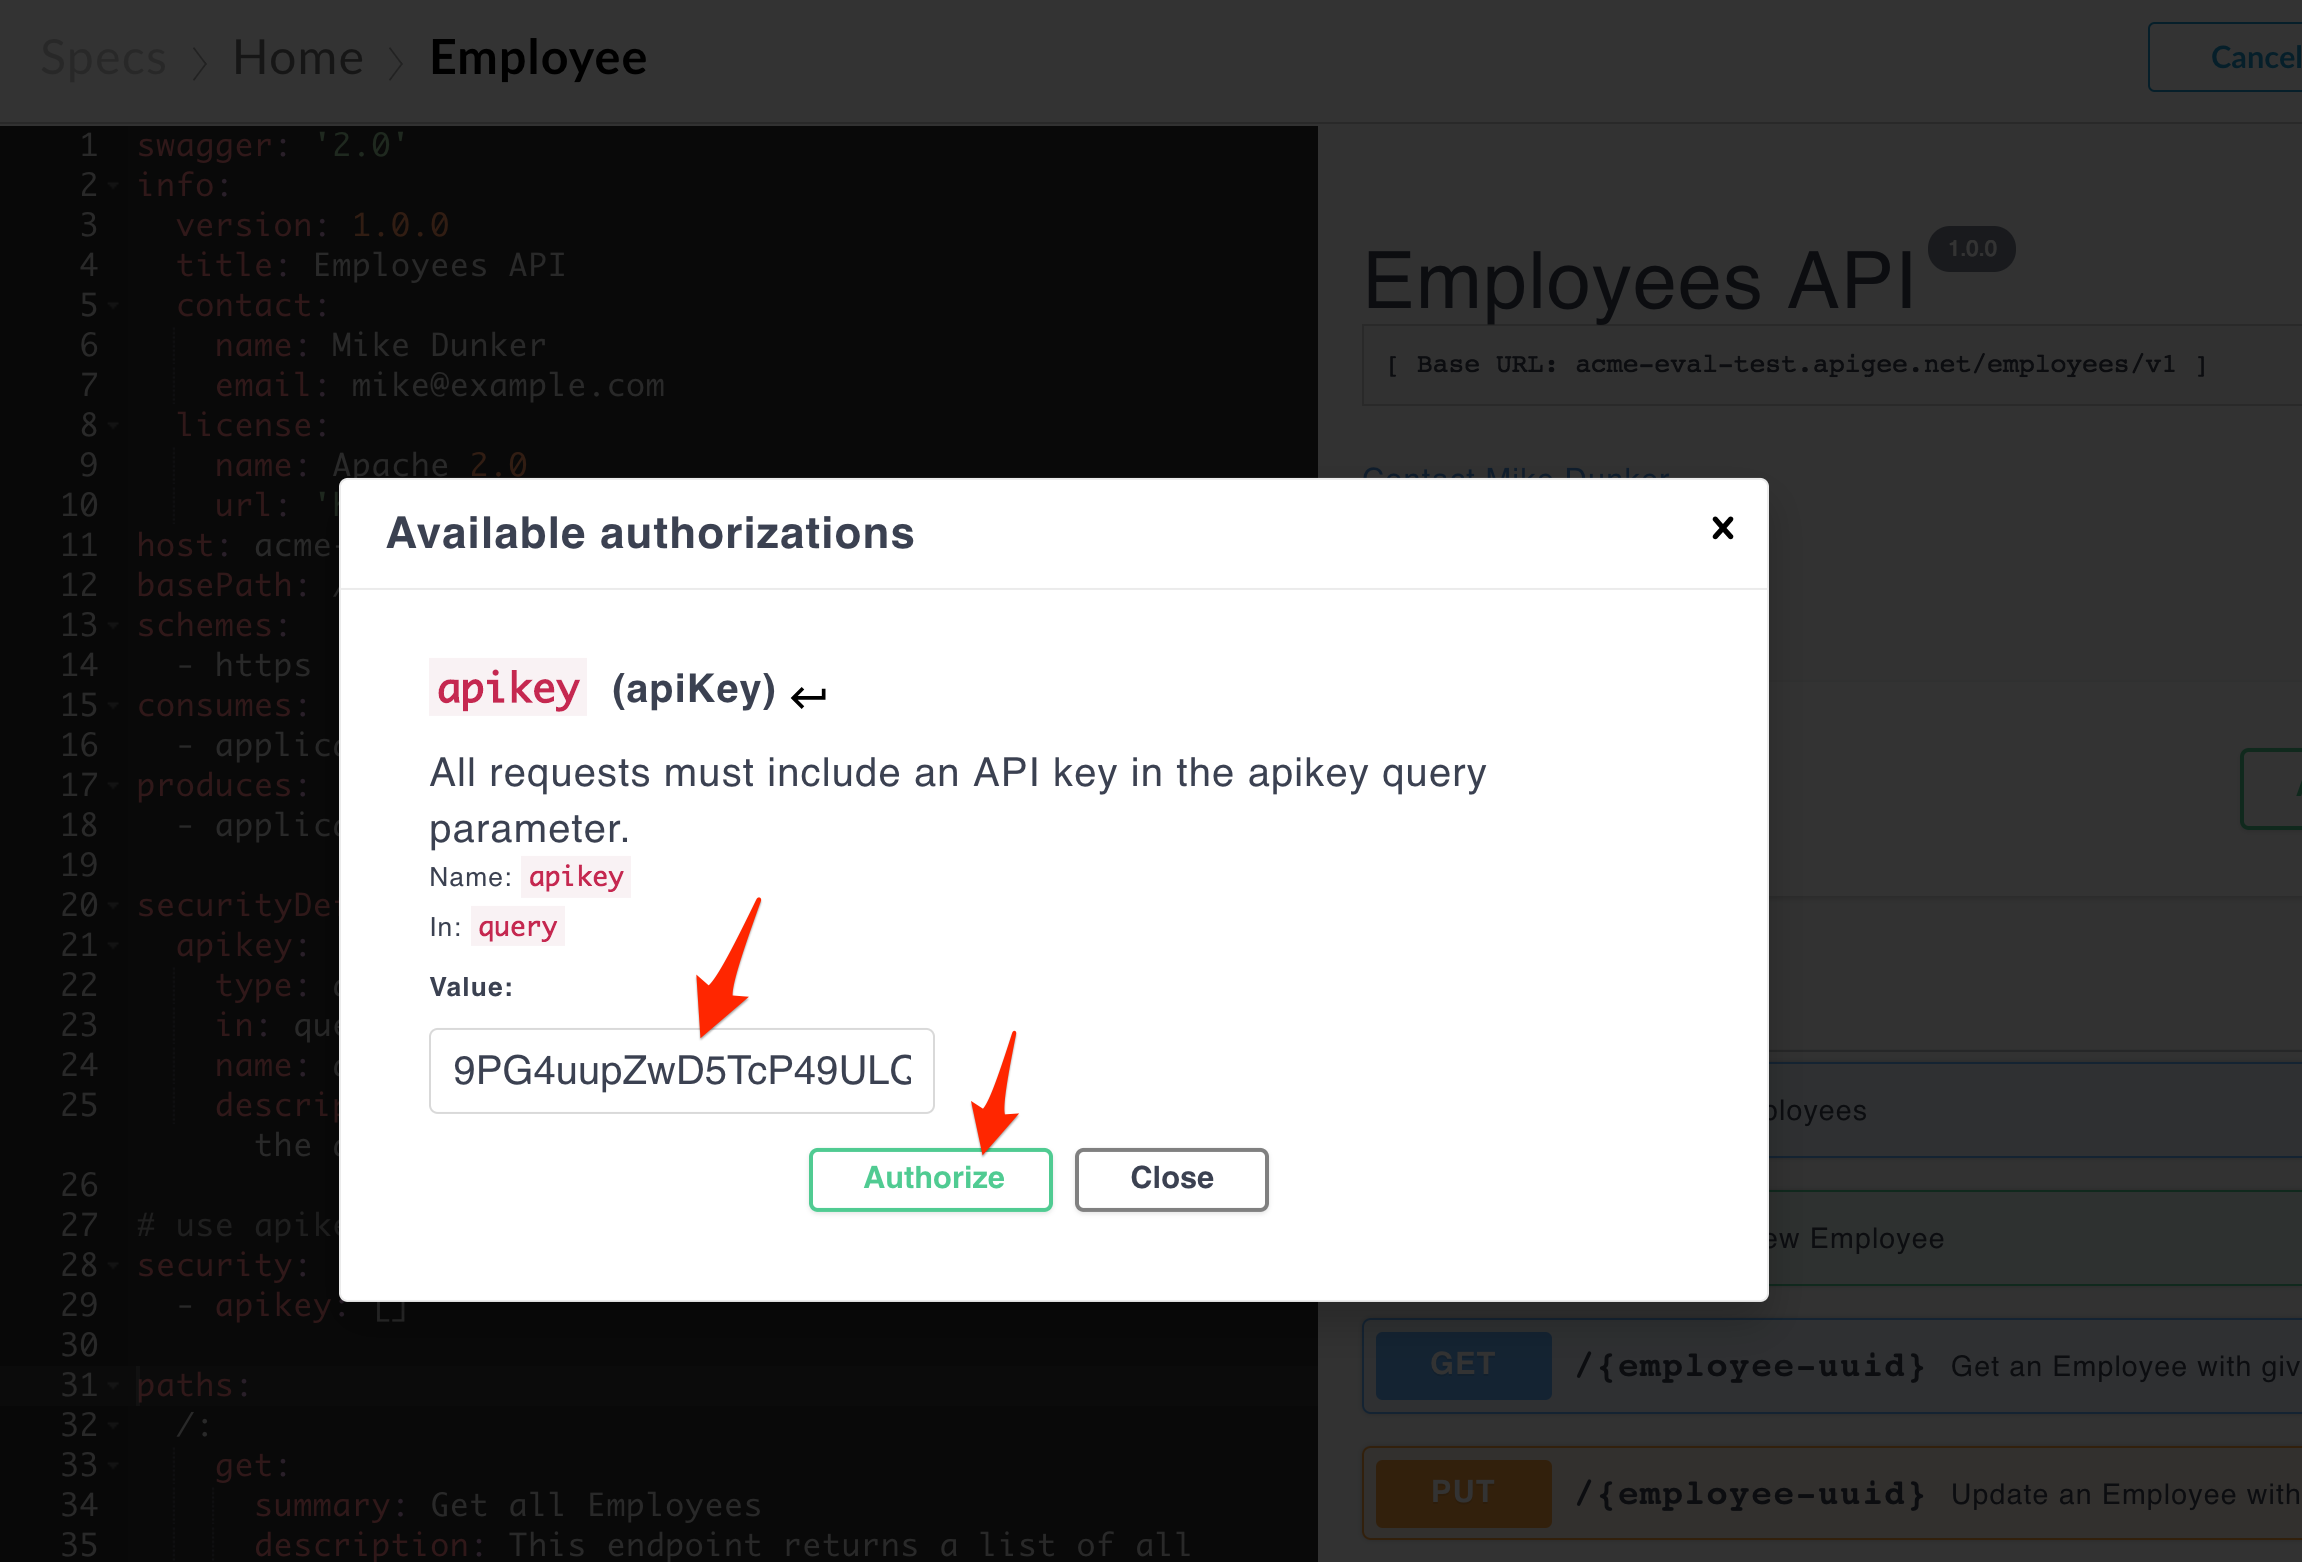
- Let’s validate a call using this page. Find the same API key you used during the lab API Design : Securing APIs with API Keys. Click the Authorize button to open a dialog for entering your key. Paste in your API key and click Authorize.
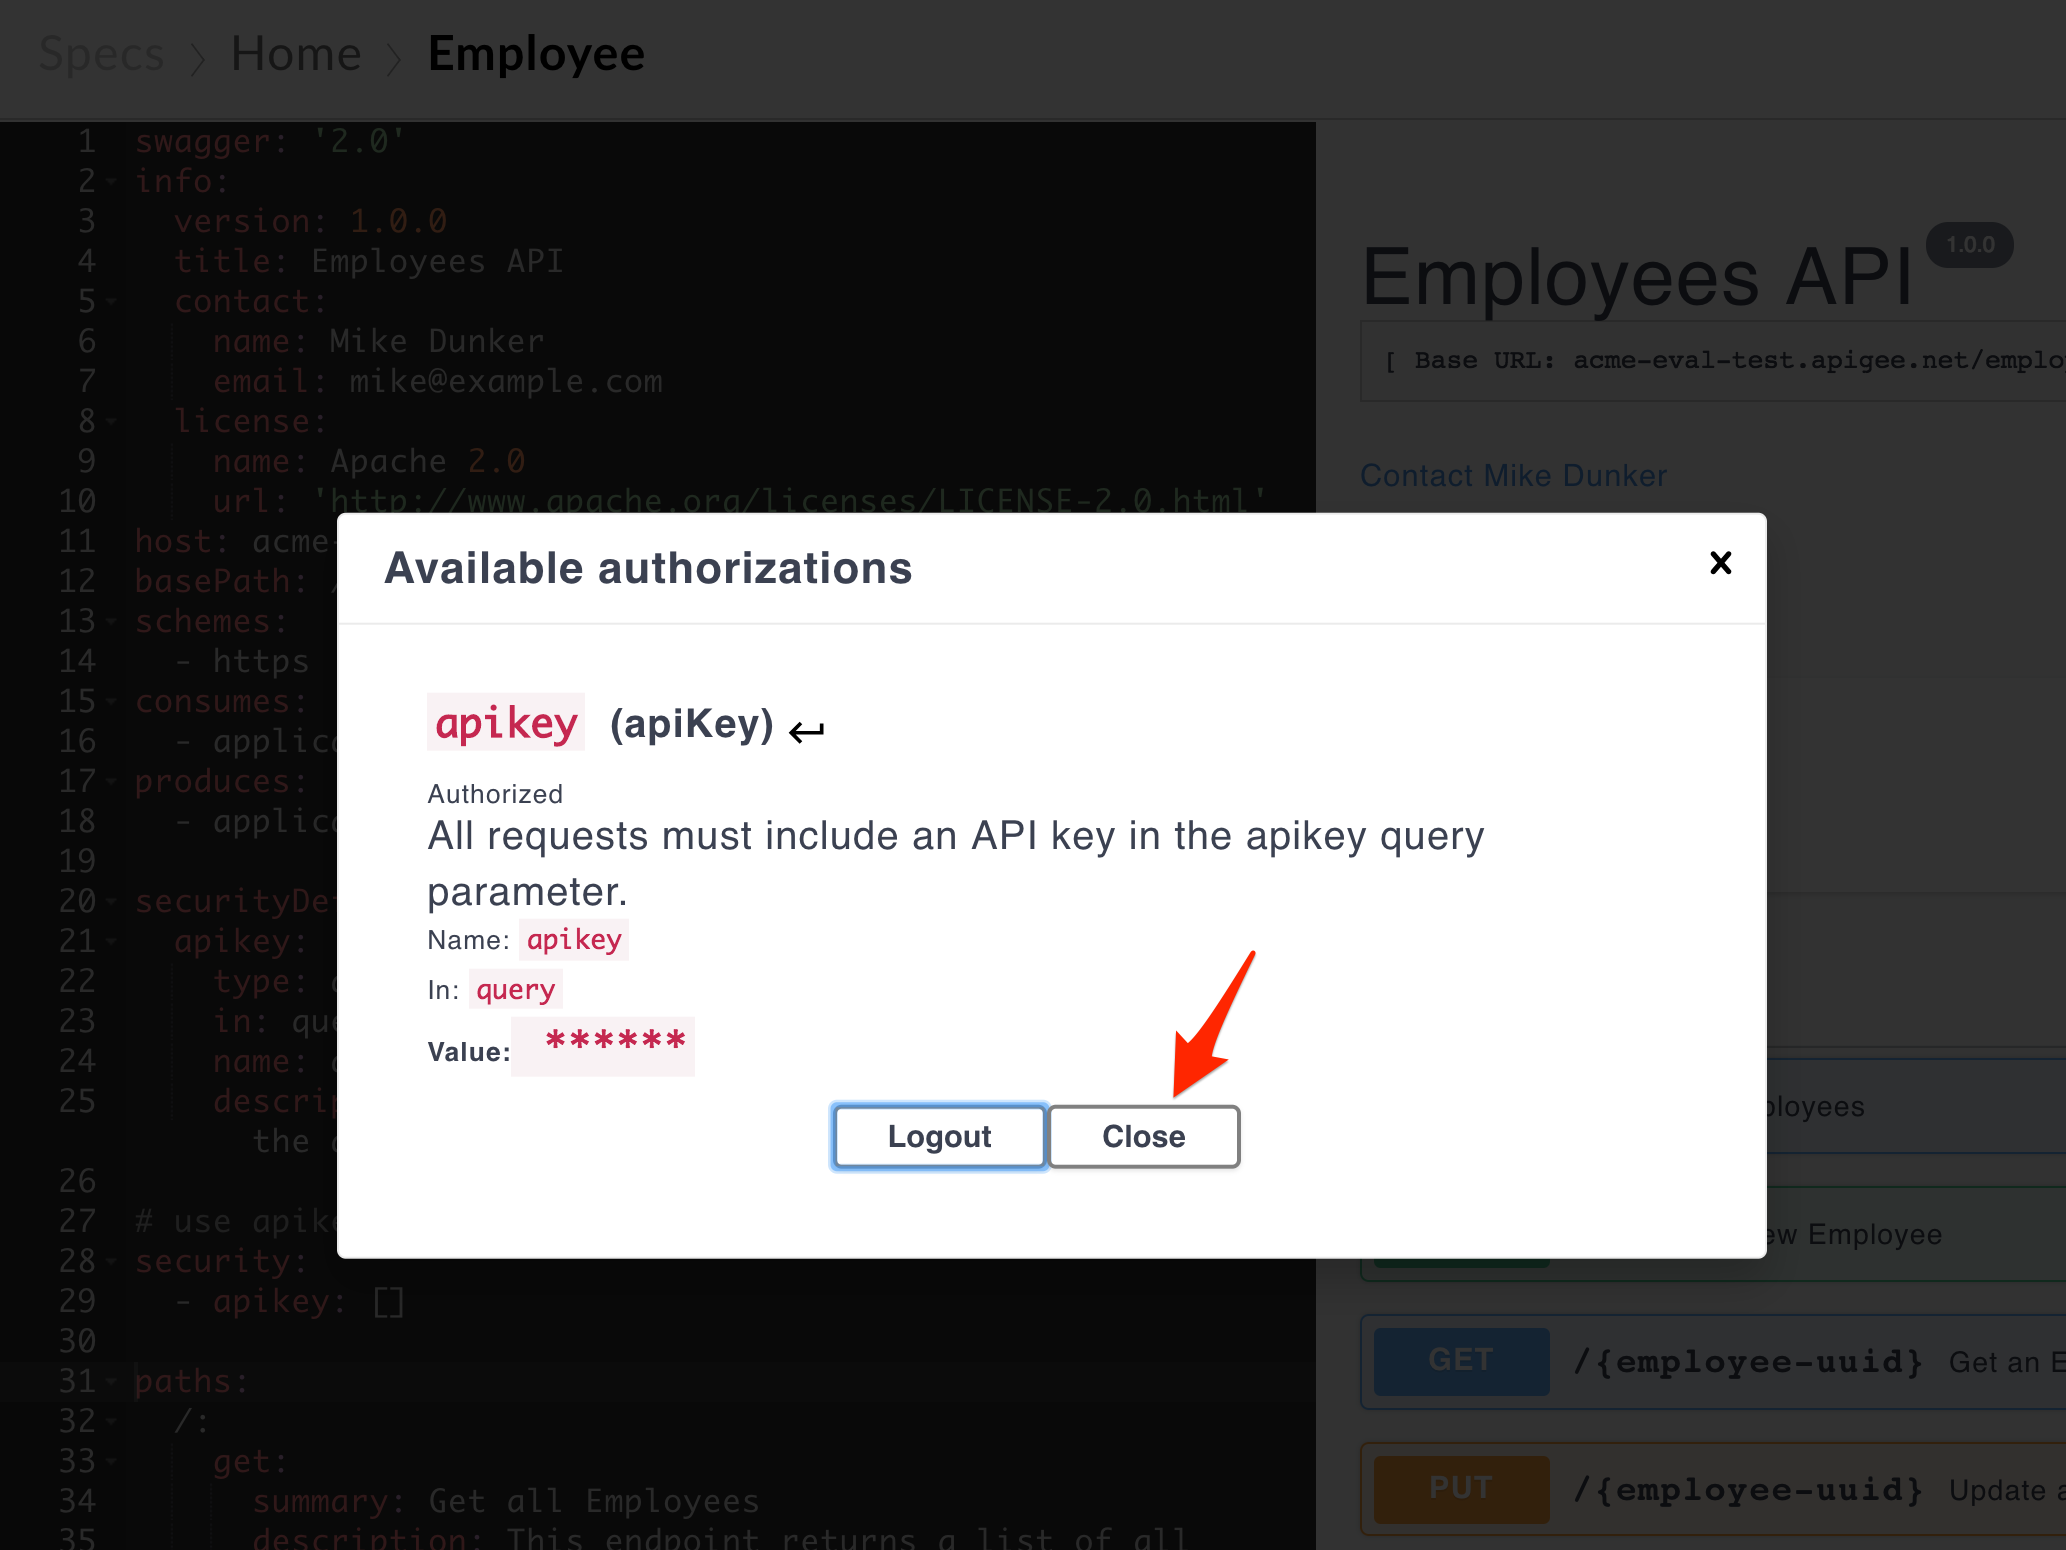
- Click the Close button.
- Select the Get all Employees section by clicking it, and then click the Try it out button.
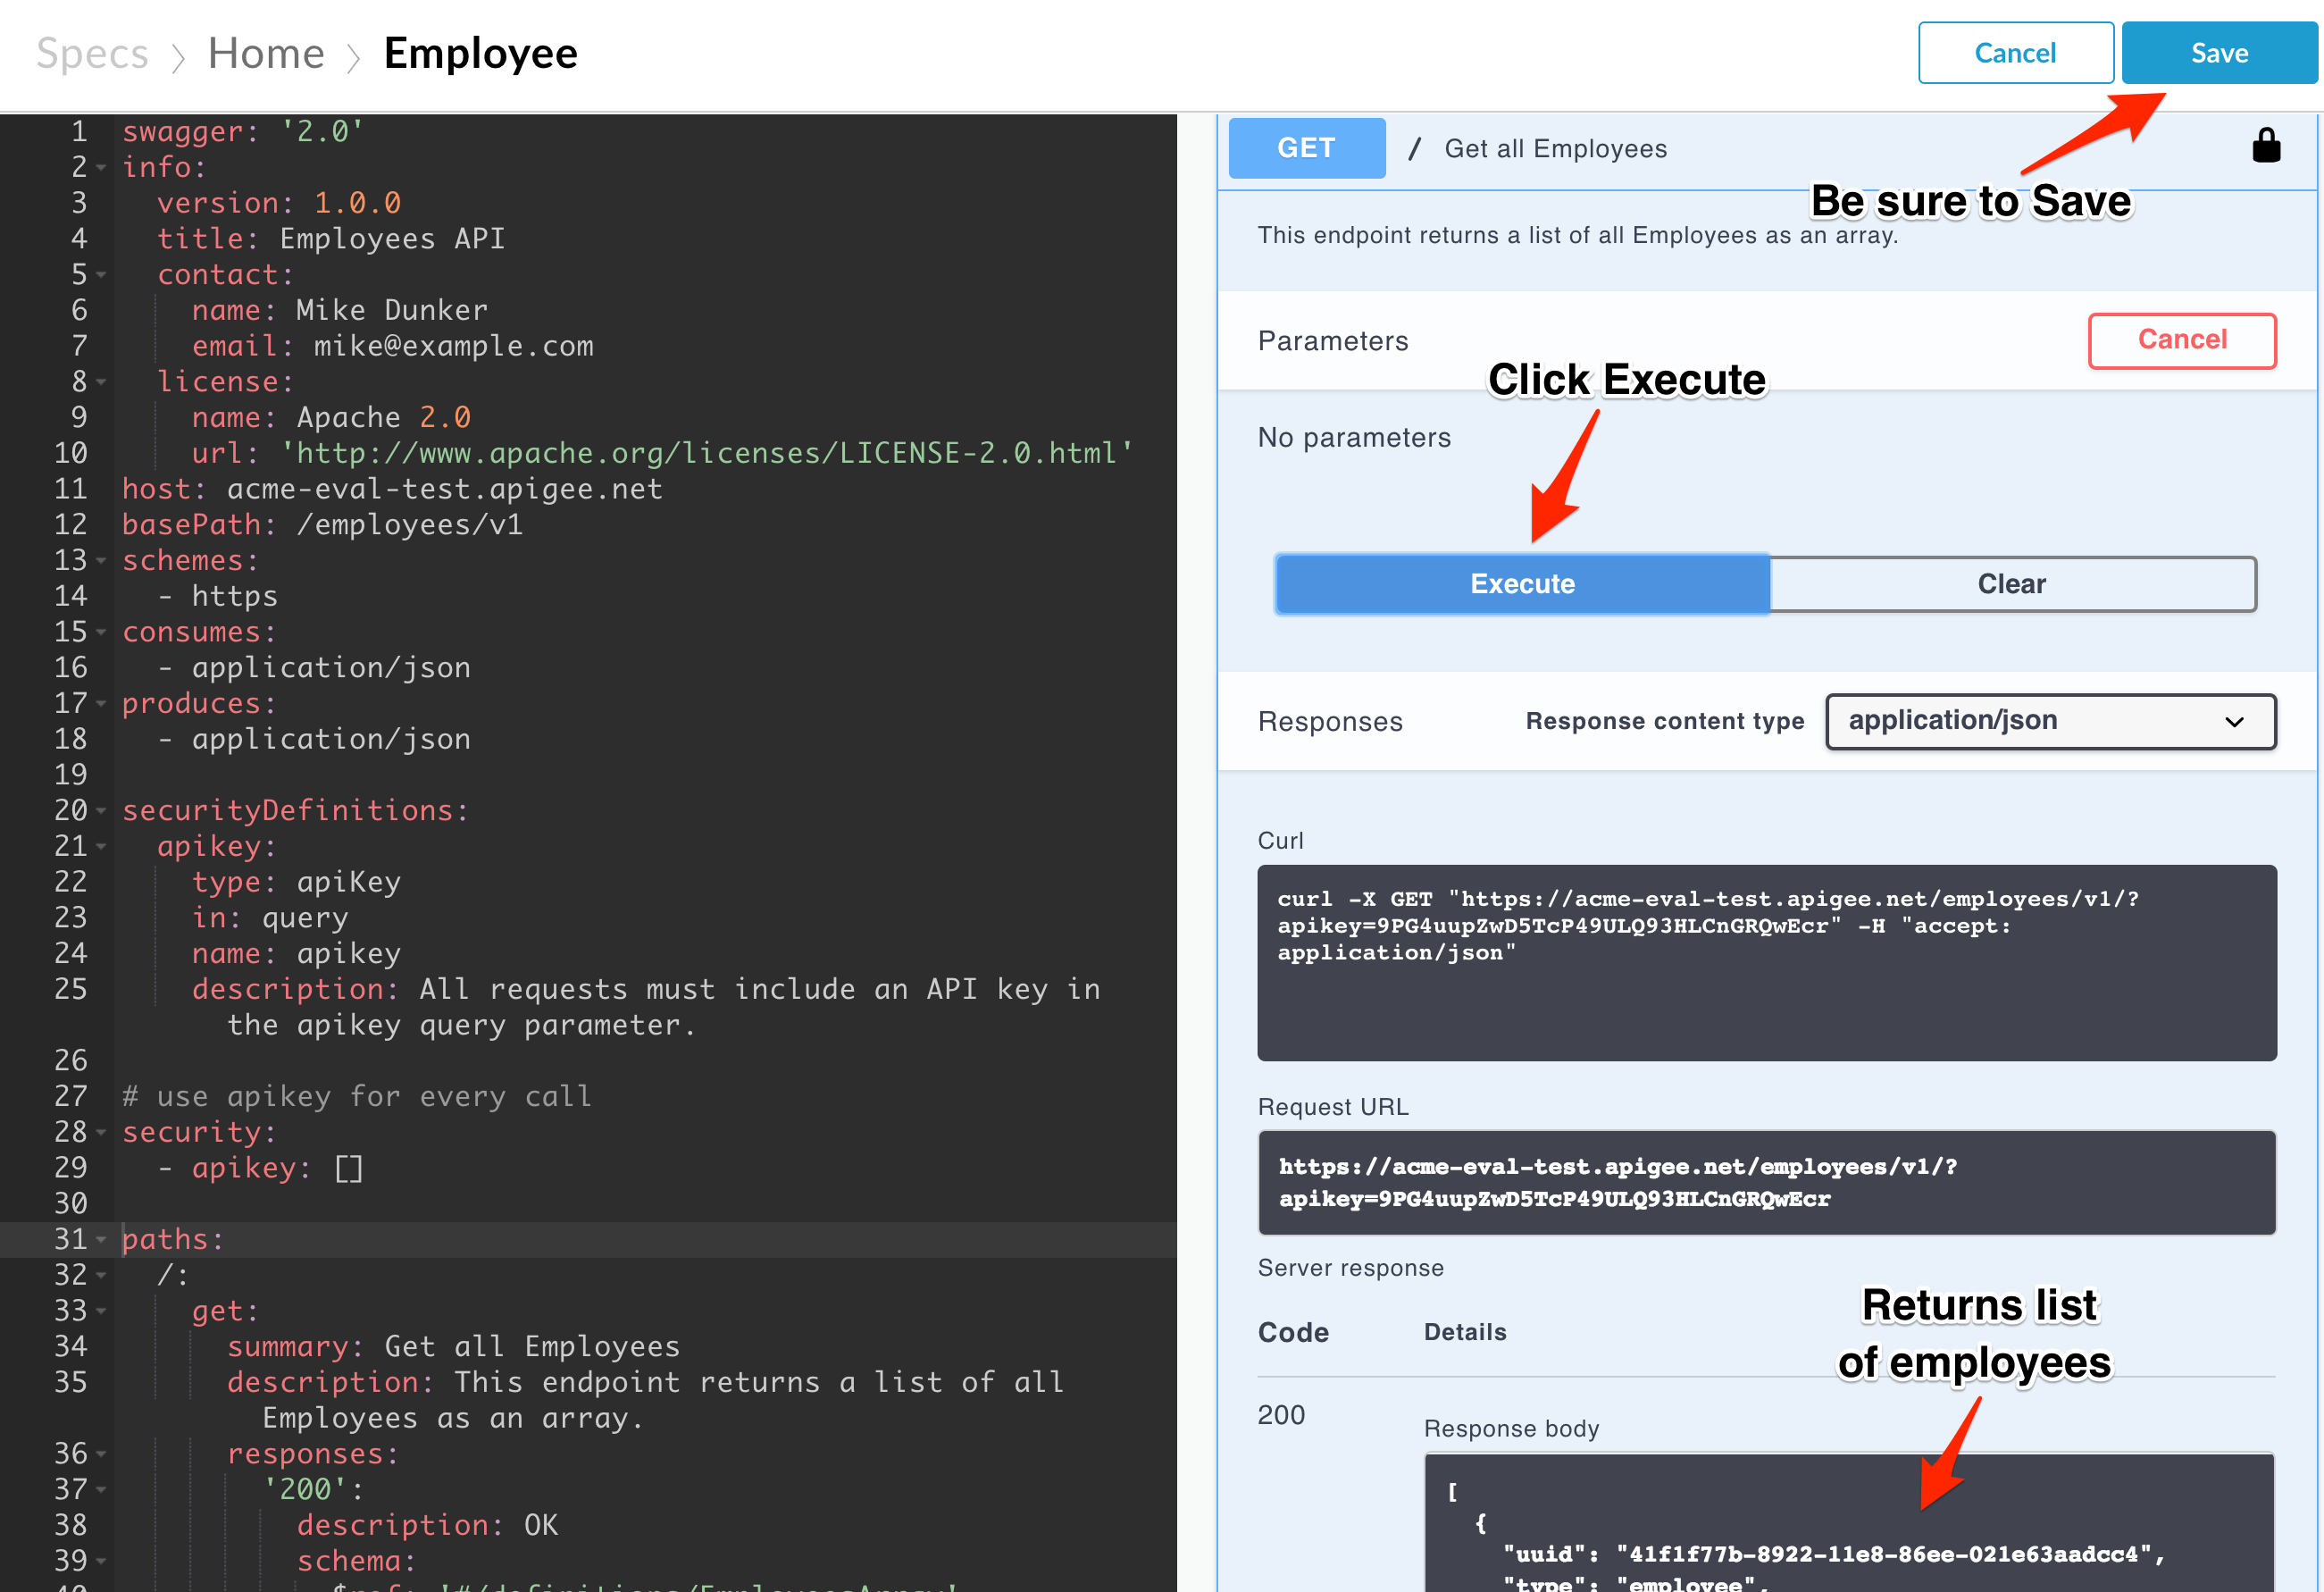
- Click the Execute button.
If you successfully made the call, you should be able to see the curl command, and also see the response below. If you can’t see these, try tracing your API using the trace tool to figure out what is happening. Make sure you save your specification.
Publish a new Portal on Apigee Edge
- Now that our API proxy specification exists, let’s create the portal. Select Publish → Portals → Get started
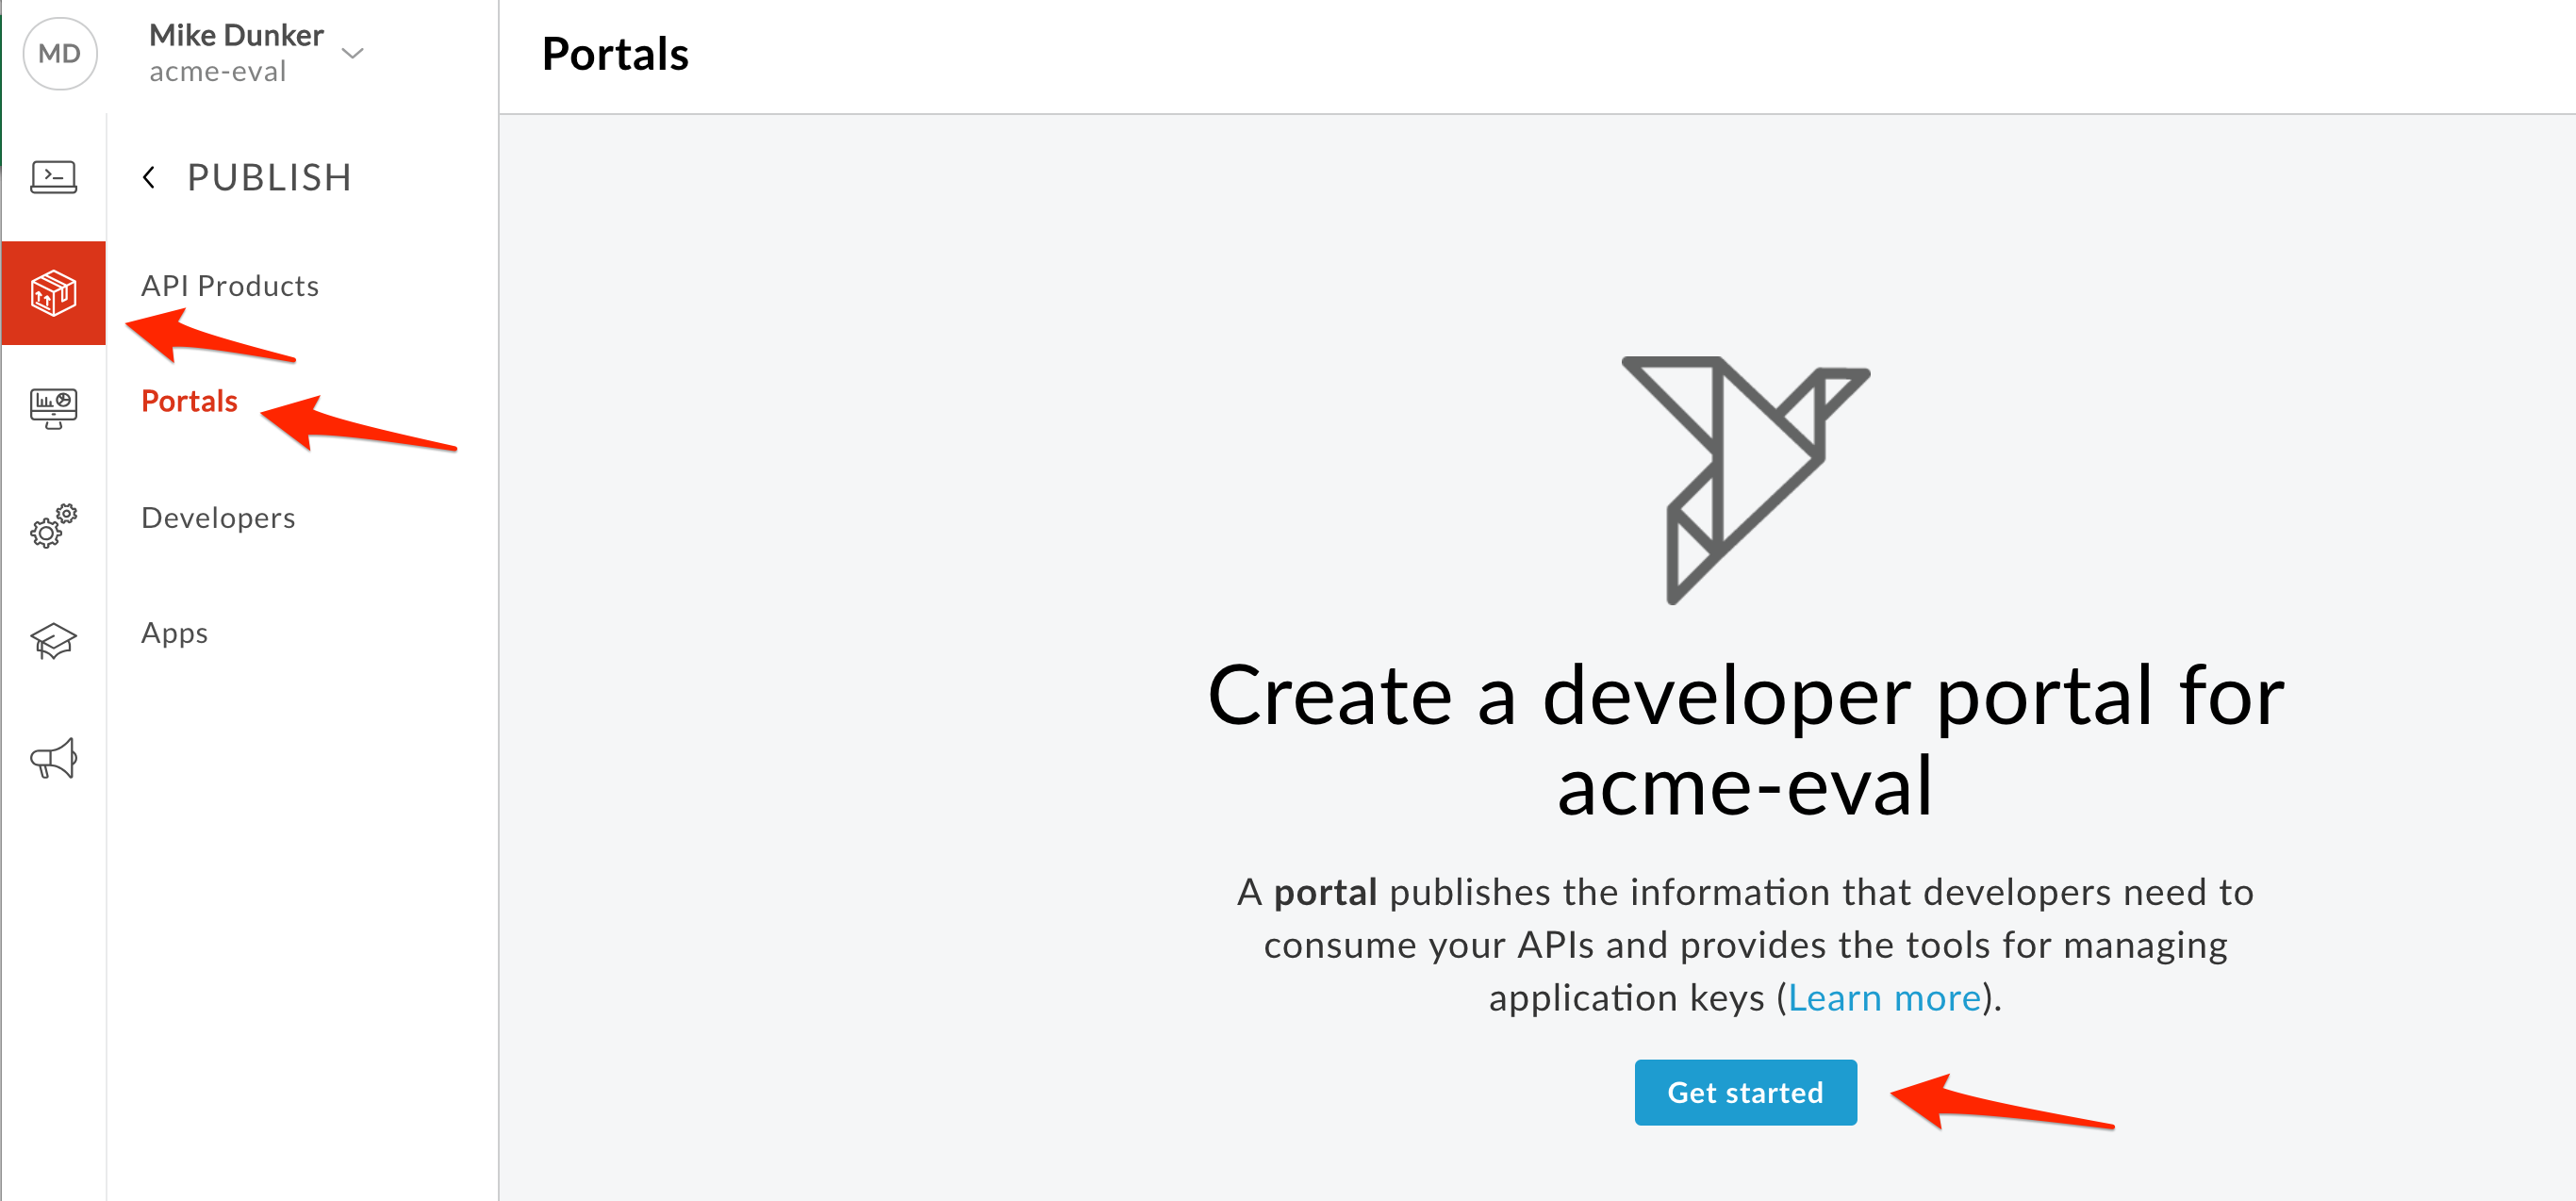
If you already have a portal, choose Publish → Portals → +Portal
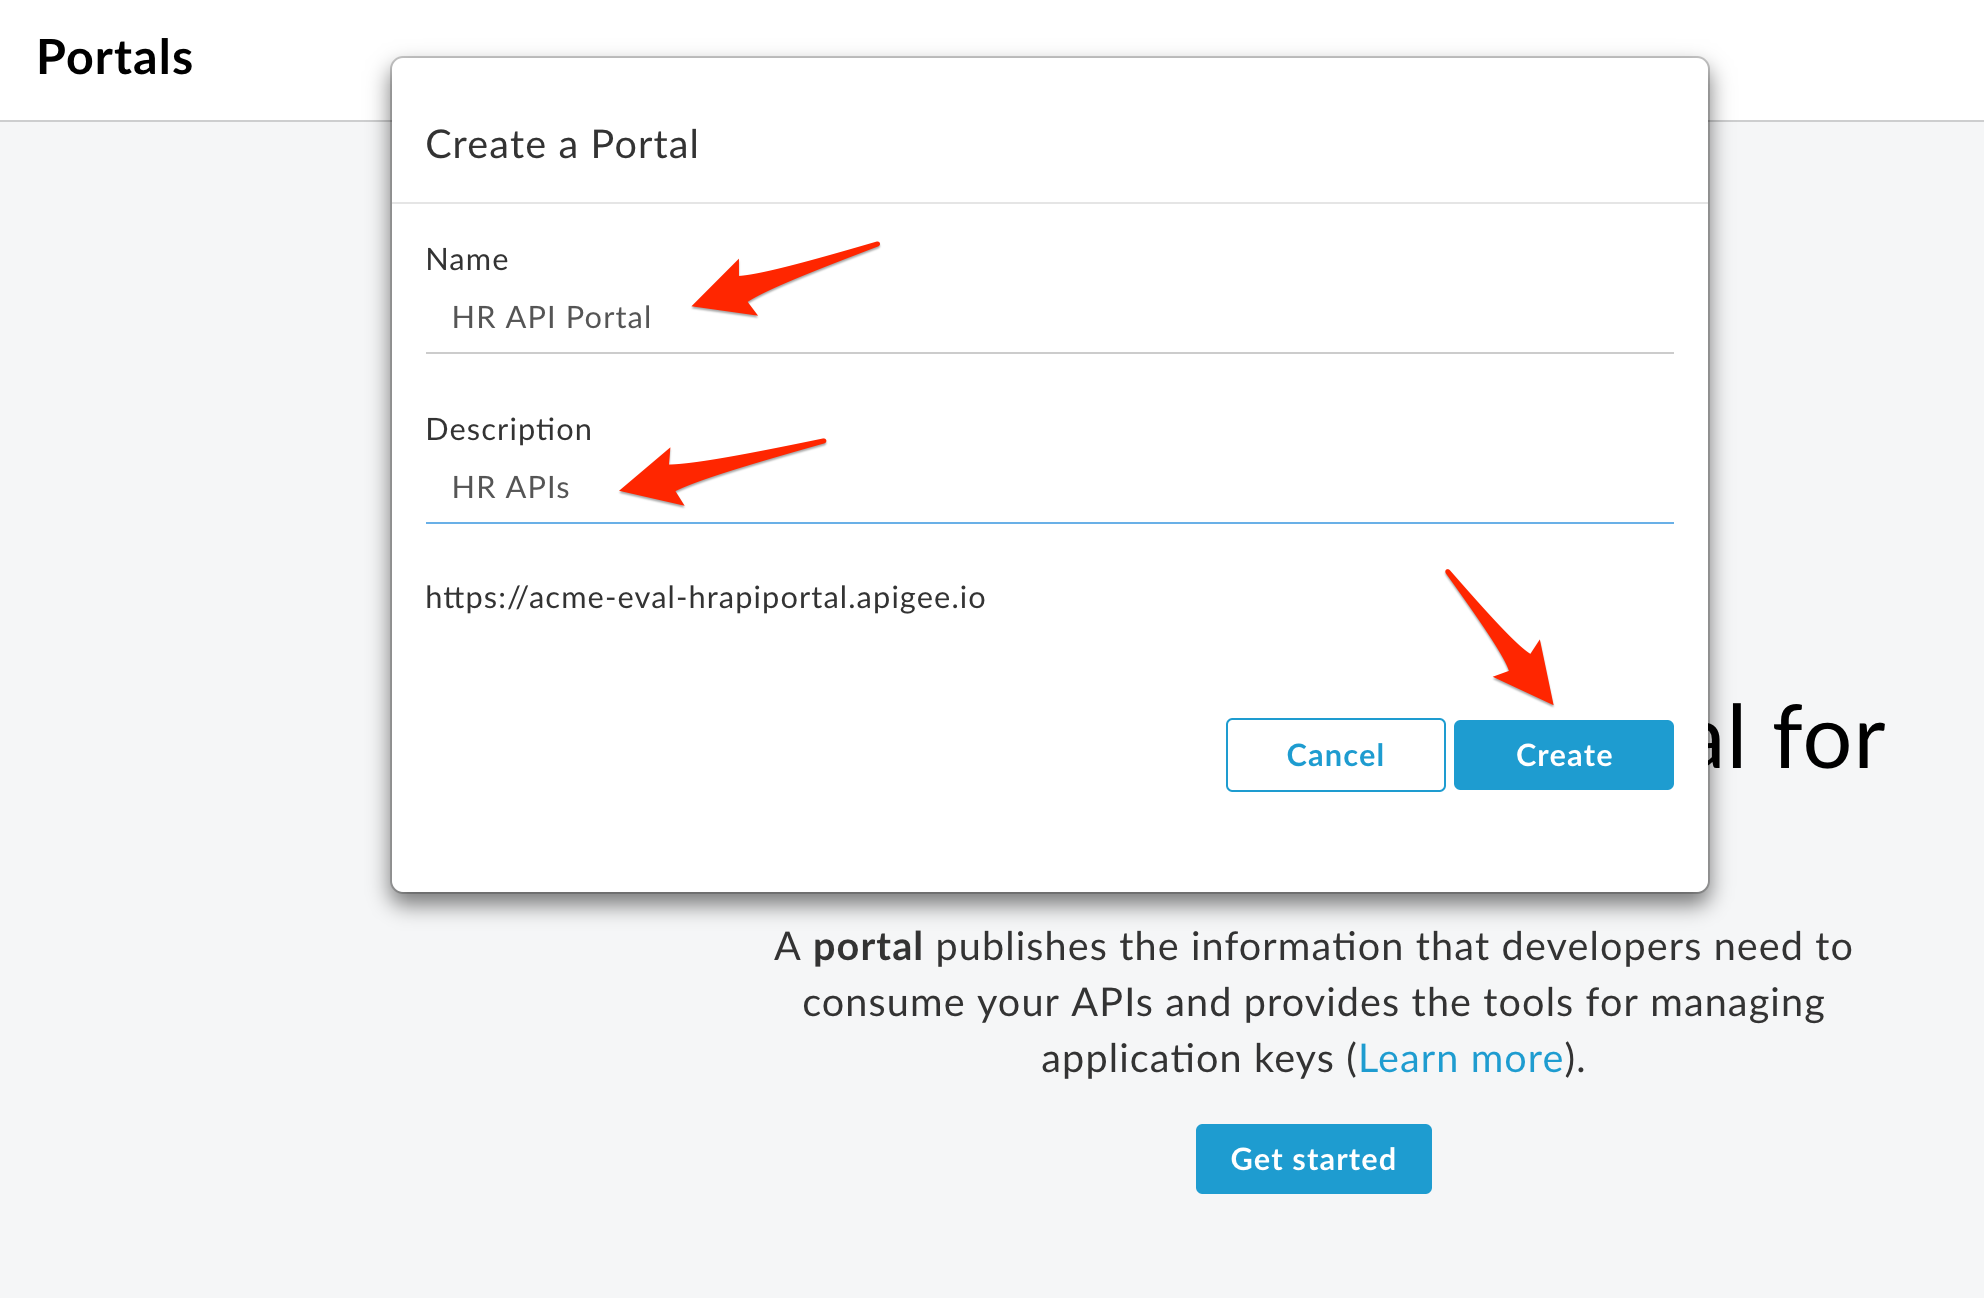
- Enter details in the portal creation wizard.
-
Name: HR API Portal
-
Description: HR APIs
- Click Create Portal
Publish an API Product to the Portal
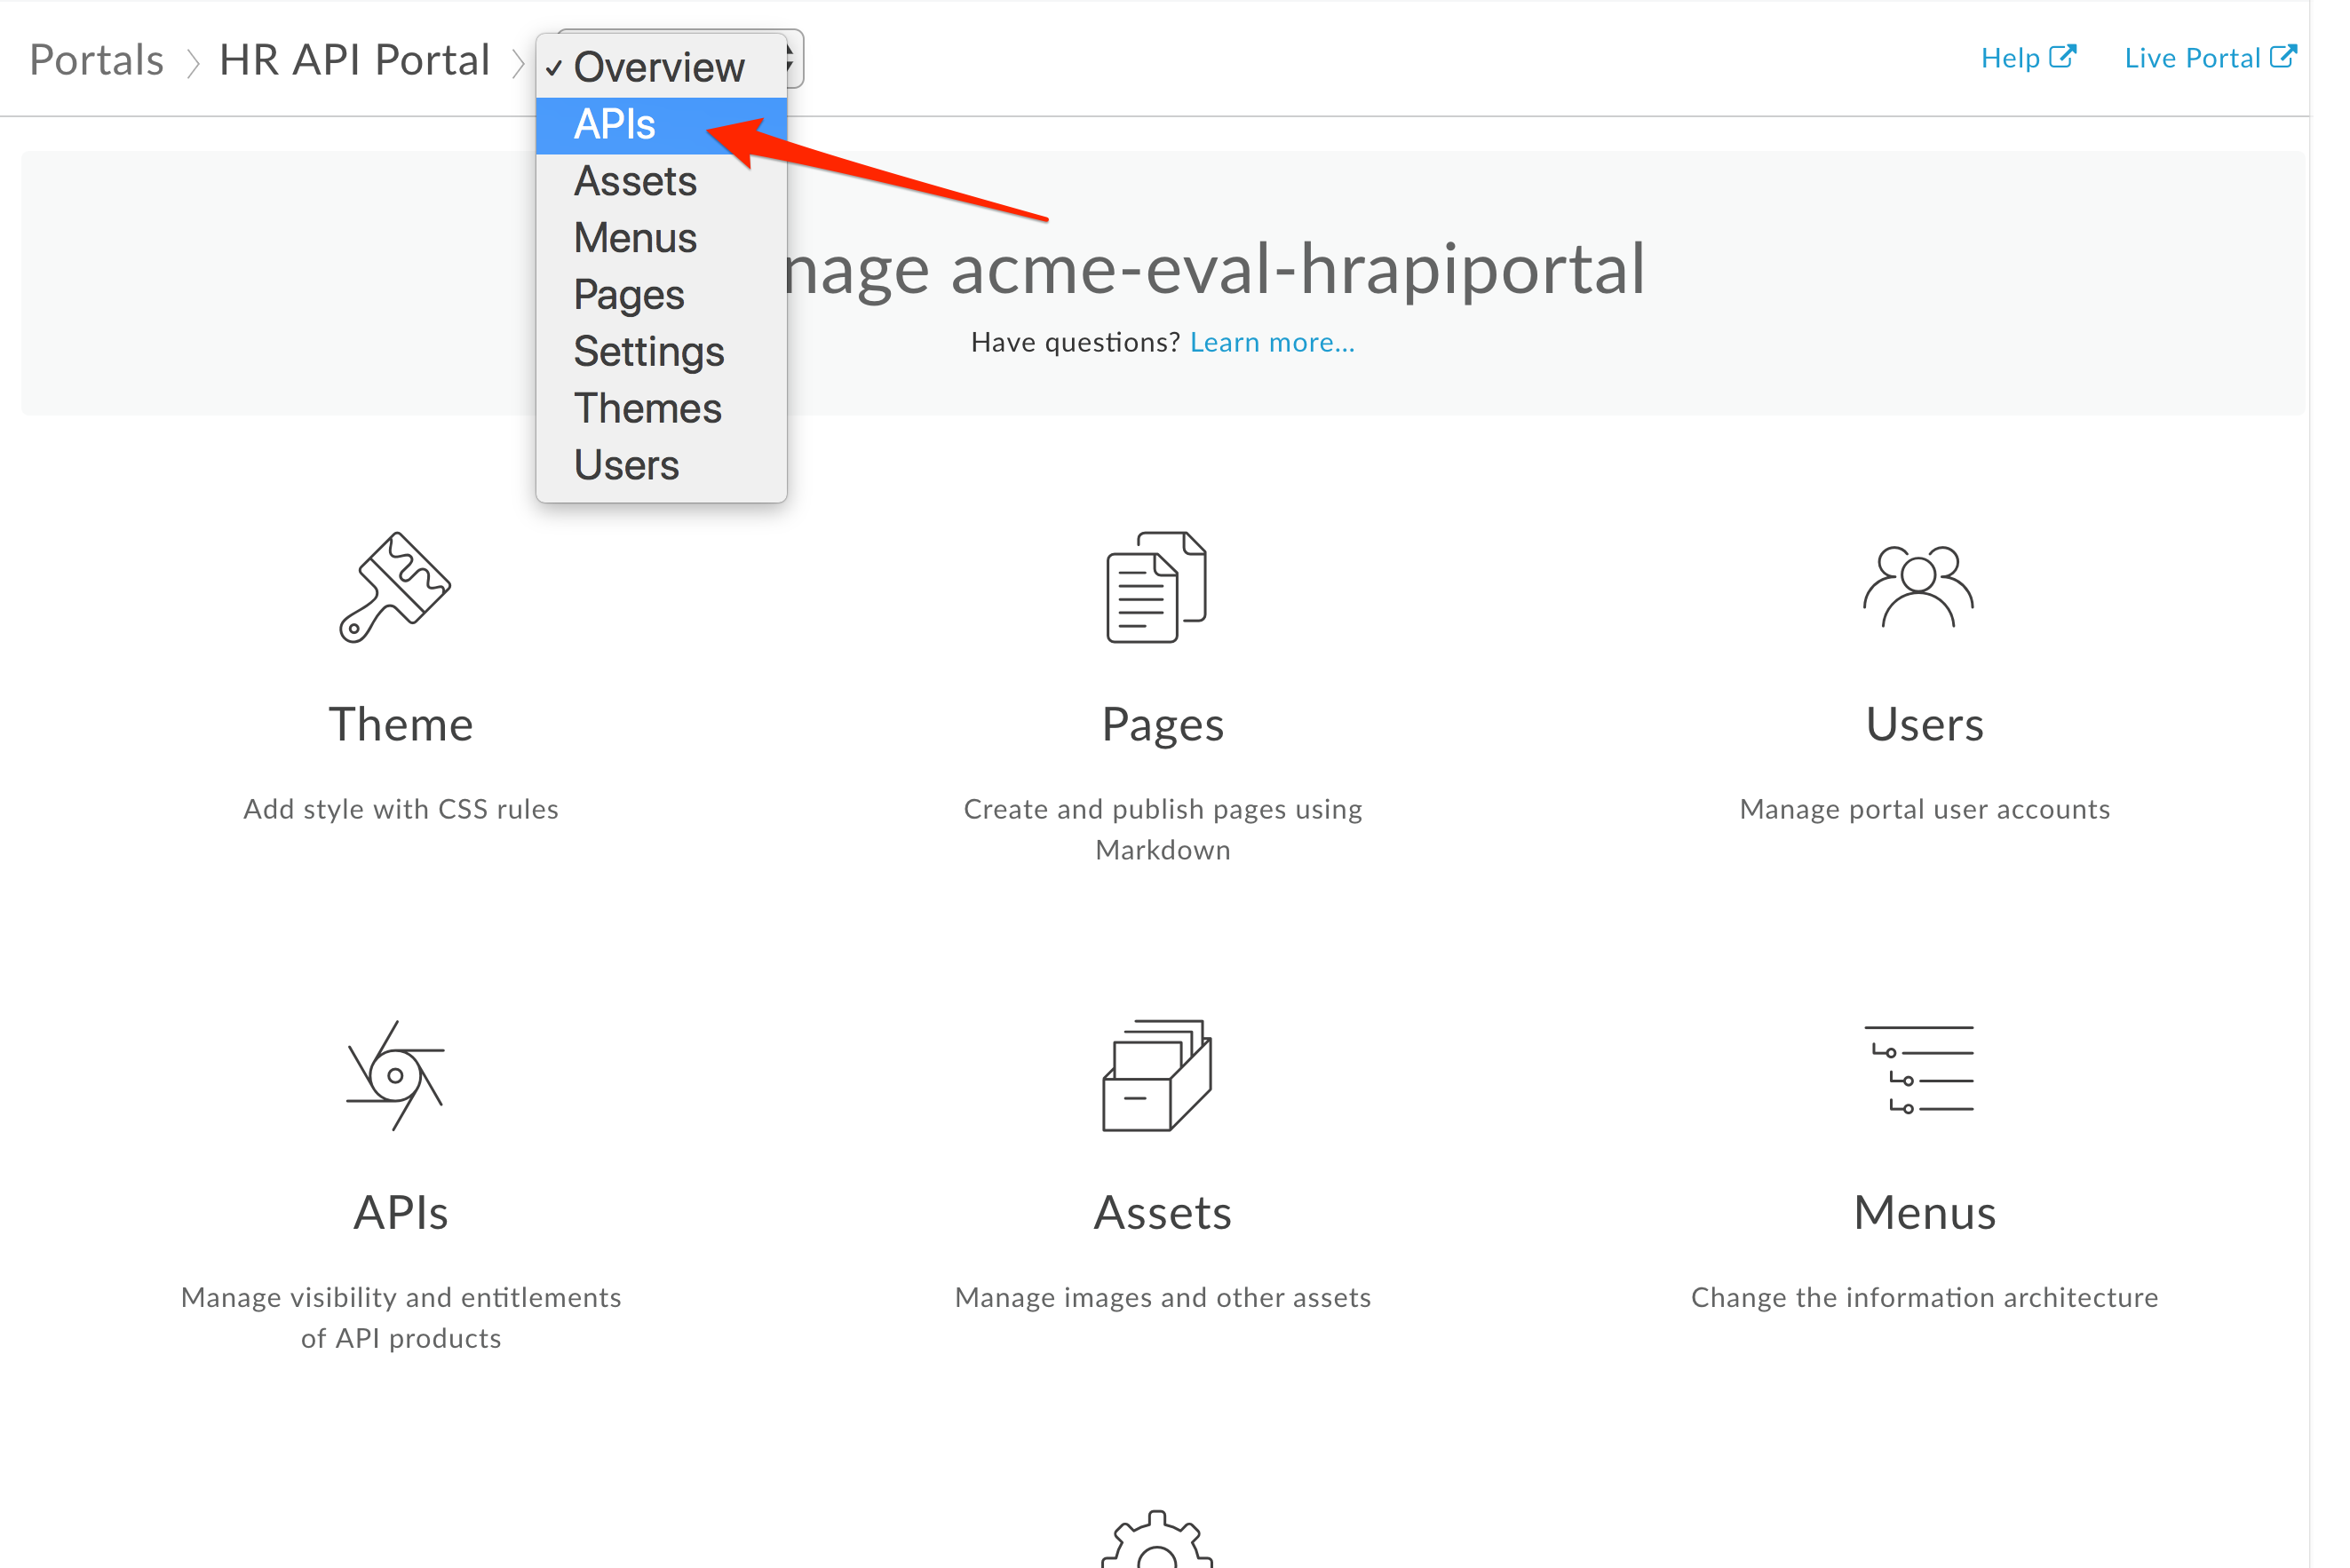
- Click the Portal Editor’s dropdown and select APIs from the list of sections
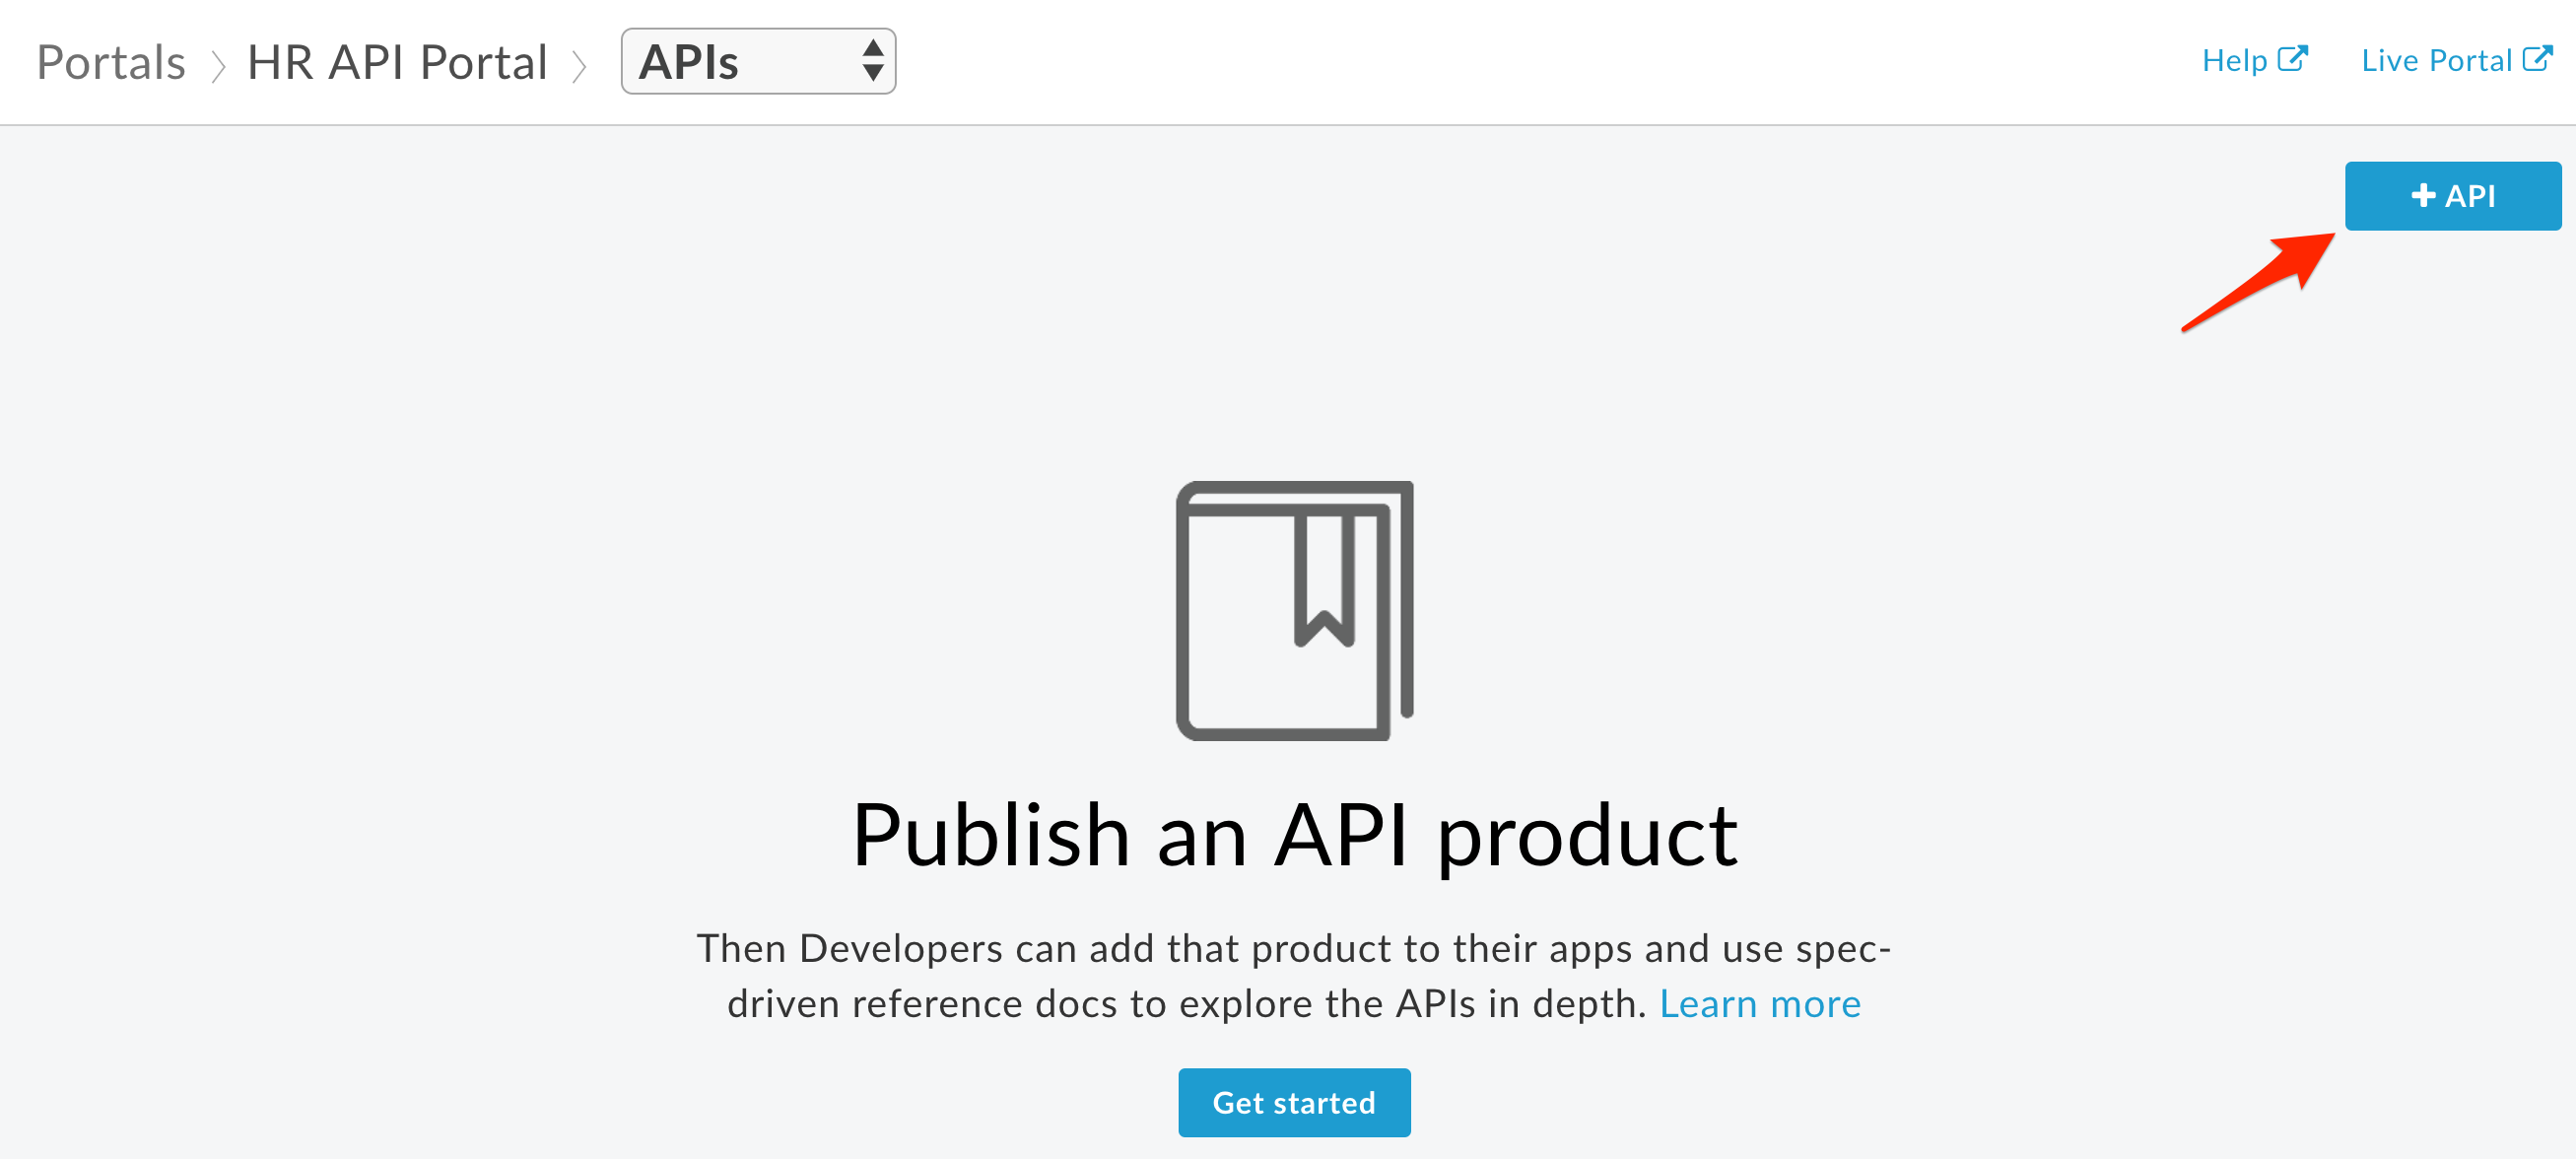
- Click +API to select an API Product to publish to the Portal
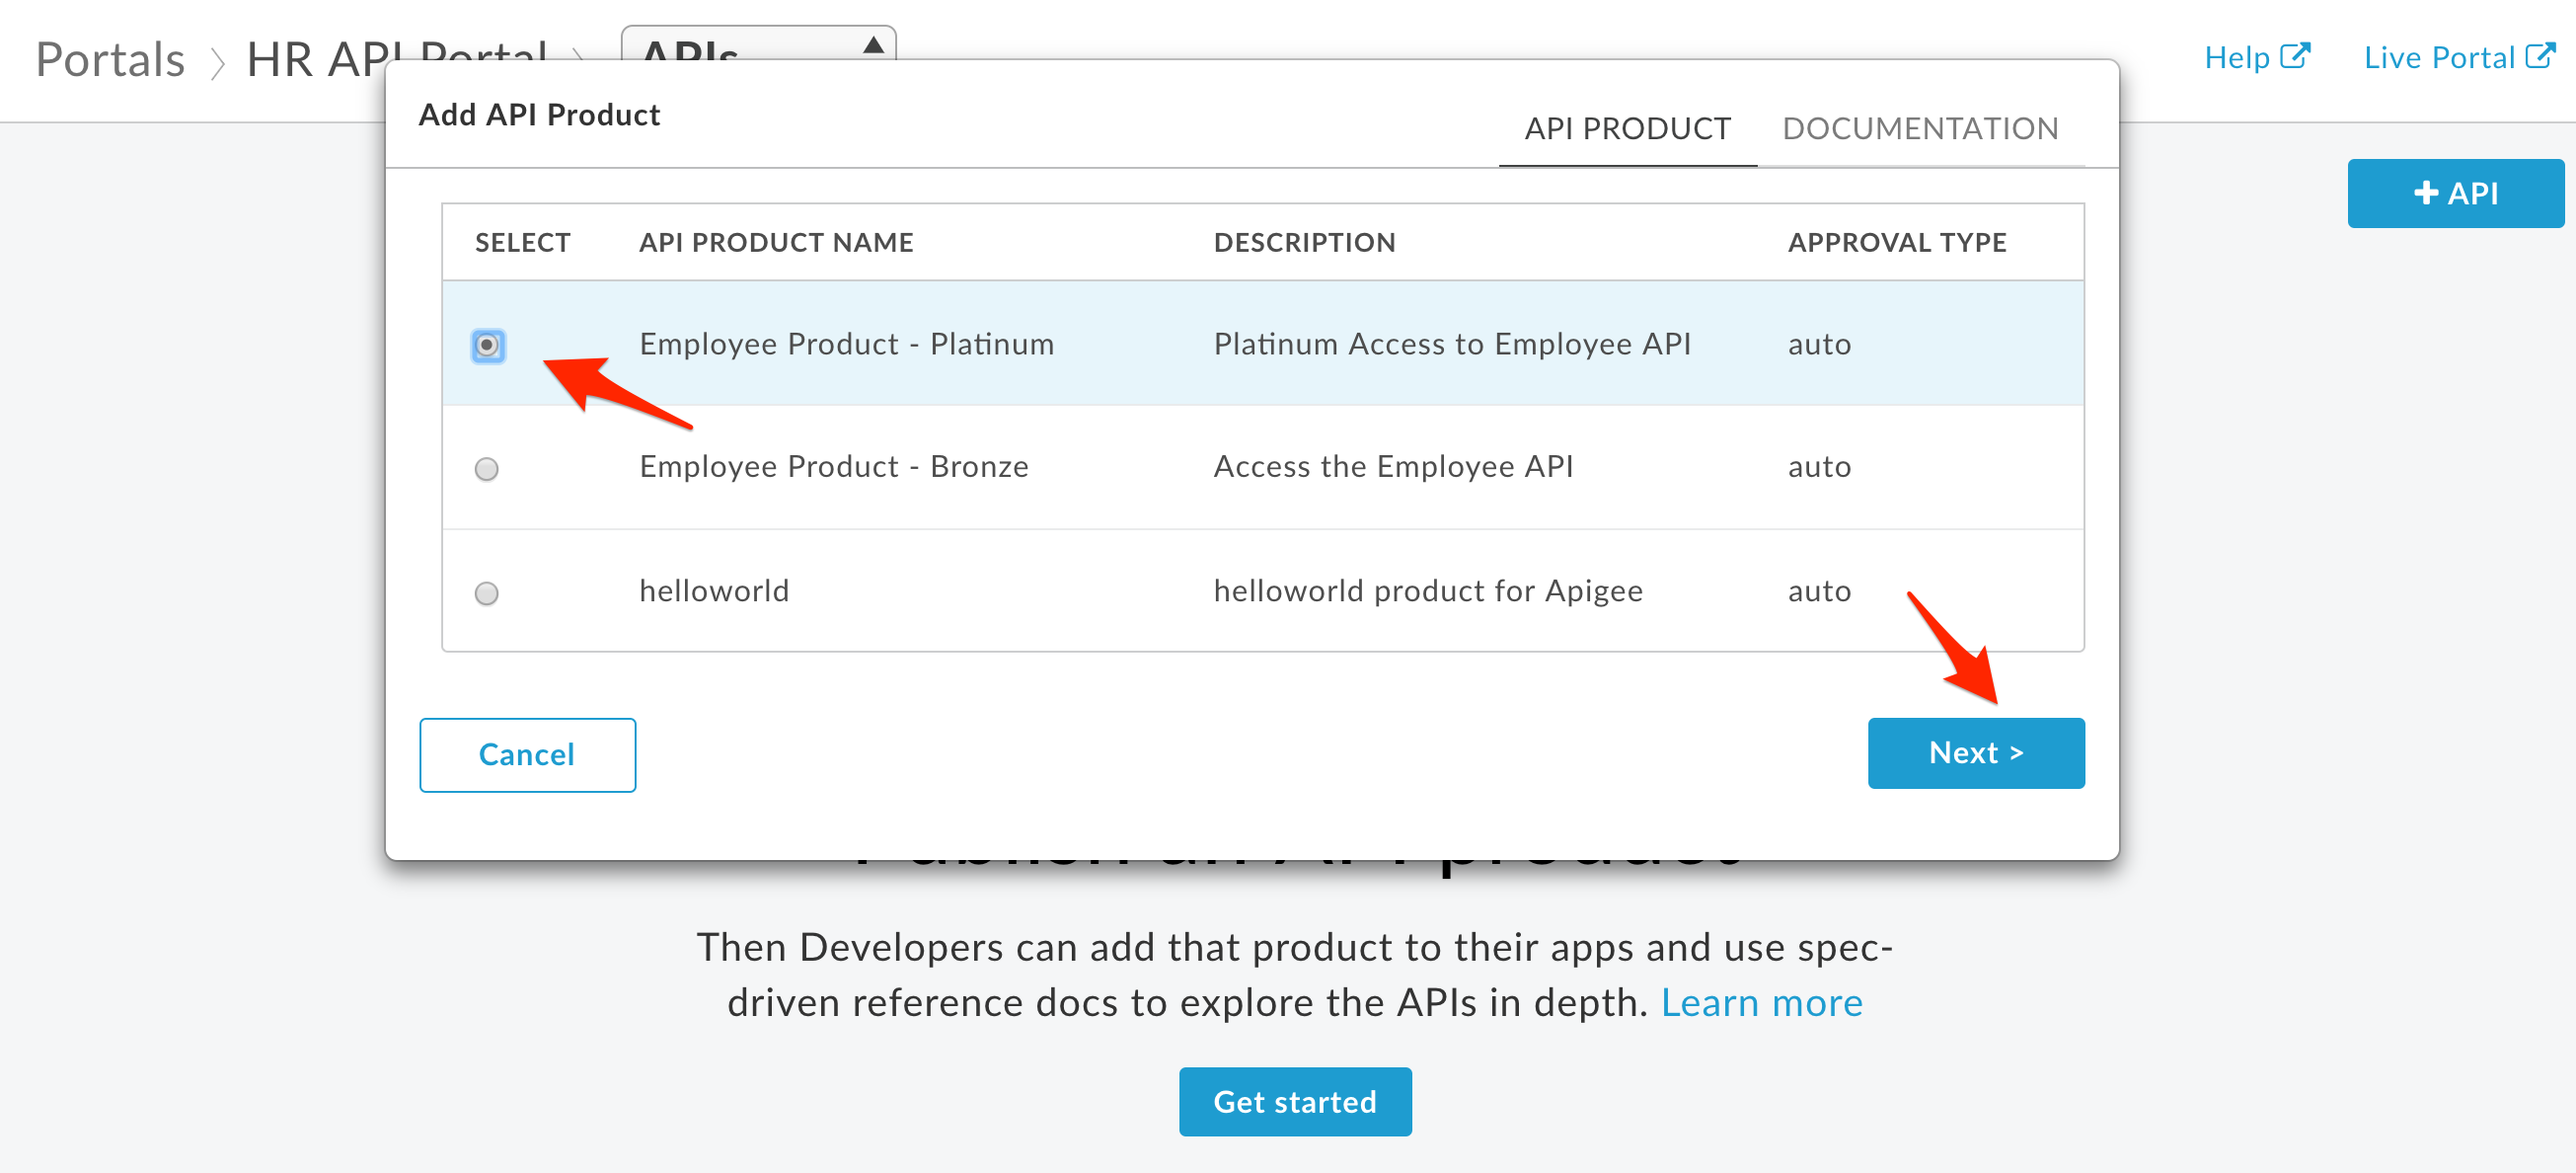
- Select the platinum employee API Product, and click Next.
- Click the Spec Source dropdown, and then “Choose a different spec…”.
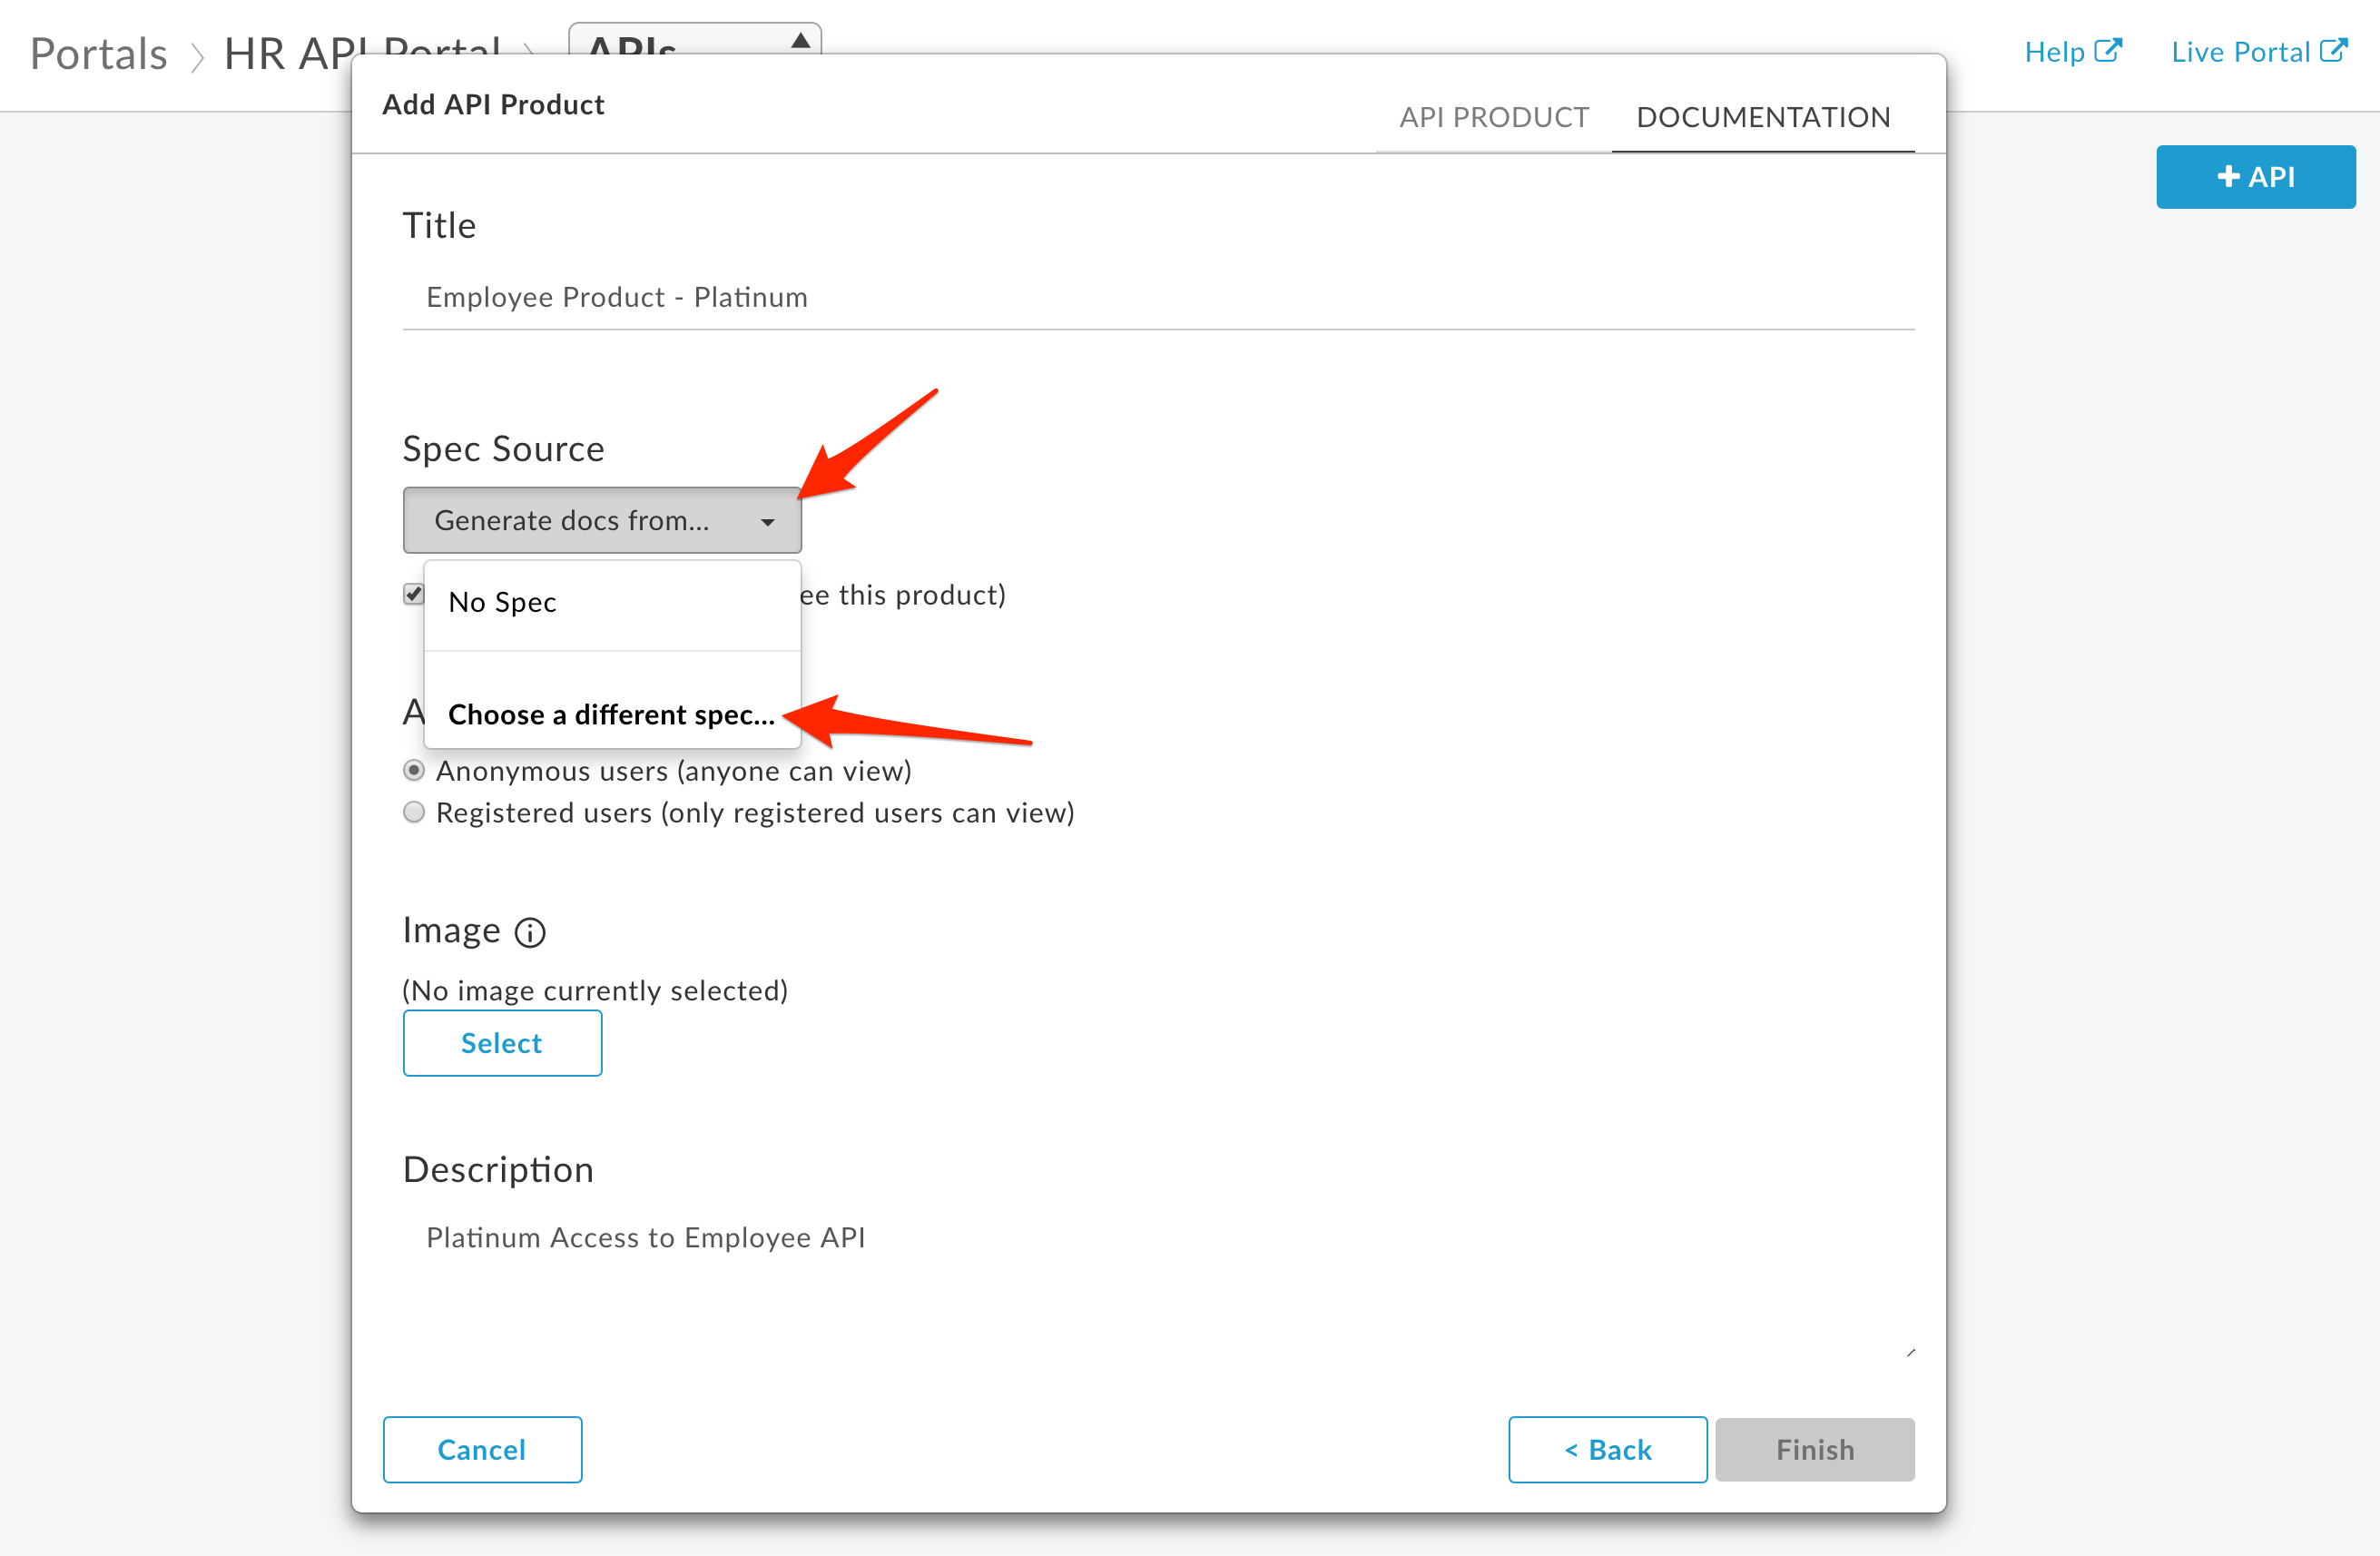
A Spec represents a version of the OpenAPI Specification at a particular point in time. The Source is the OpenAPI Specification used to generate the Snapshot. Because the specification might change over time, you take snapshots so that your Portal will reflect the version of the specification that is published, which may differ from the version under current development. Read this document to better understand snapshots.
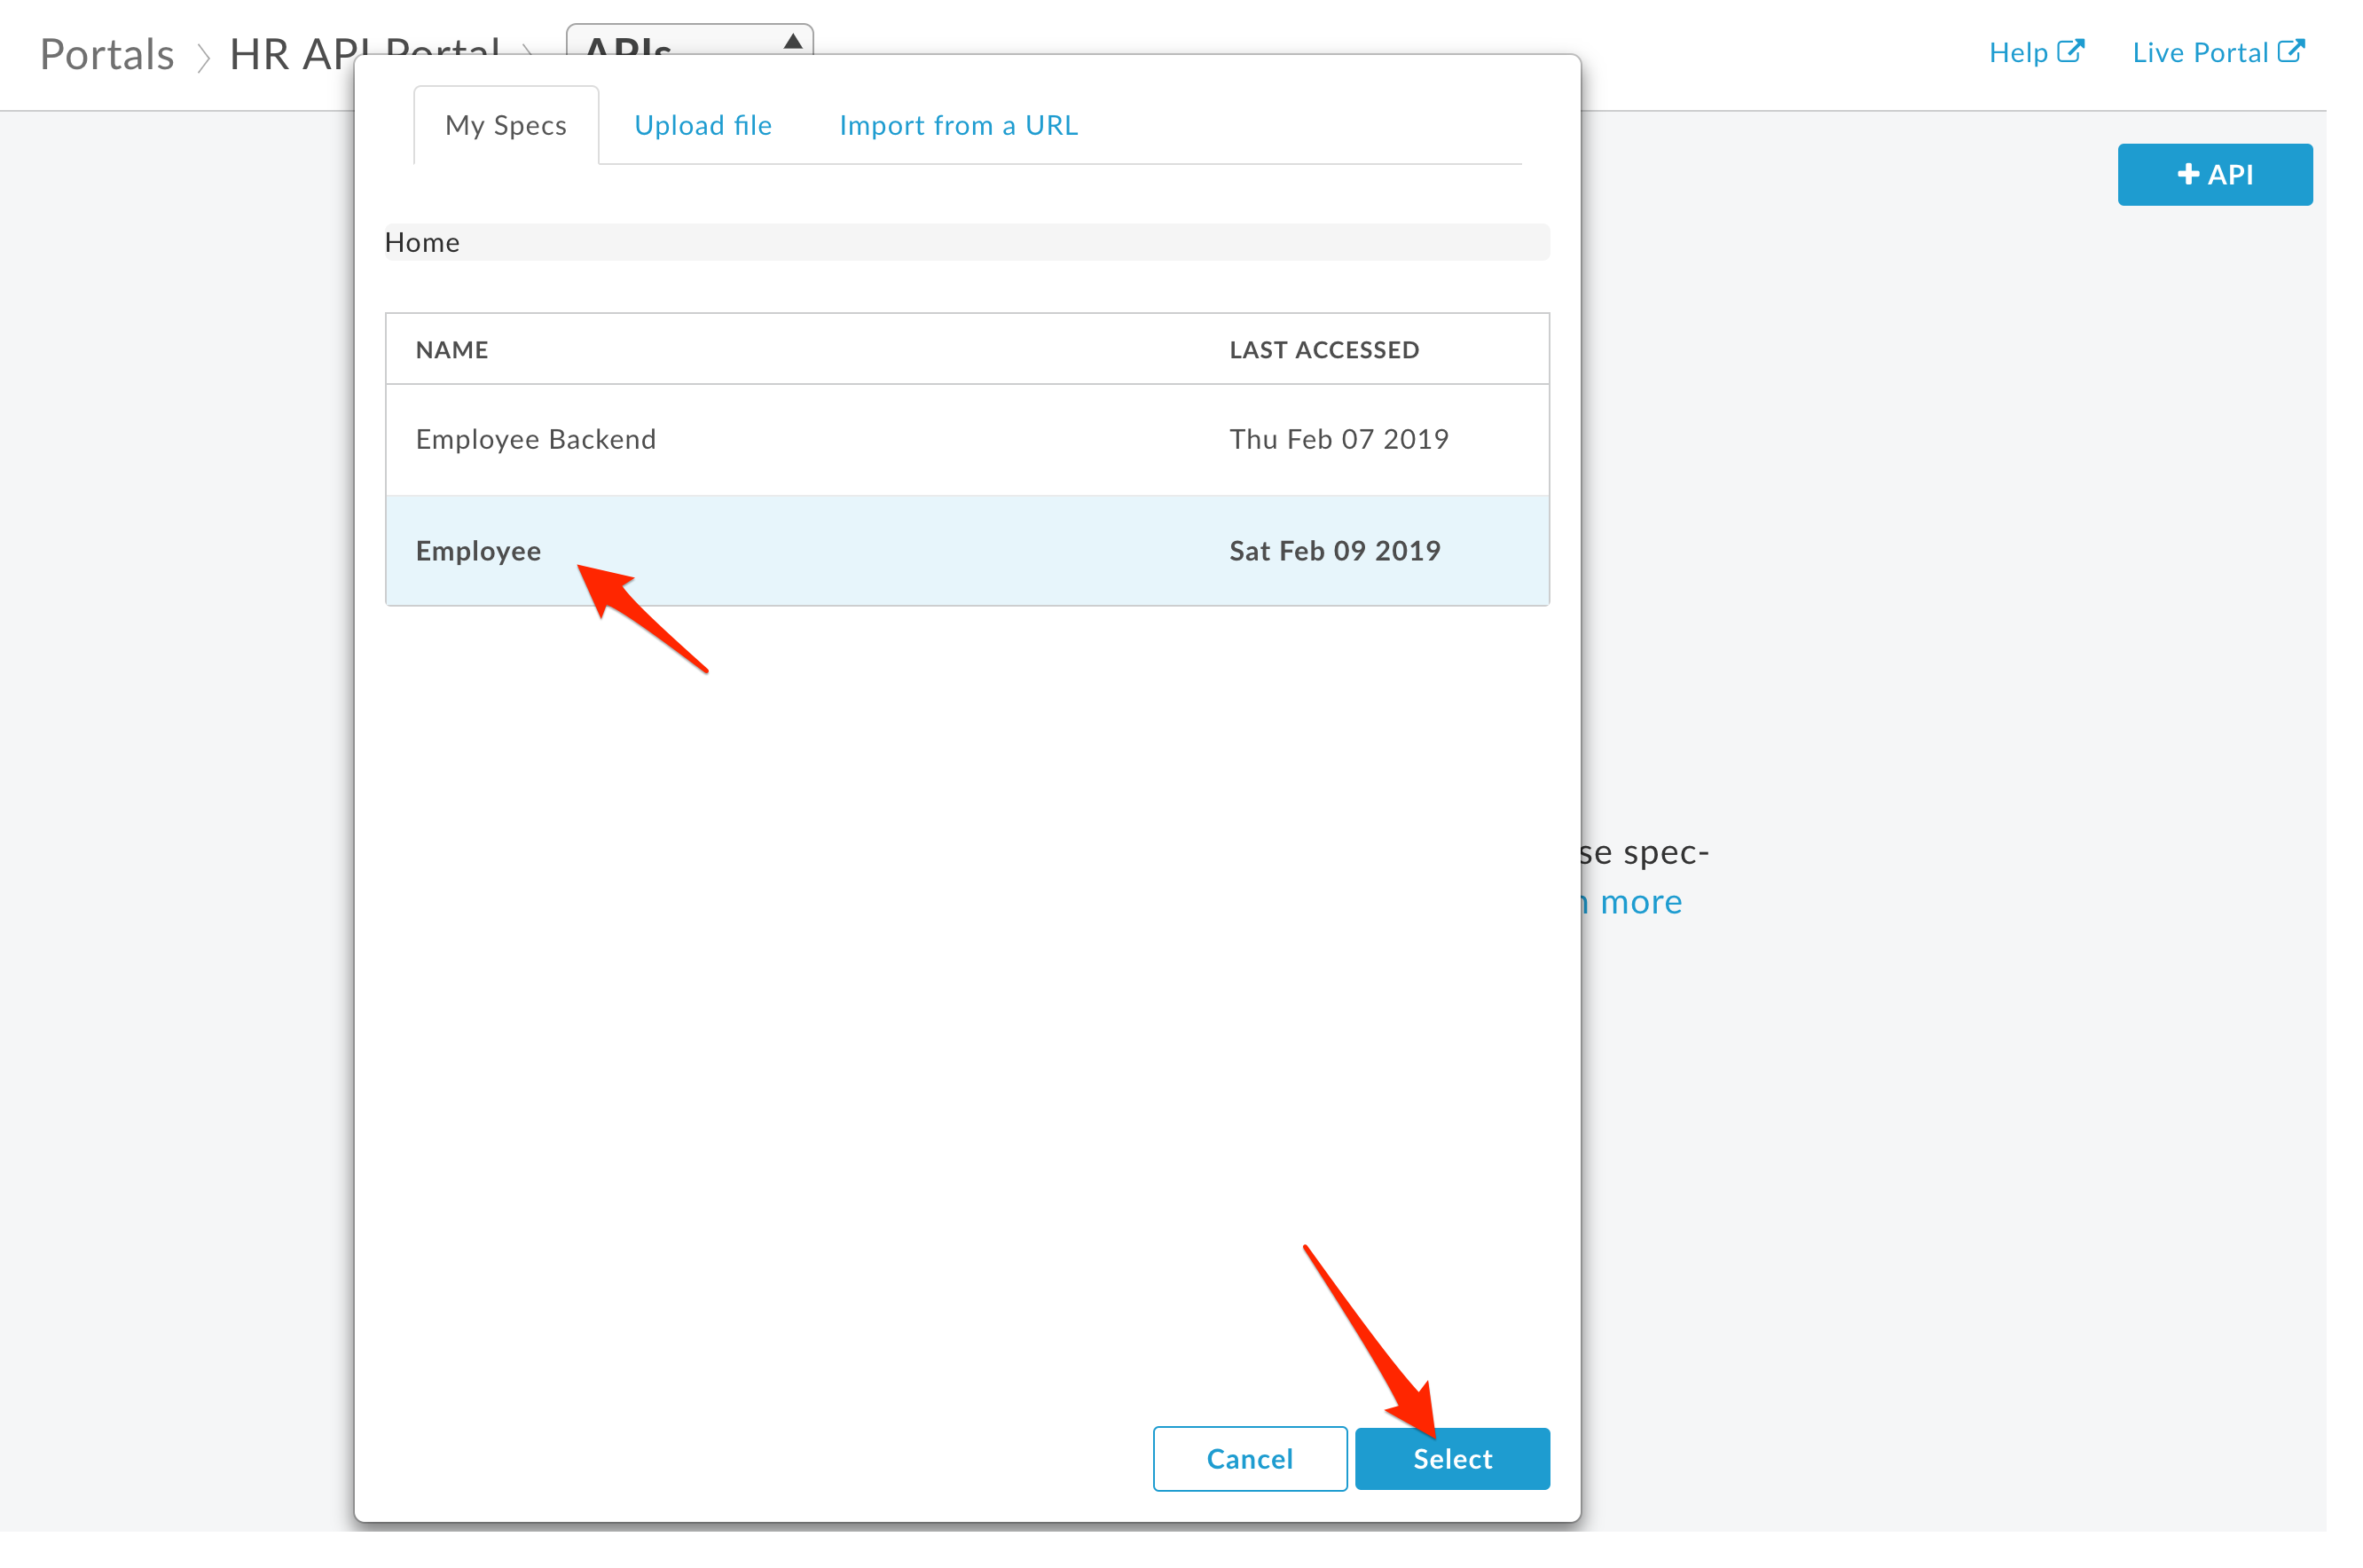
- Click the Employee OpenAPI Specification (the front end API spec), then click Select.
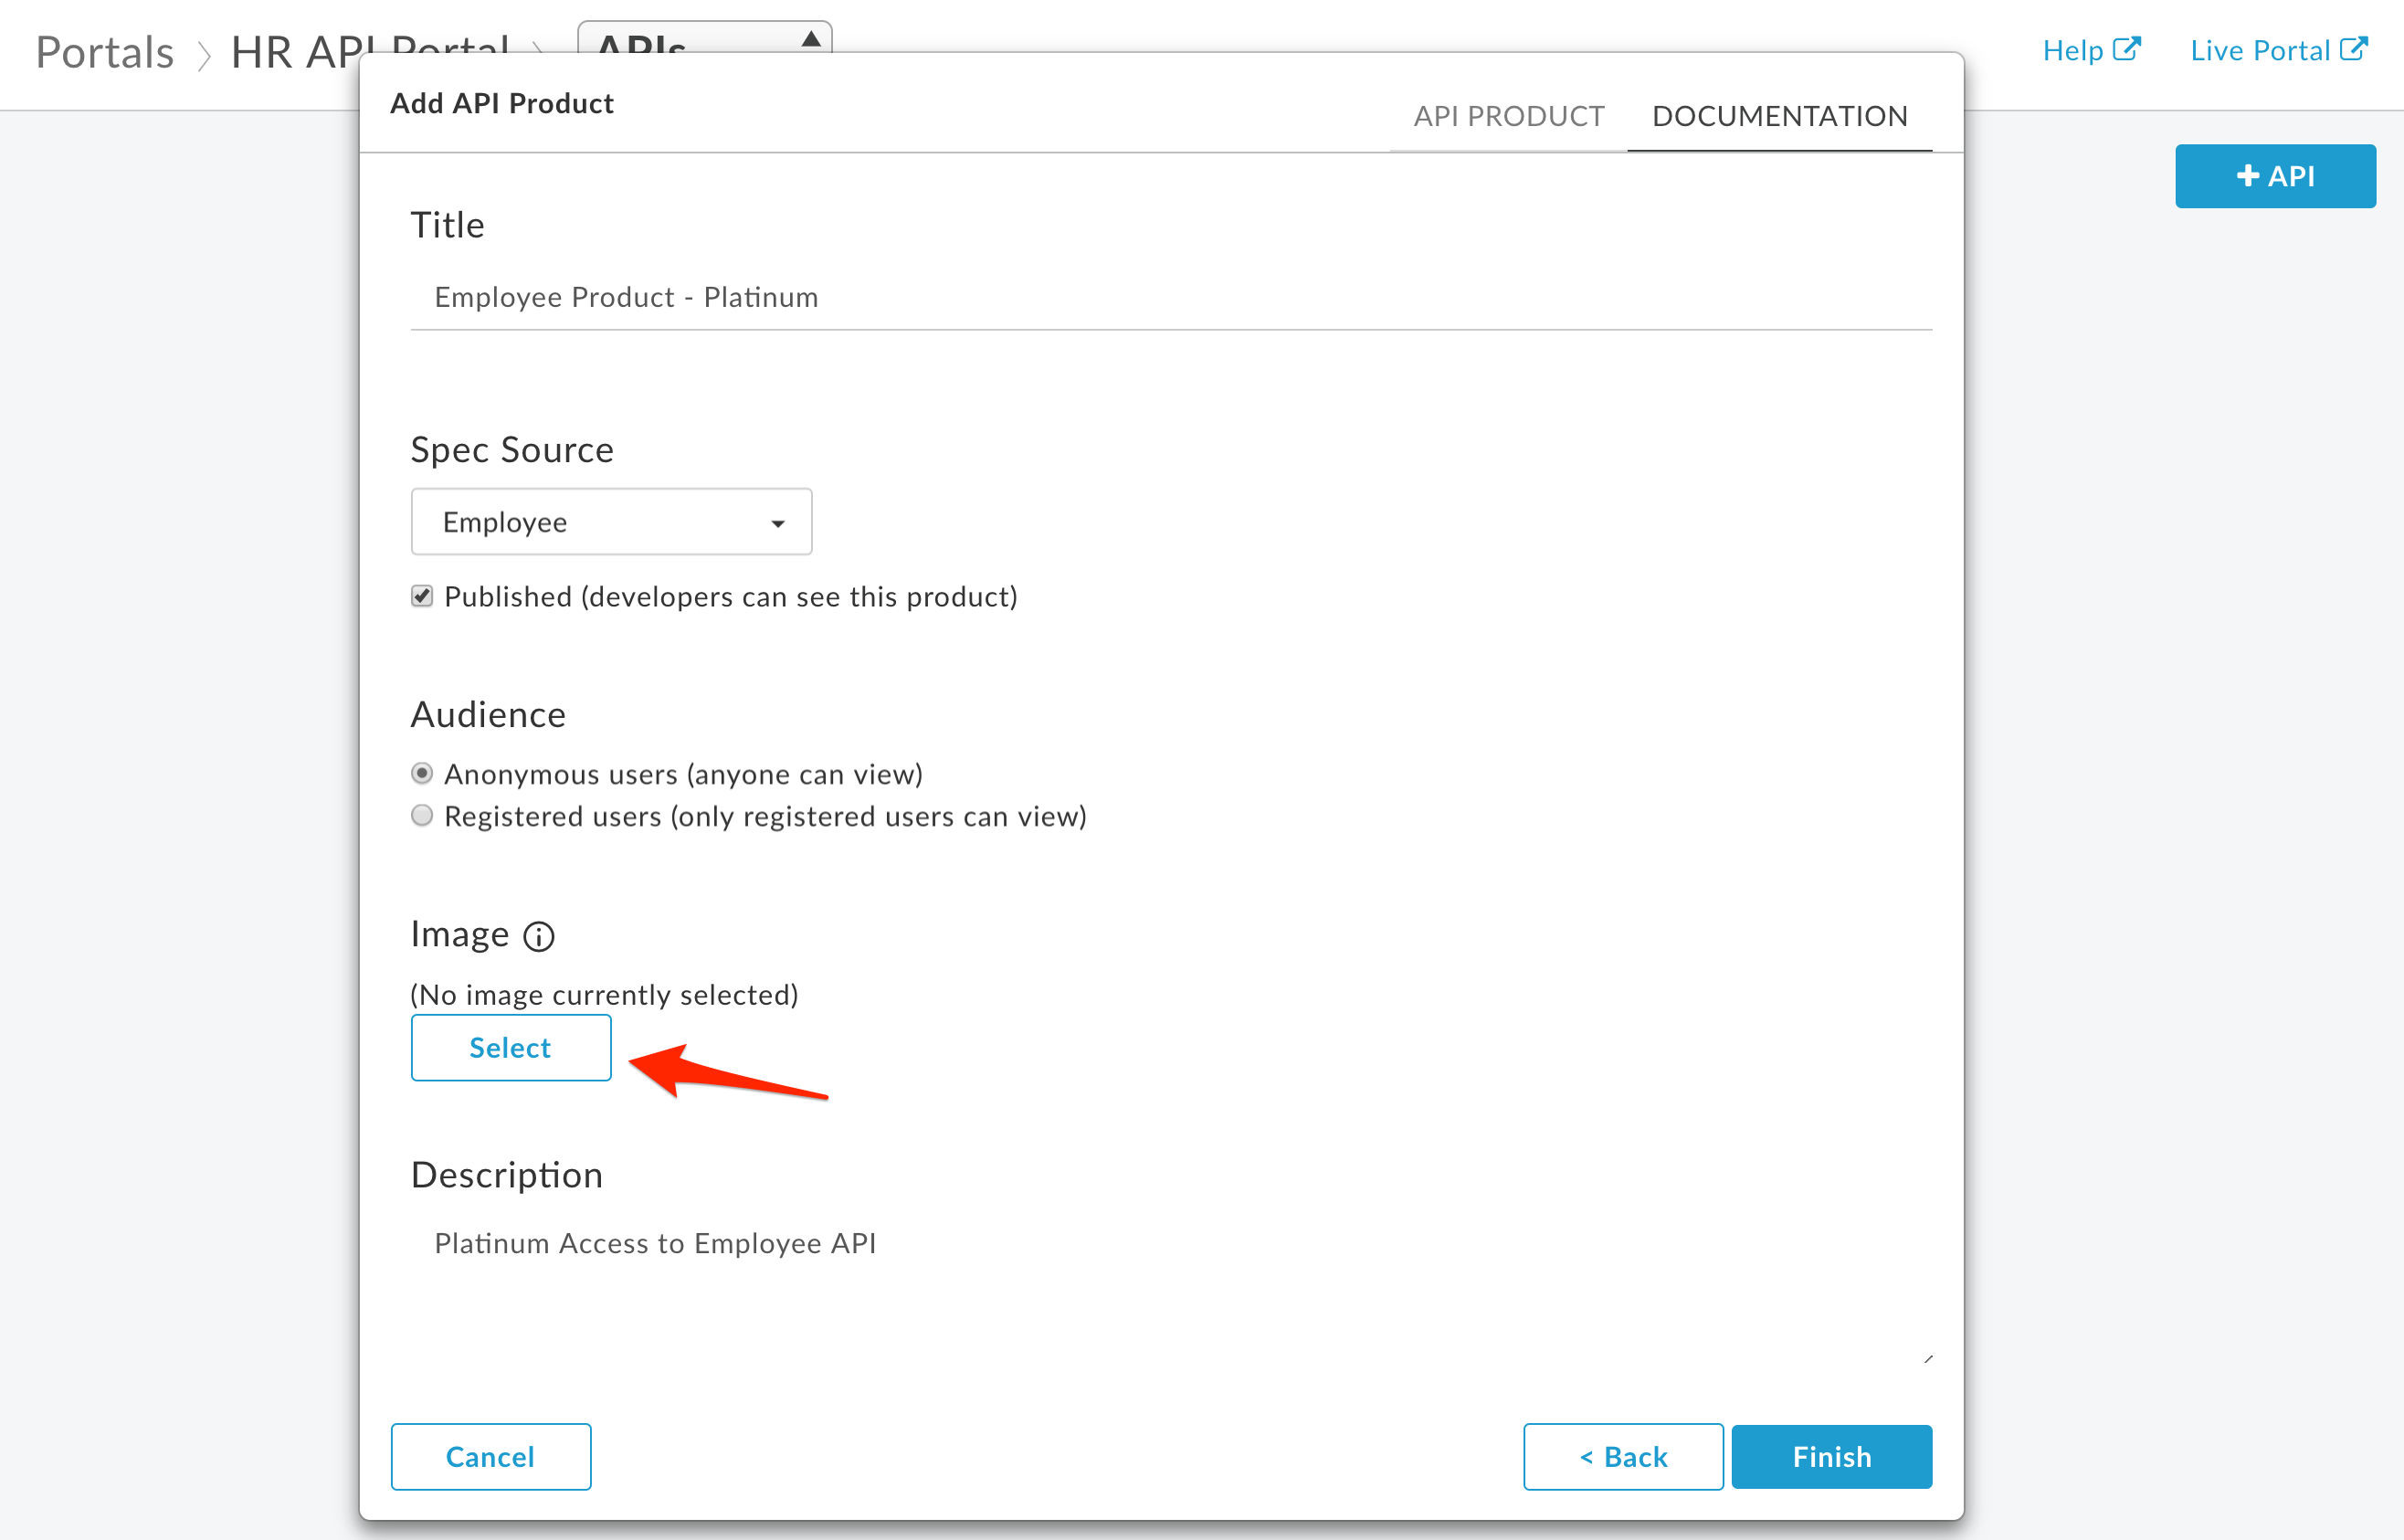
- To add an image for the API product. Click Select.
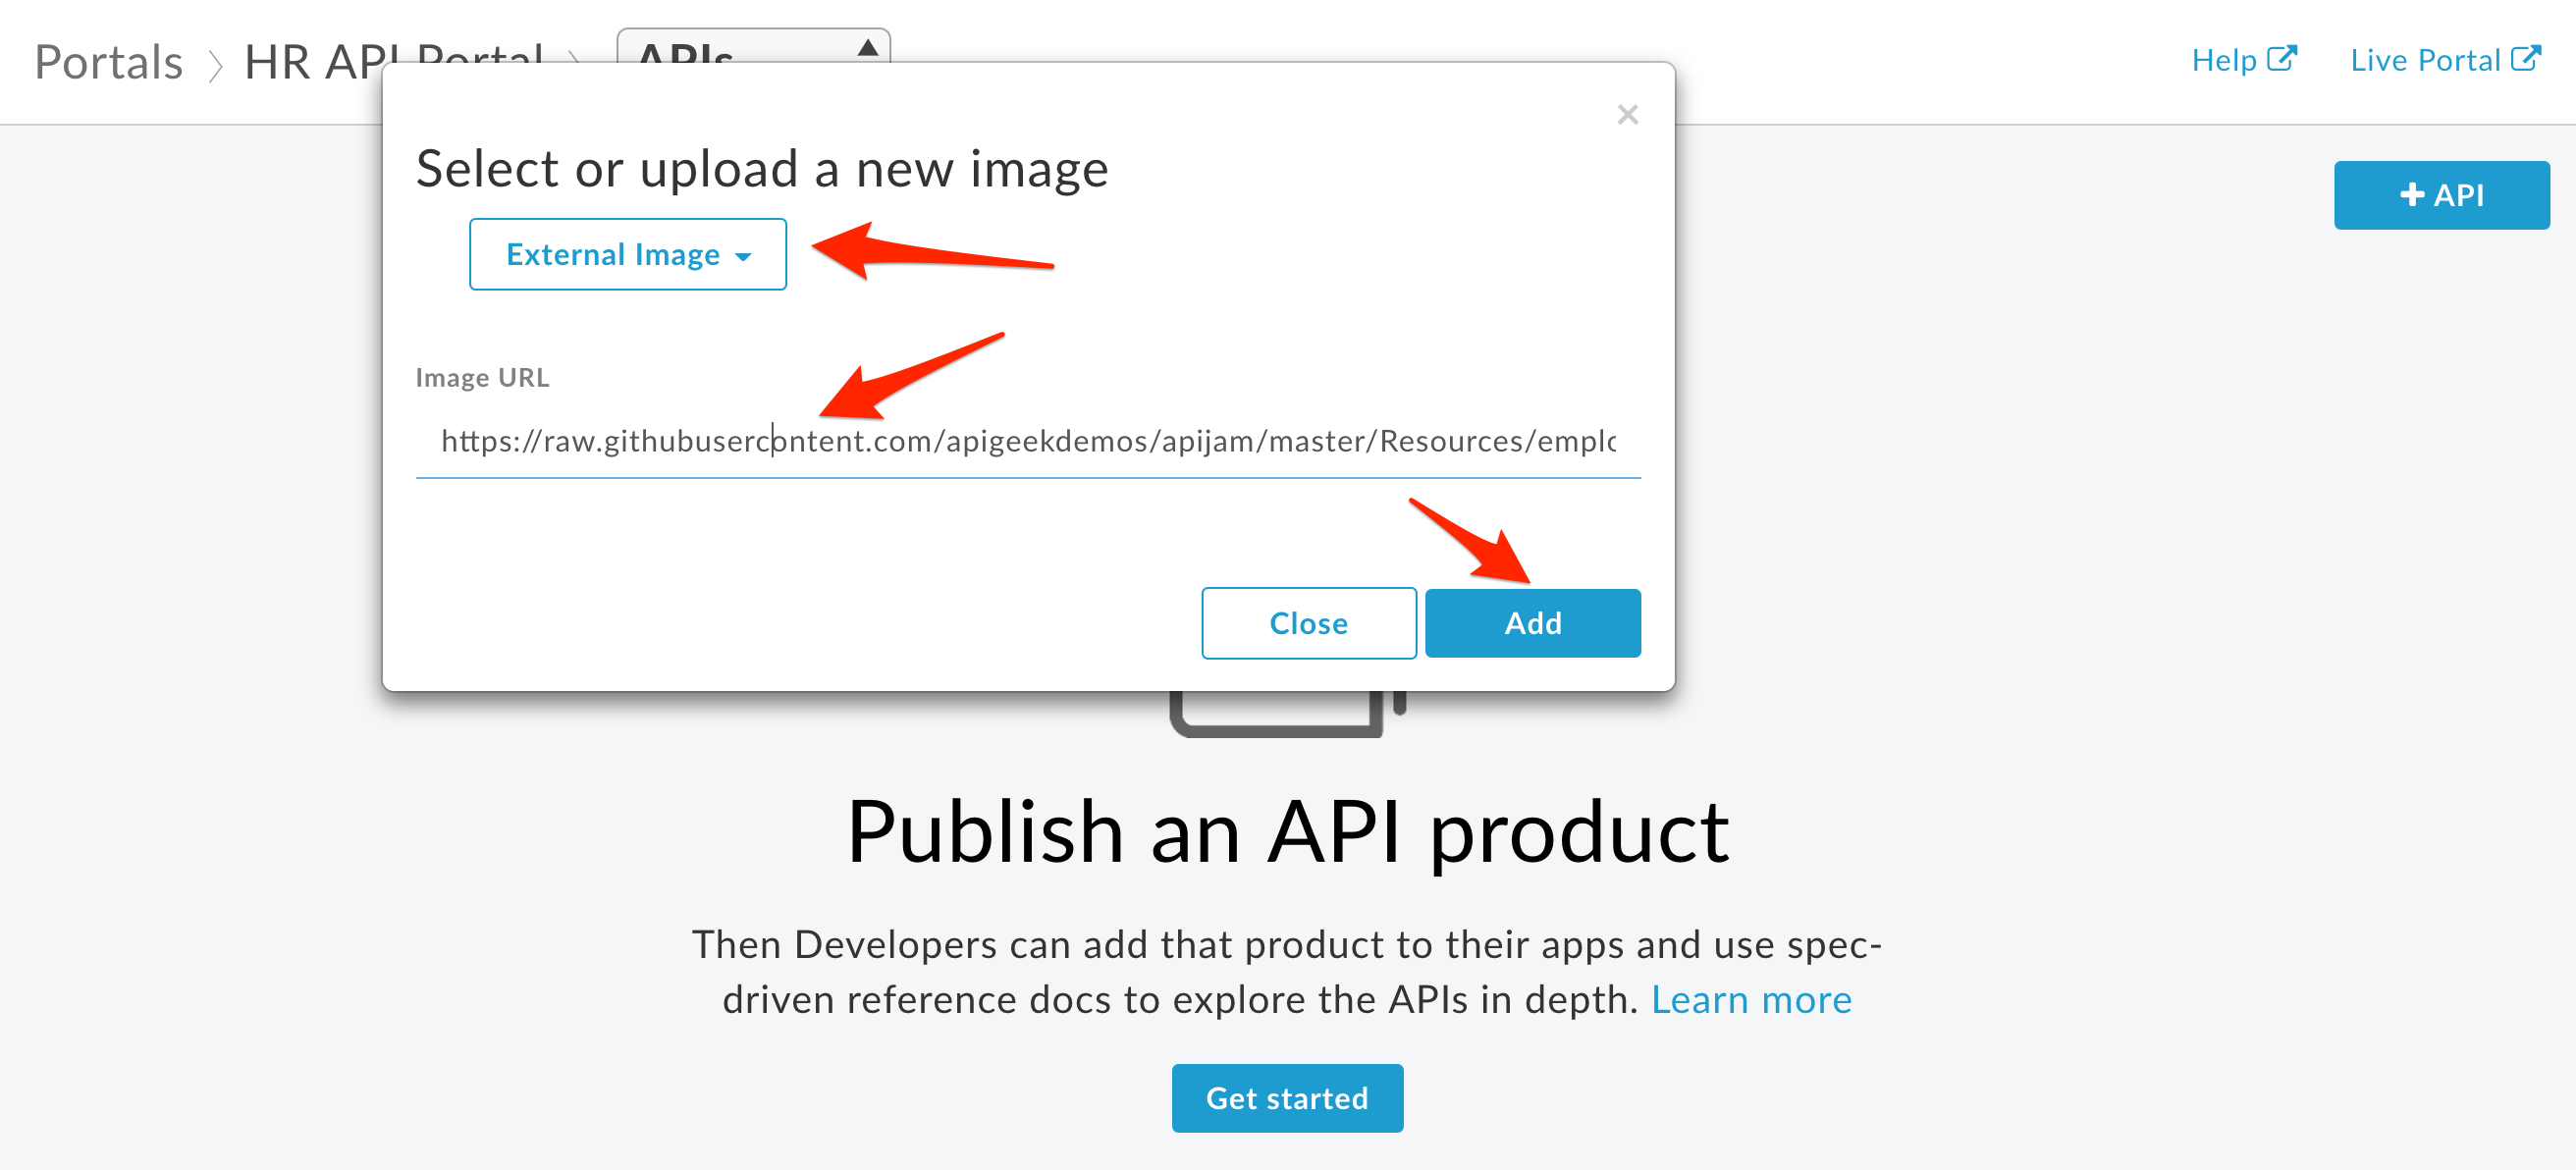
In the dropdown choose External Image. Set the Image URL: https://raw.githubusercontent.com/apigee/apijam/master/Resources/employee-image.jpg
Click Add.
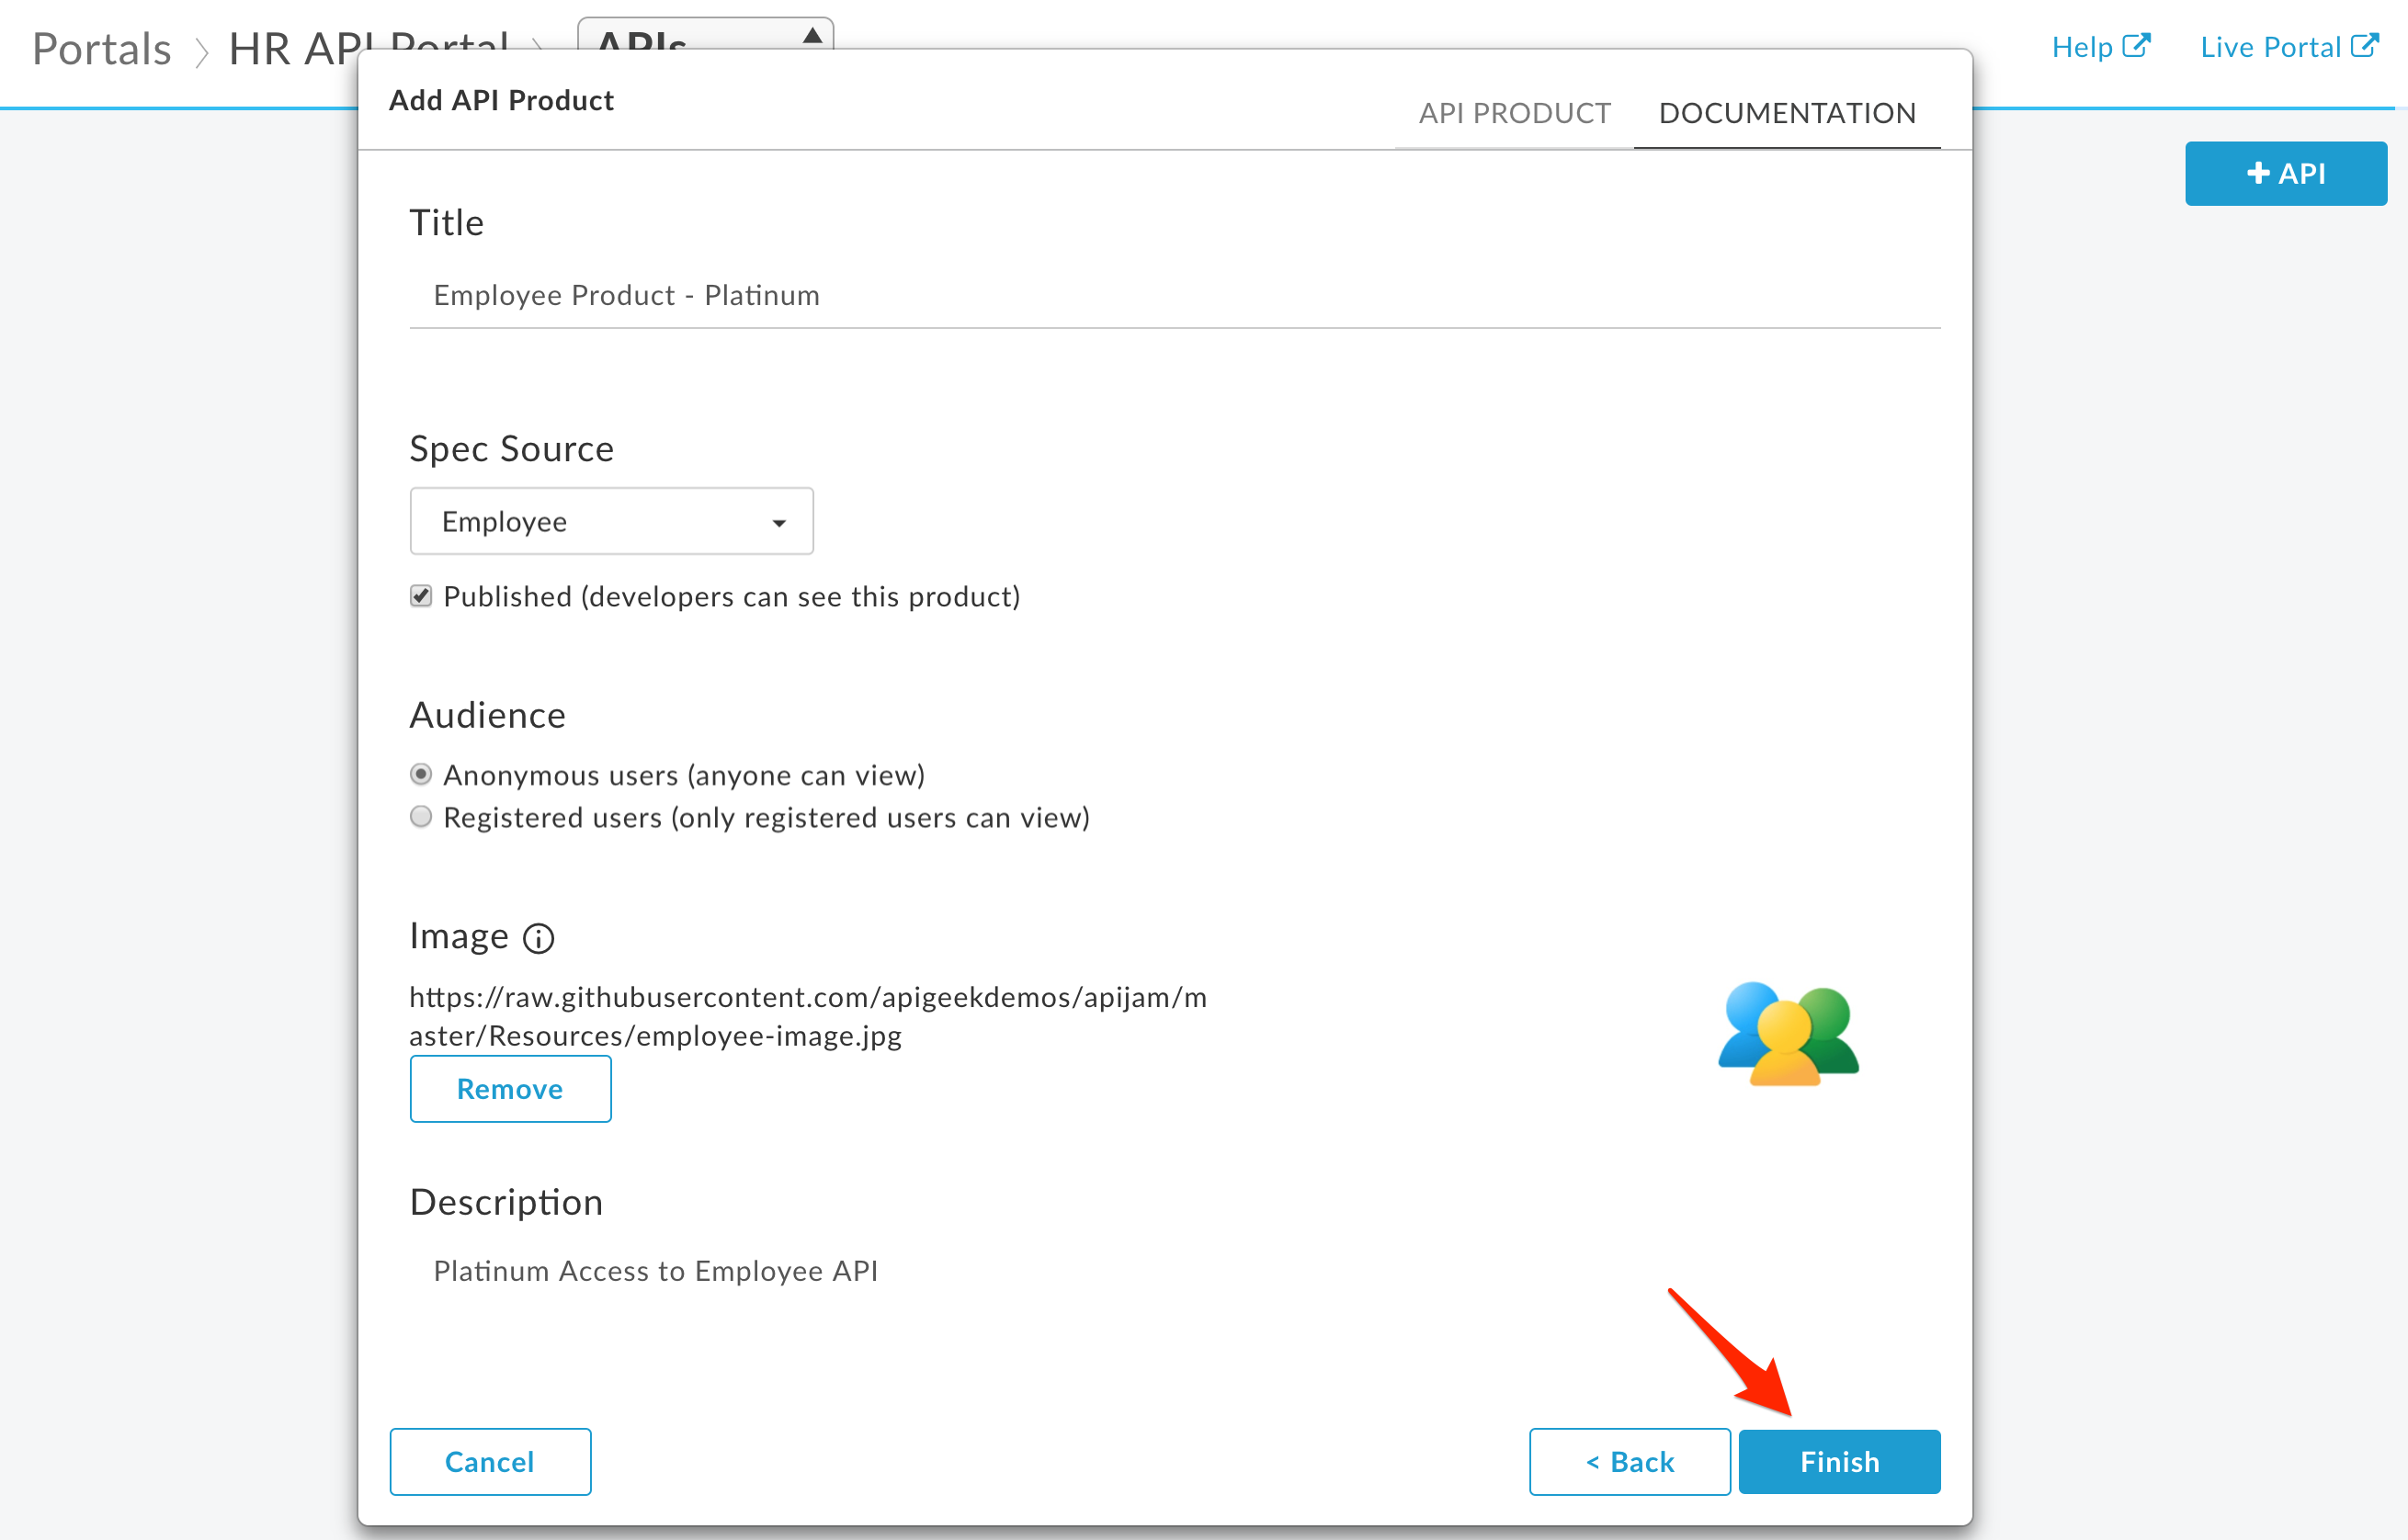
- Verify the settings. Note that, by default, a new API Product will default to being immediately published. Click Finish to publish the API product and associated spec to the developer portal.
- Repeat the process for the bronze product.
Review Published API Products
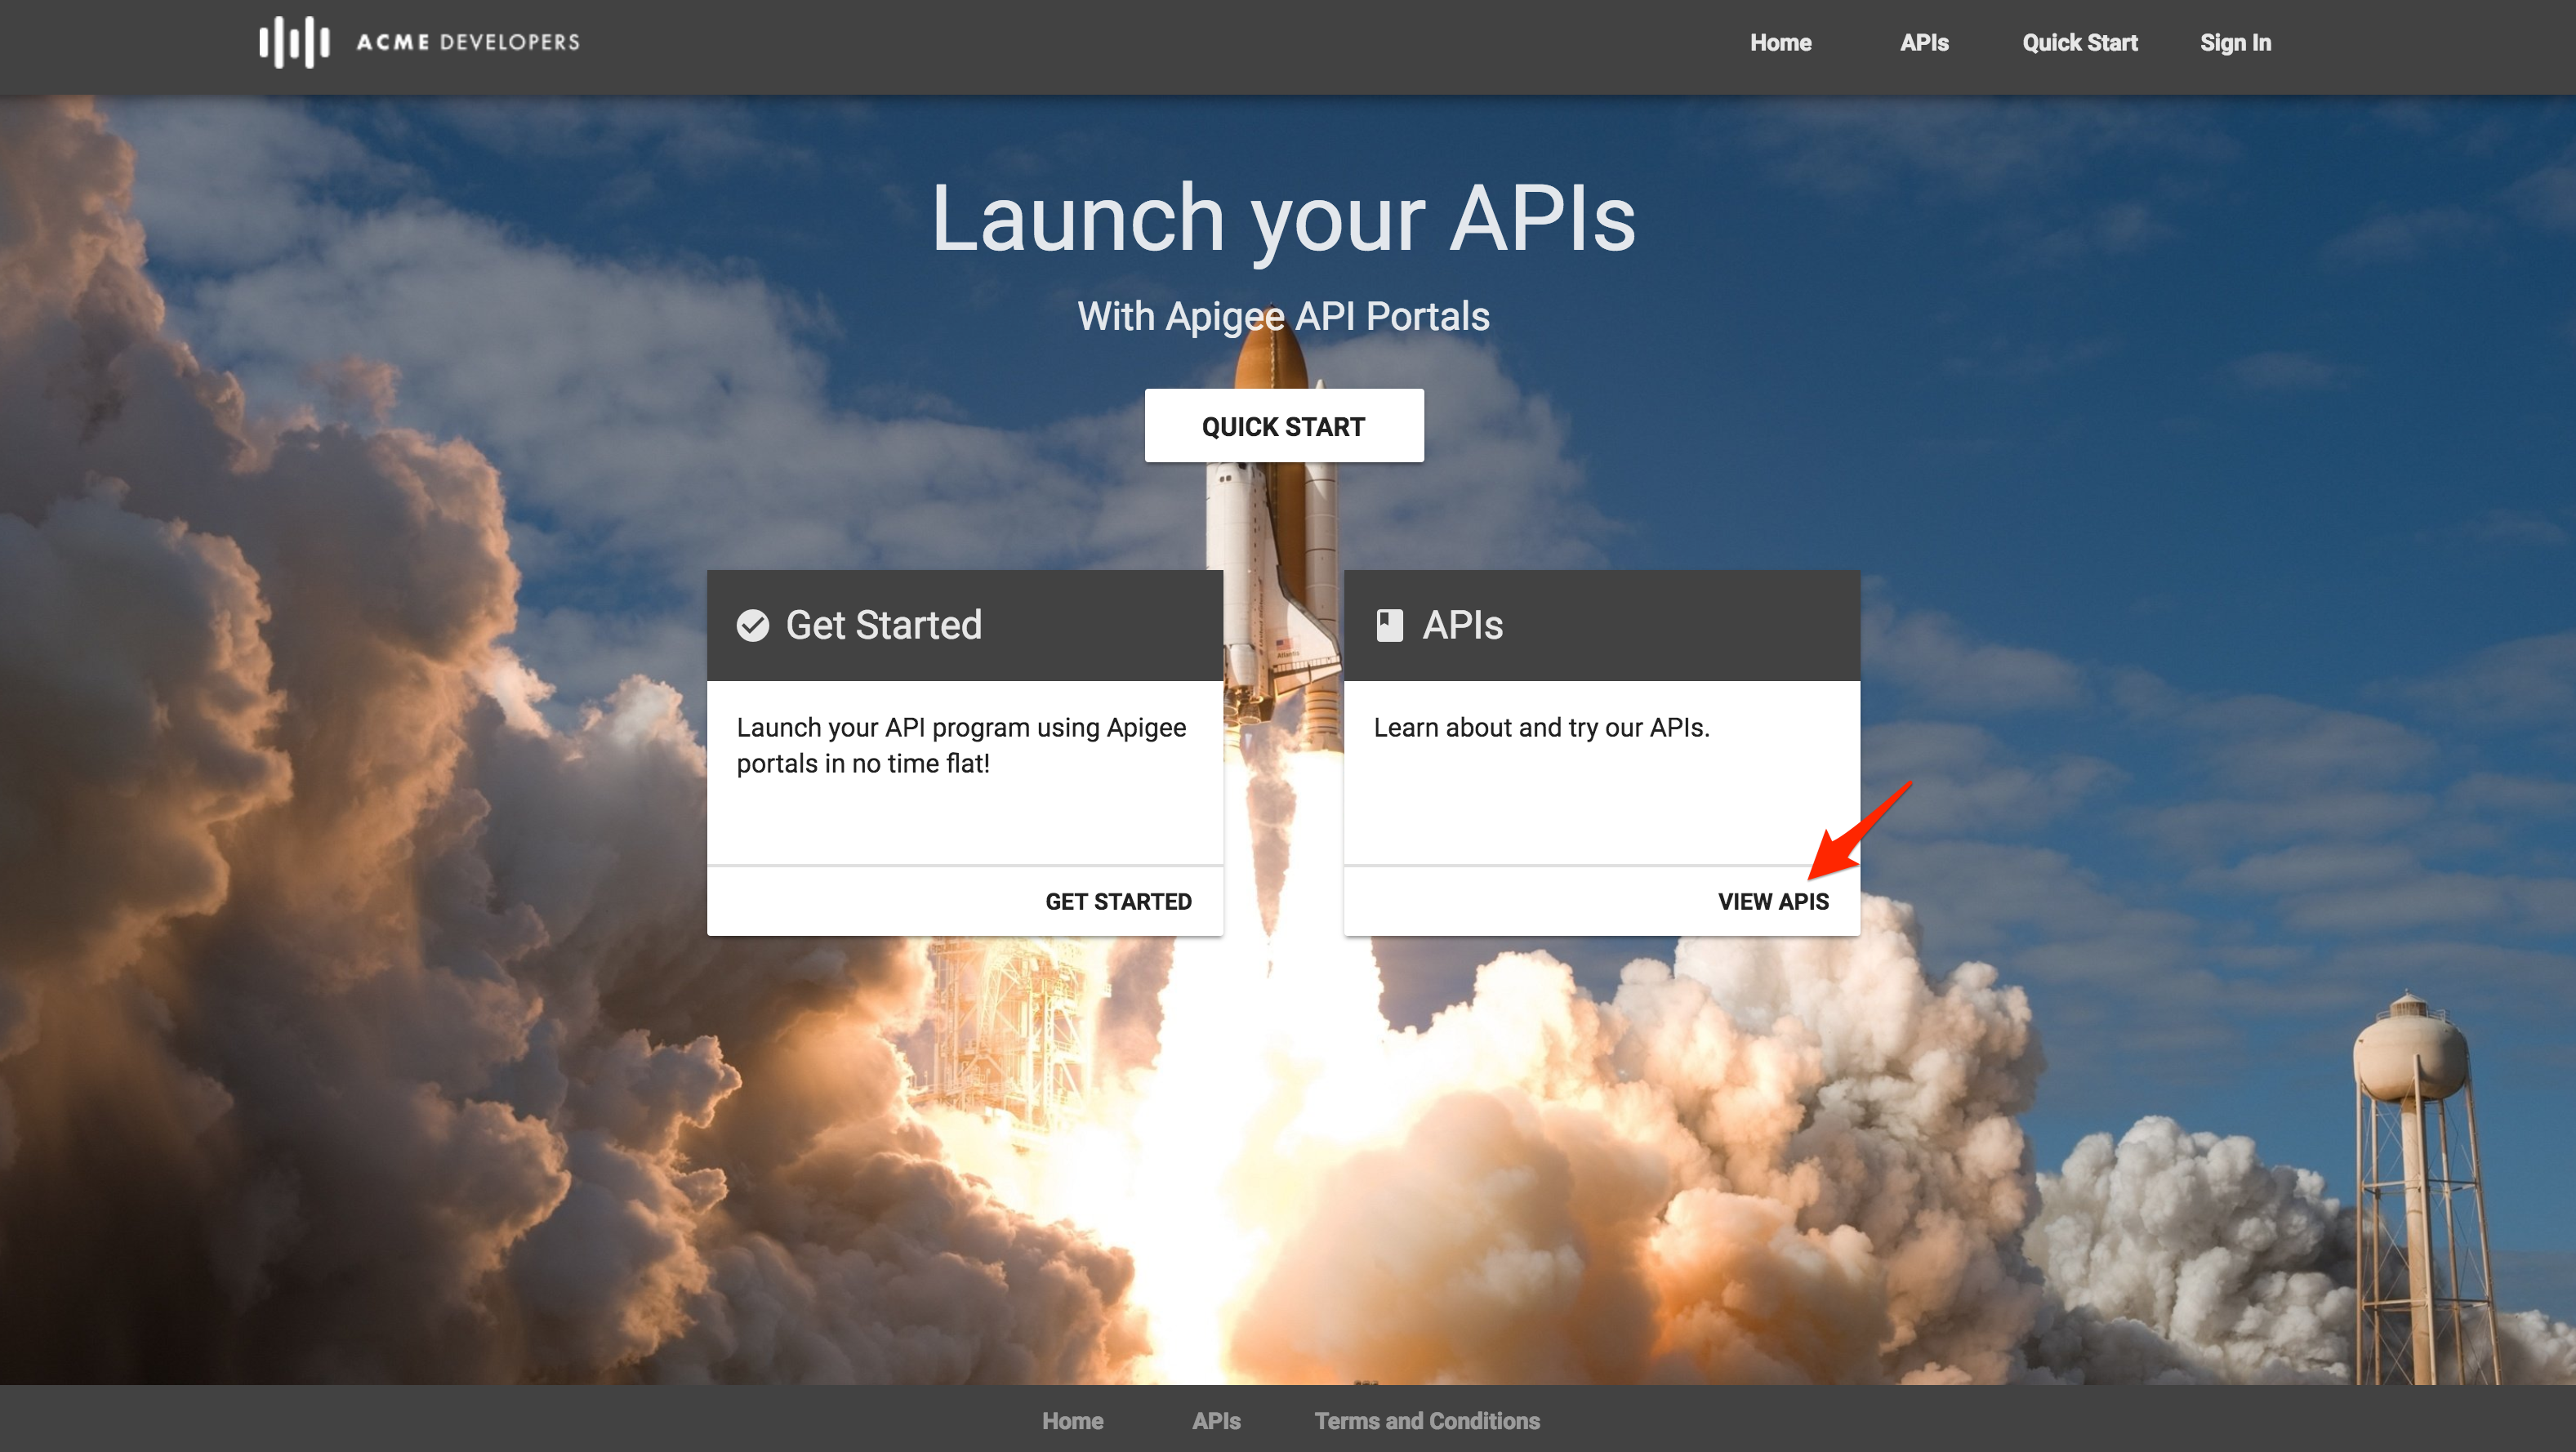
- Click the Live Portal link to launch a browser tab/window with the new Developer Portal.
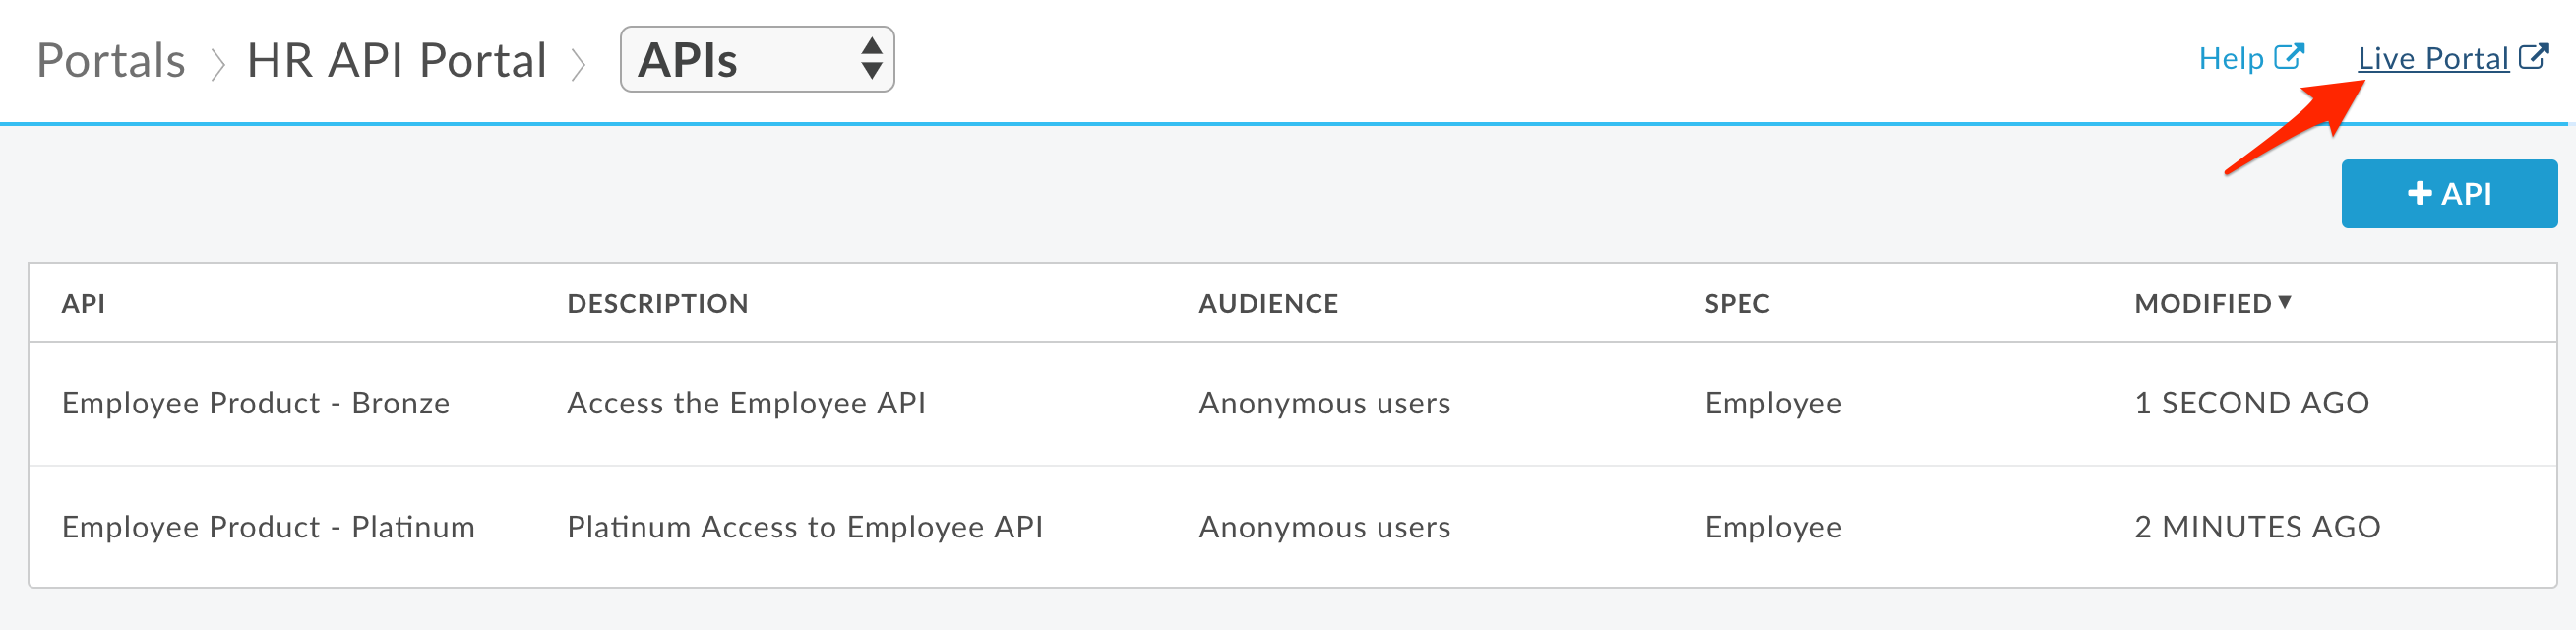
- In the Portal UI, click APIs to view the products that have been published.
Products are used to bundle APIs together so that a developer can request access to a set of related functionality without registering for each API. They are also useful for managing access to, and quotas for, particular developers. For more on API Products, read this document.
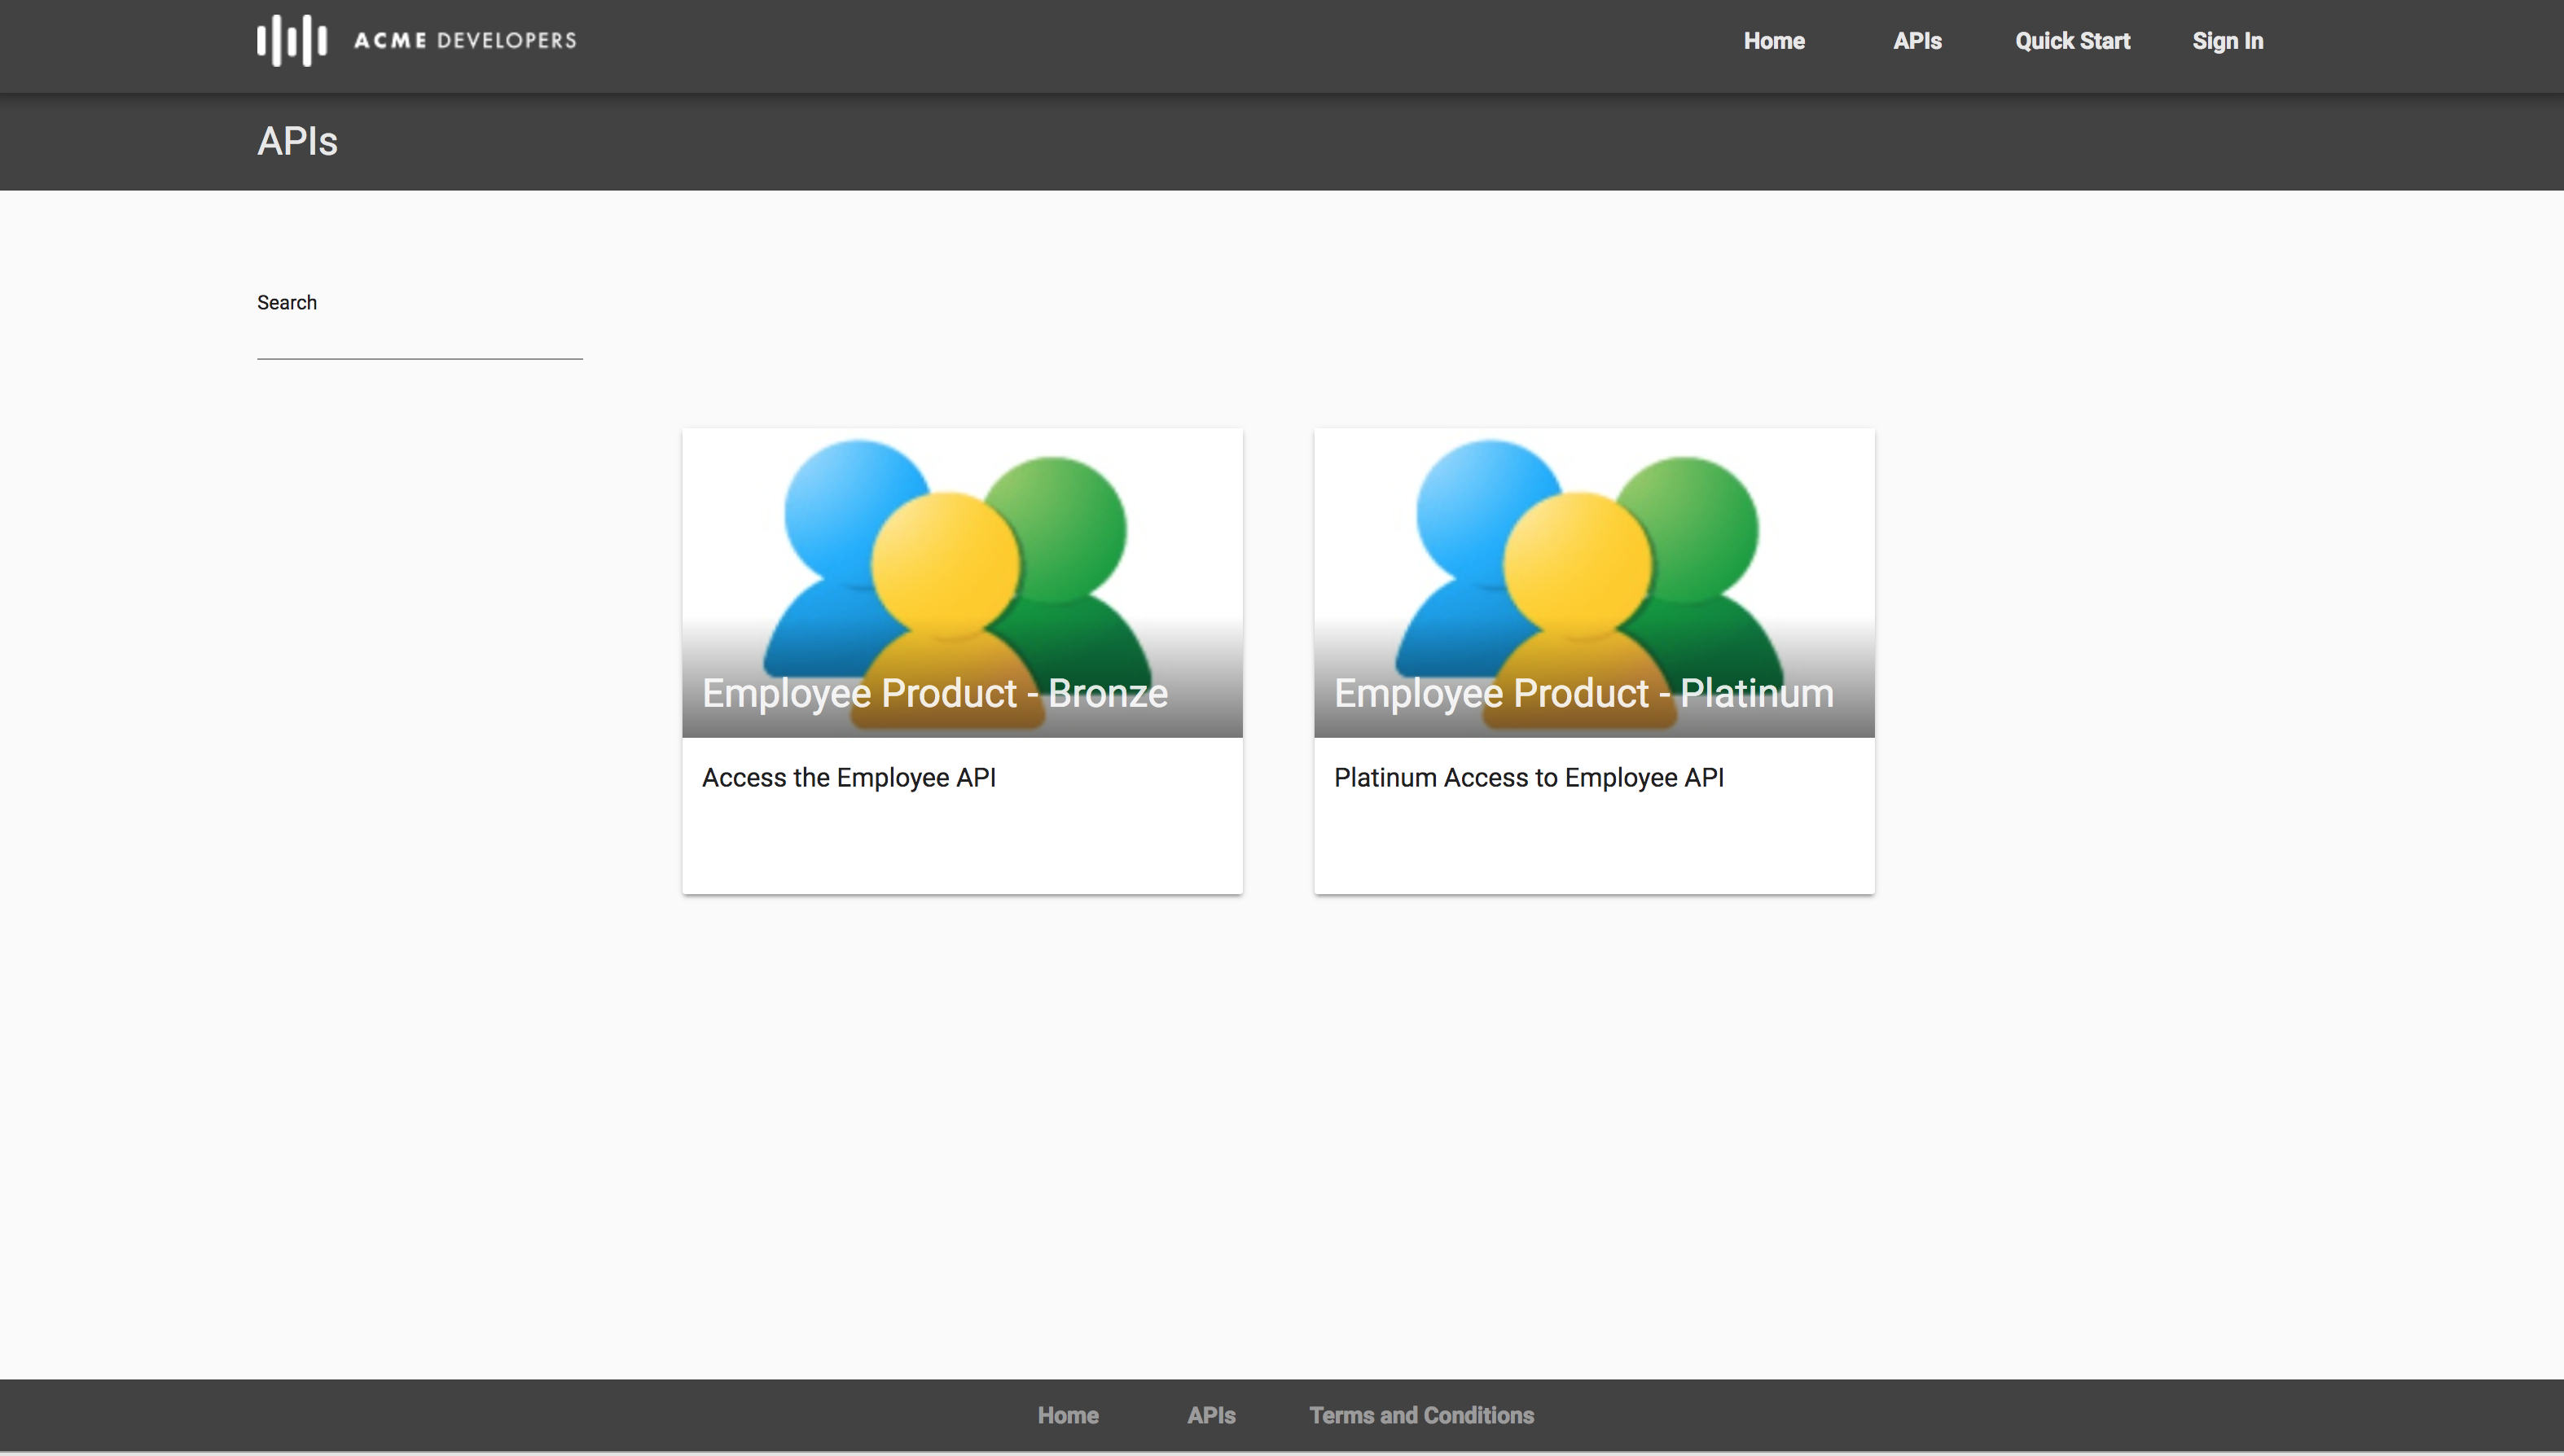
- Click on the platinum API product to view documentation.
The Portal will display the OpenAPI Specification for browsing the APIs included in the product. Depending on the method, you’d expect to see model details, response codes, etc., as per the OpenAPI Specification.

Select the GET / call on the left navbar. Add the API (consumer) key for the Platinum app using the Authorize button. You should be able to click Execute and see the results.
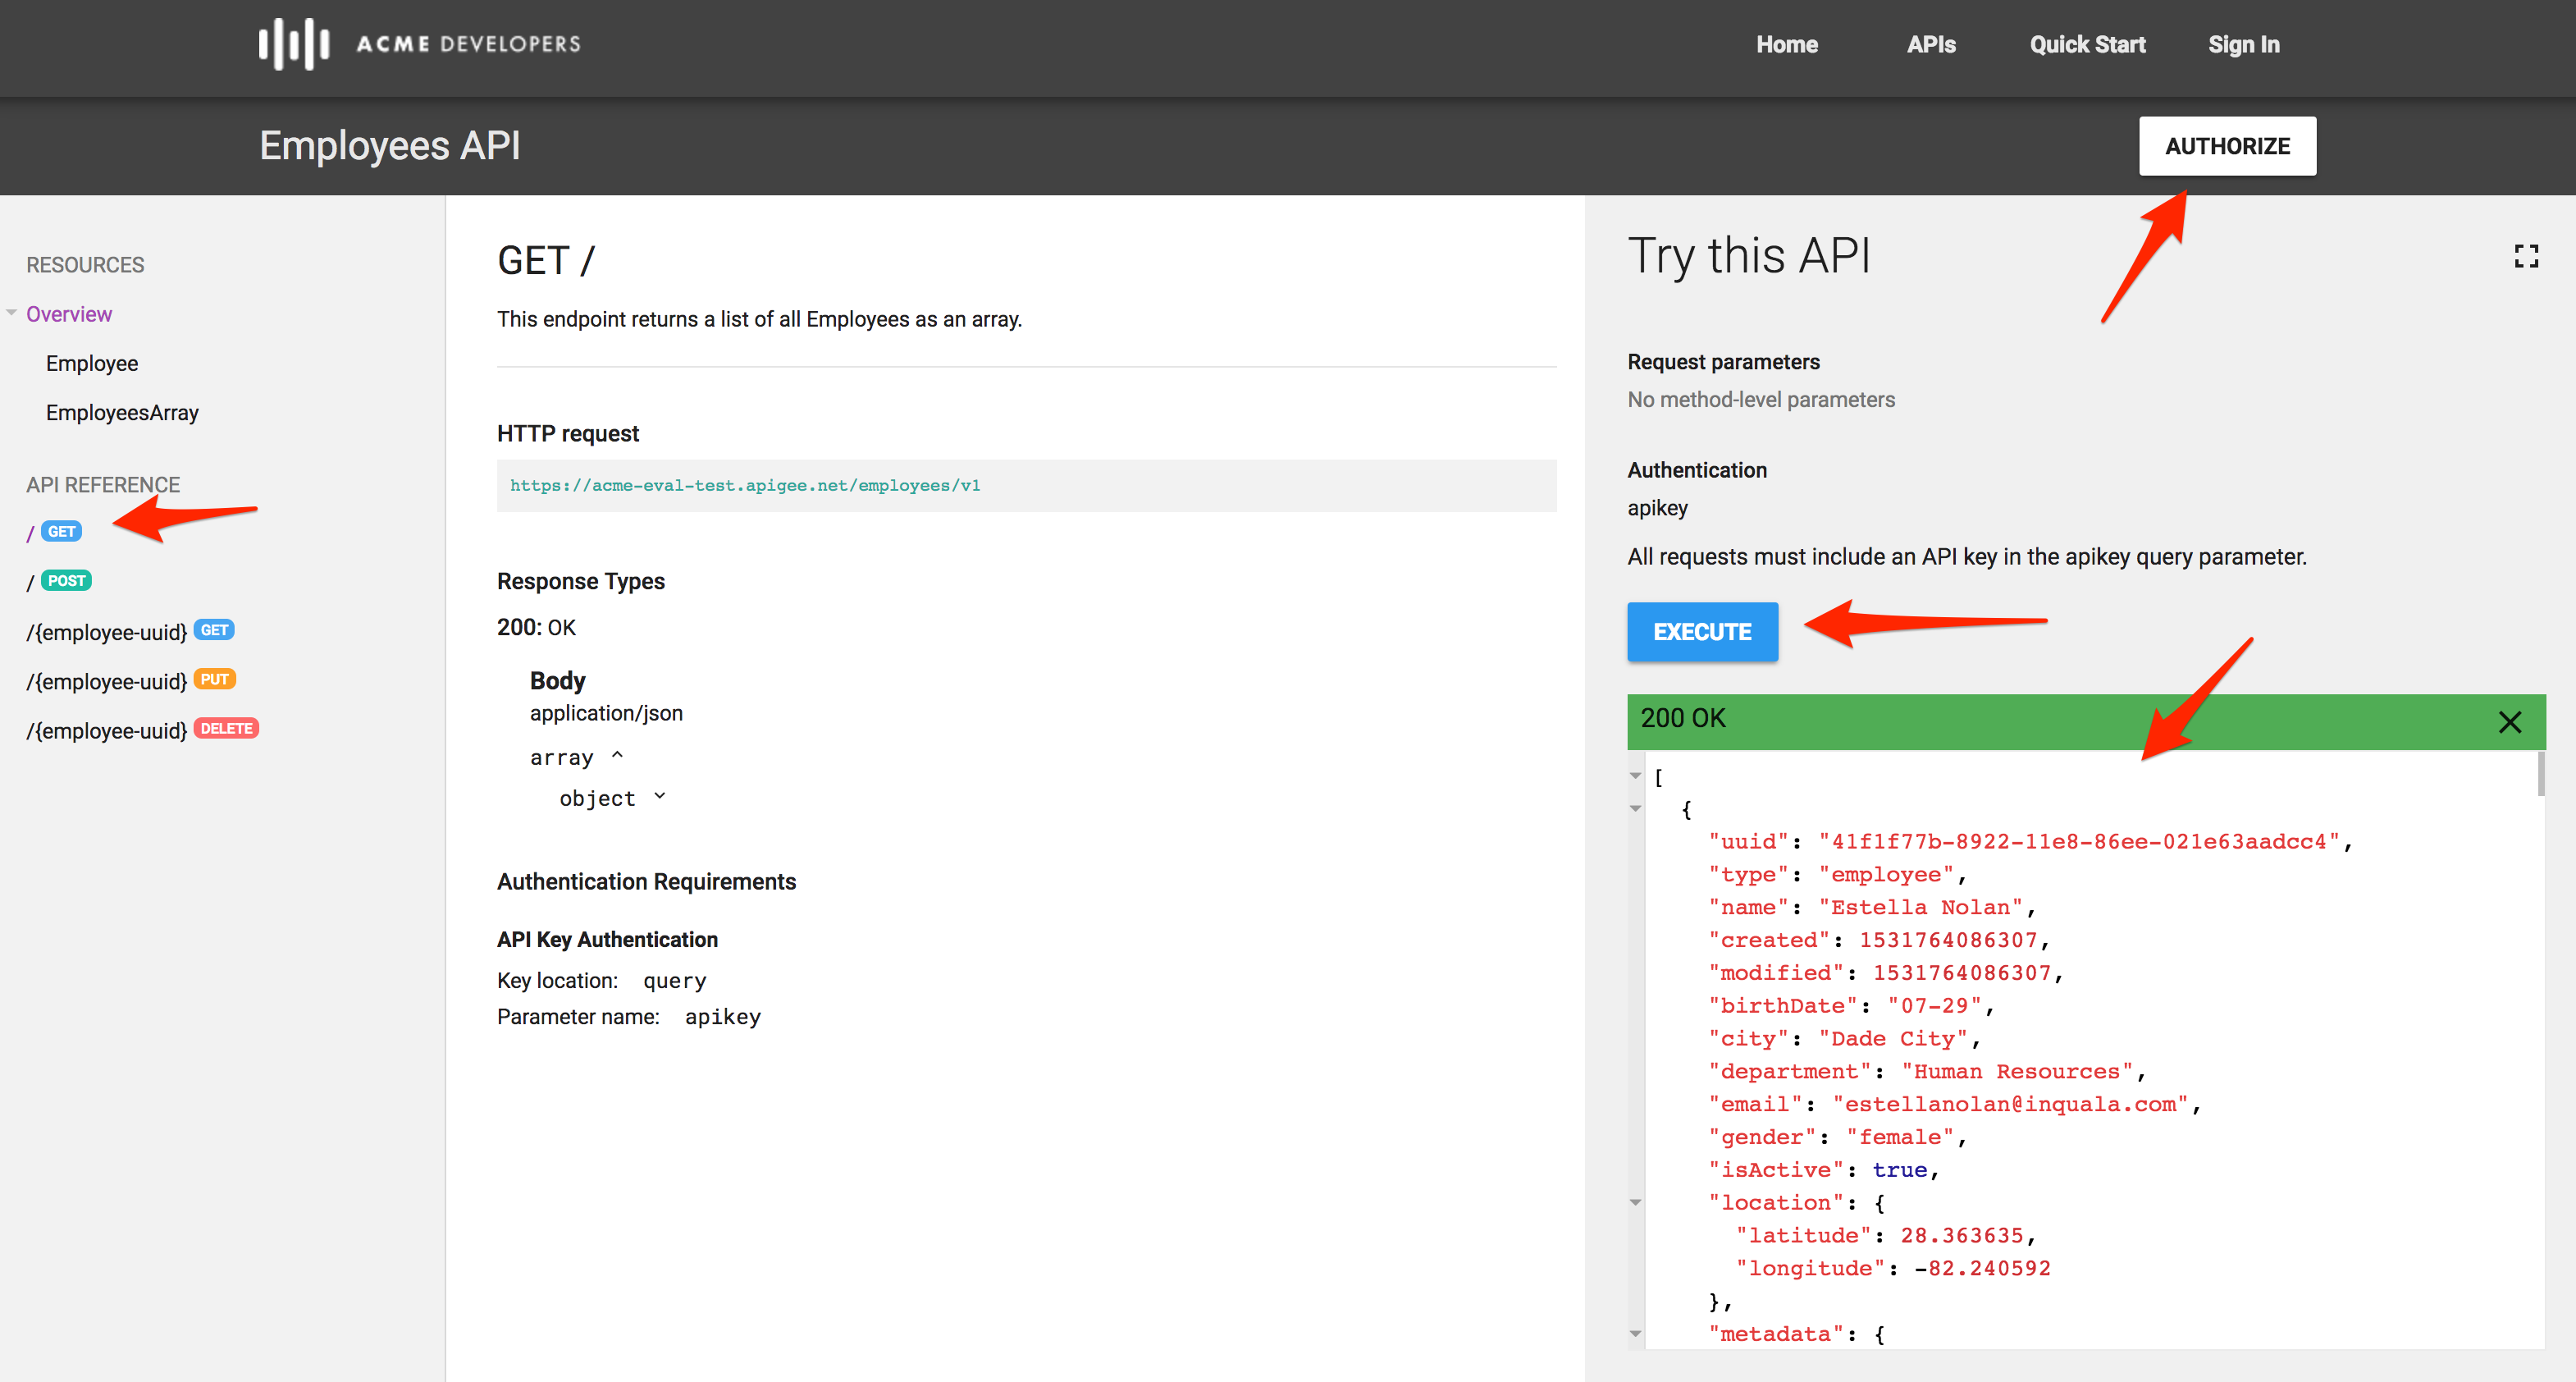
If you have problems using the Execute functionality of the API documentation, make sure you have have the CORS functionality that was added during the API Design : Securing APIs using API Key lab, and that you are using the correct API key.
Lab Video
If you would rather watch a video that covers this topic, point your browser here.
Earn Extra-points
Modify your OpenAPI Spec and introduce the new changes to your portal.
Quiz
-
What are two reasons why you might publish multiple API Products to the Developer Portal?
-
Changes made to OpenAPI Specification are made available in the Developer Portal automatically. True or False?
Summary
You’ve learned how to do the following;
-
Deploy the Apigee Lightweight Developer Portal.
-
Publish API Products with an OpenAPI Specification.
-
Use the Developer Portal UI to browse the OpenApi Specification.
Next step
Now go to Lab-7