apijam
Lab 4 - Build an App Developer Experience using Apigee Integrated Developer Portals
Duration : 30 mins
Persona : API Team
Use case
You want to provide and manage an easy, self-service on-boarding experince for app developers who wish to consume your API Products via a Developer Portal. You want to enable app developers to learn about, register for, and begin using your APIs, as well as control visibility and access to different API Products.
How can Apigee Edge help?
Apigee Edge provides multiple options for your Developer Portal. Apigee supports several developer portal solutions, ranging from simple turn-key to fully customizable and extensible. The turn-key Integrated Developer Portal option supports branding and customization of much of the site, such as theme, logos, and page content, and can be published in seconds, directly from the management UI. We also provide a Drupal-based portal if you want full control and to leverage any of the hundreds of Drupal modules available in the Drupal Market. This lab focuses on the Integrated Developer Portal.

In this lab, you will create an Integrated Developer Portal wherein you will publish API Products, and through which app developers can
- learn API usage through OpenAPI specification based interactive documentation
- register Apps that consume API Products, and thereby
- generate App client credentials (API Key and Secret) that can be used to consume APIs.
Pre-requisites
For this lab, you should have completed Lab 1, Lab 2 and Lab 3 of this module.
You will need…
- An OpenAPI specification uploaded to your Spec store within your Organization. This specification will make up the documentation of your API. If you do not have an OpenAPI Specification available for this lab, revisit Lab 1 - Design & Create an API Proxy with OpenAPI Specification
- API Products that bundle your API Proxies. If you do not have an API Product configured, revisit Lab 2 - API Security and API Producer/Consumer Relationship on Apigee Edge, and Lab 3 - Manage tiered API Product subscription through API call quotas.
Instructions
Update API Proxy for CORS Support
CORS (Cross-origin resource sharing) is a standard mechanism that allows JavaScript XMLHttpRequest (XHR) calls executed in a web page to interact with resources from non-origin domains. CORS is a commonly implemented solution to the “same-origin policy” that is enforced by all browsers. For example, if you make an XHR call to your API Proxy from JavaScript code executing in your browser, the call will fail. This is because the domain serving the page to your browser is not the same as the domain serving your API, eg. “{your org name}-{environment name}.apigee.net”. CORS provides a solution to this problem by allowing servers to “opt-in” if they wish to provide cross-origin resource sharing.
In this step, we upload and deploy a version of your API proxy which includes configurations that support CORS, before it is published to a Developer Portal where it could be invoked within interactive docs pages. Typically, you would set these configurations up as described under “Adding CORS support to an API proxy”. However, in the interest of time, in this lab, we will make use of a pre-configured proxy revision instead.
-
Download this revision of the API proxy. This is a version of the same Hipster Products API that we have been working on so far, but with CORS configurations.
-
Navigate to API Proxies and select your Hipster Product API proxy. Then click the Project button and select Upload a New Revision.
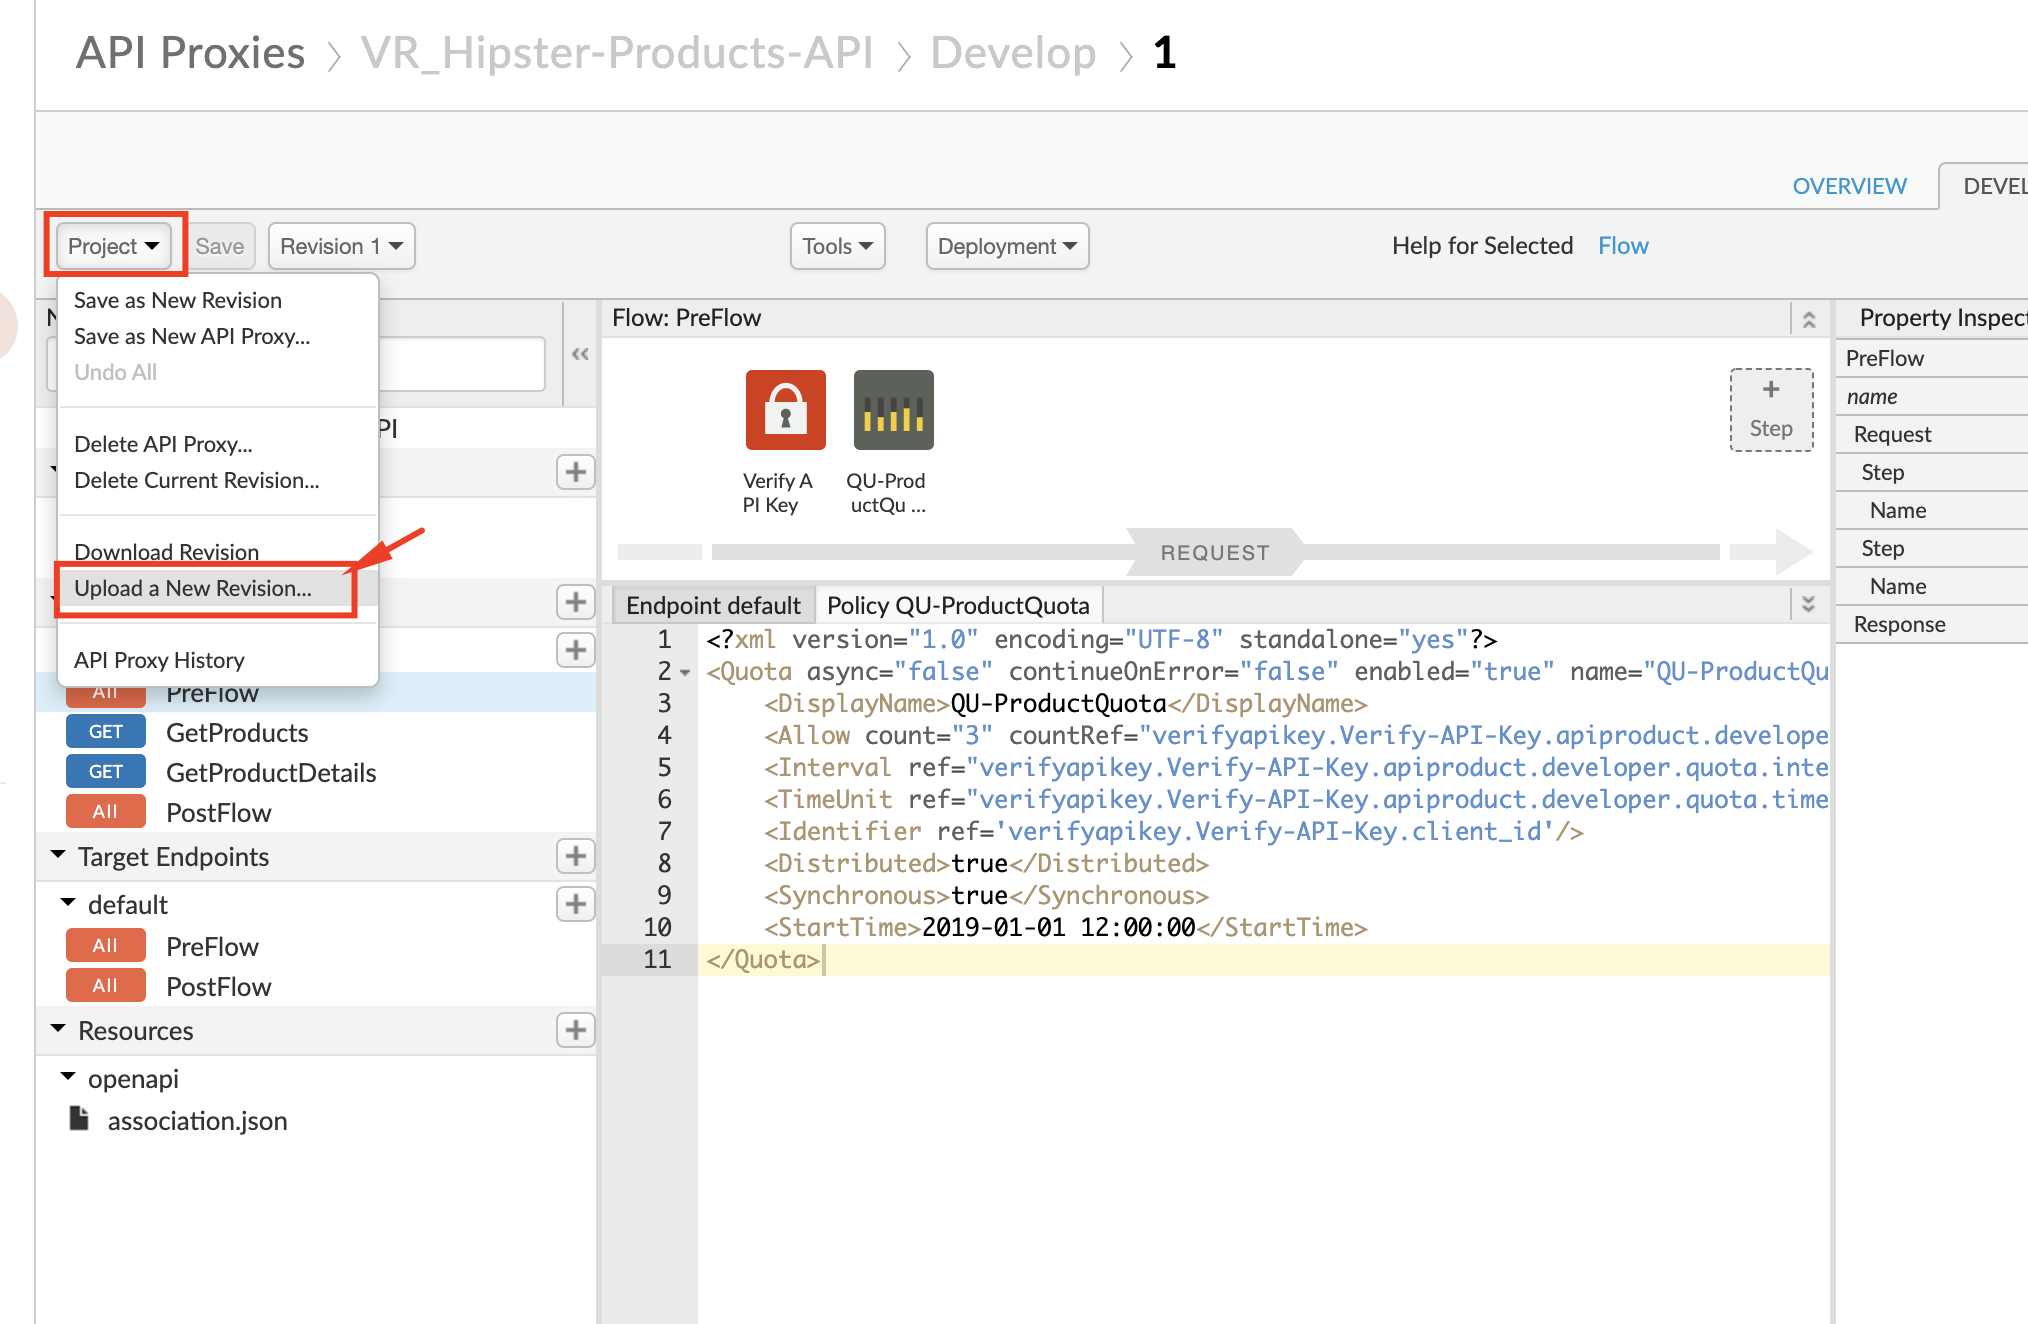
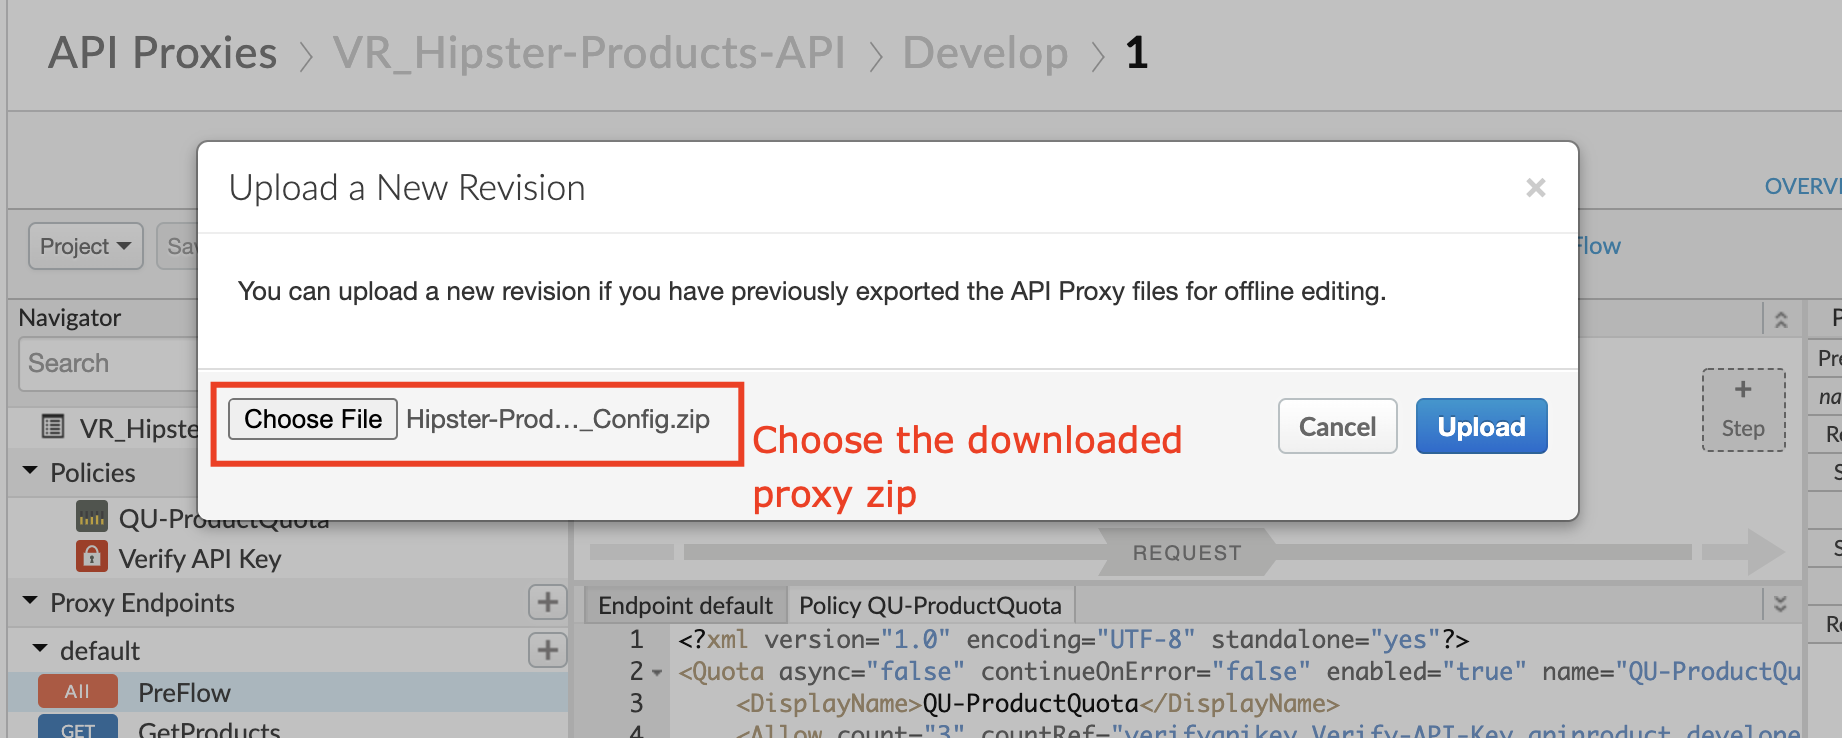
In the pop-up dialog, choose the previously downloaded revision of the API proxy, and click Upload.
- Once uploaded, in the latest revision of your API proxy, navigate to the Proxy Endpoints » default XML, scroll down and change the
<BasePath>node value to match your proxy’s basepath.
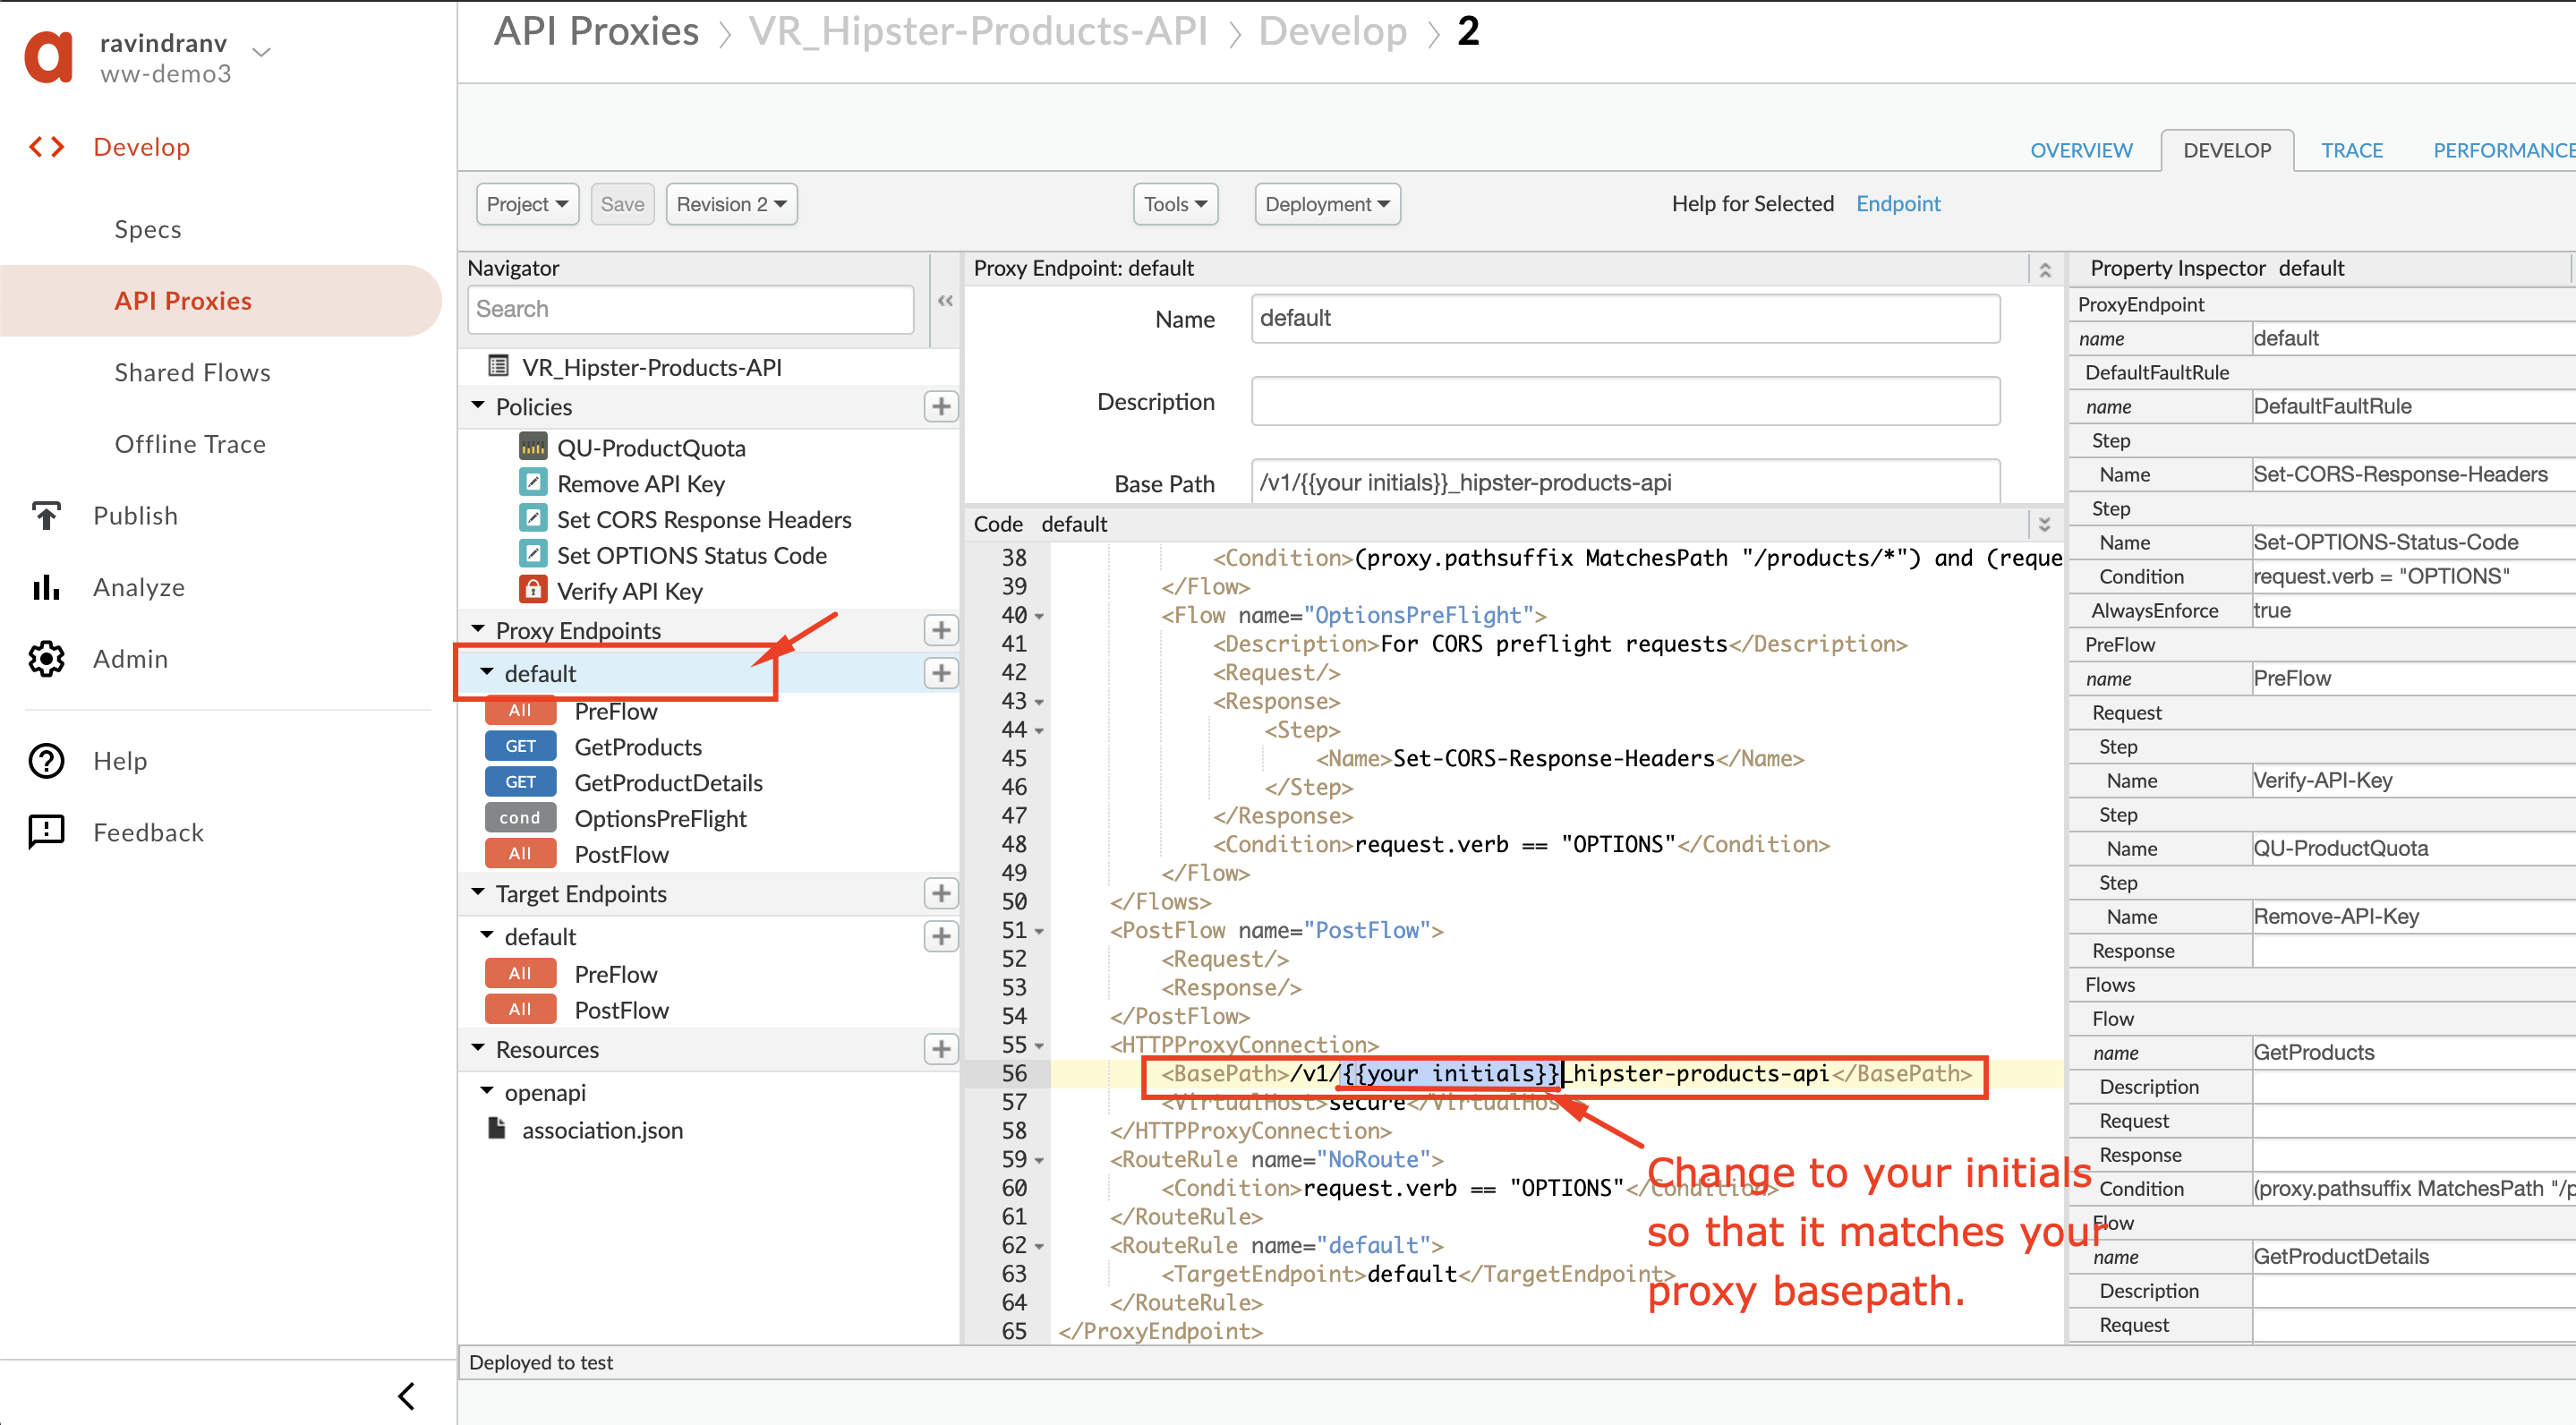
Hit Save.
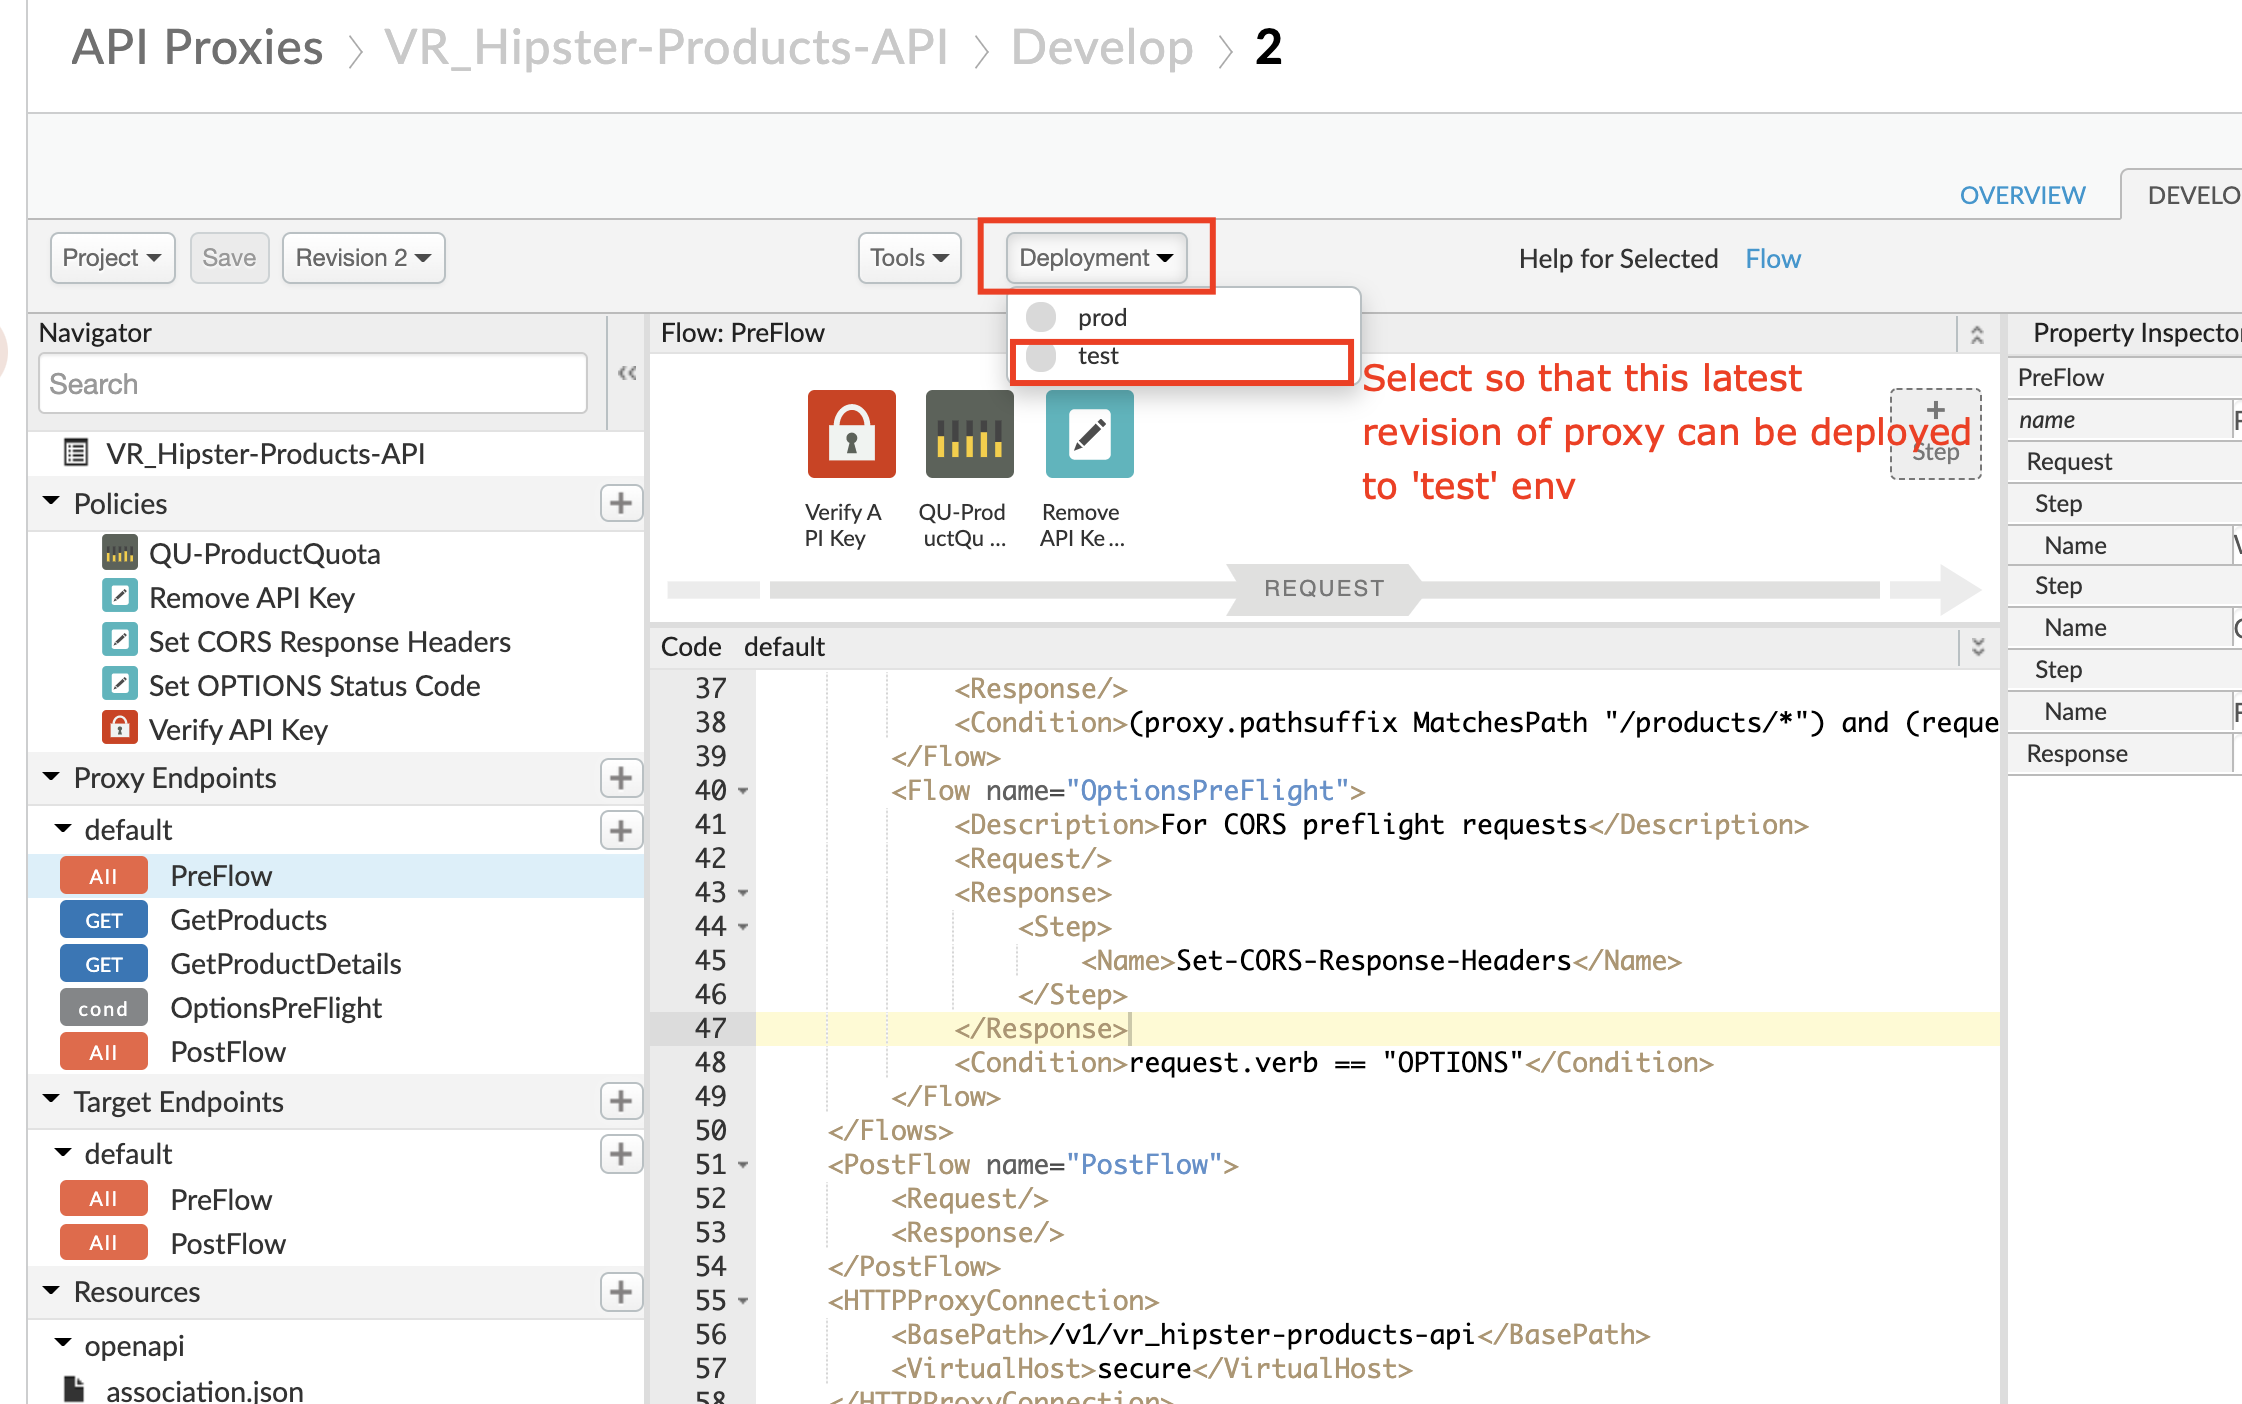
- Once saved, select the Deployment drop down and click on test, to undeploy the older revision and deploy the latest revision of the proxy to the test environment.
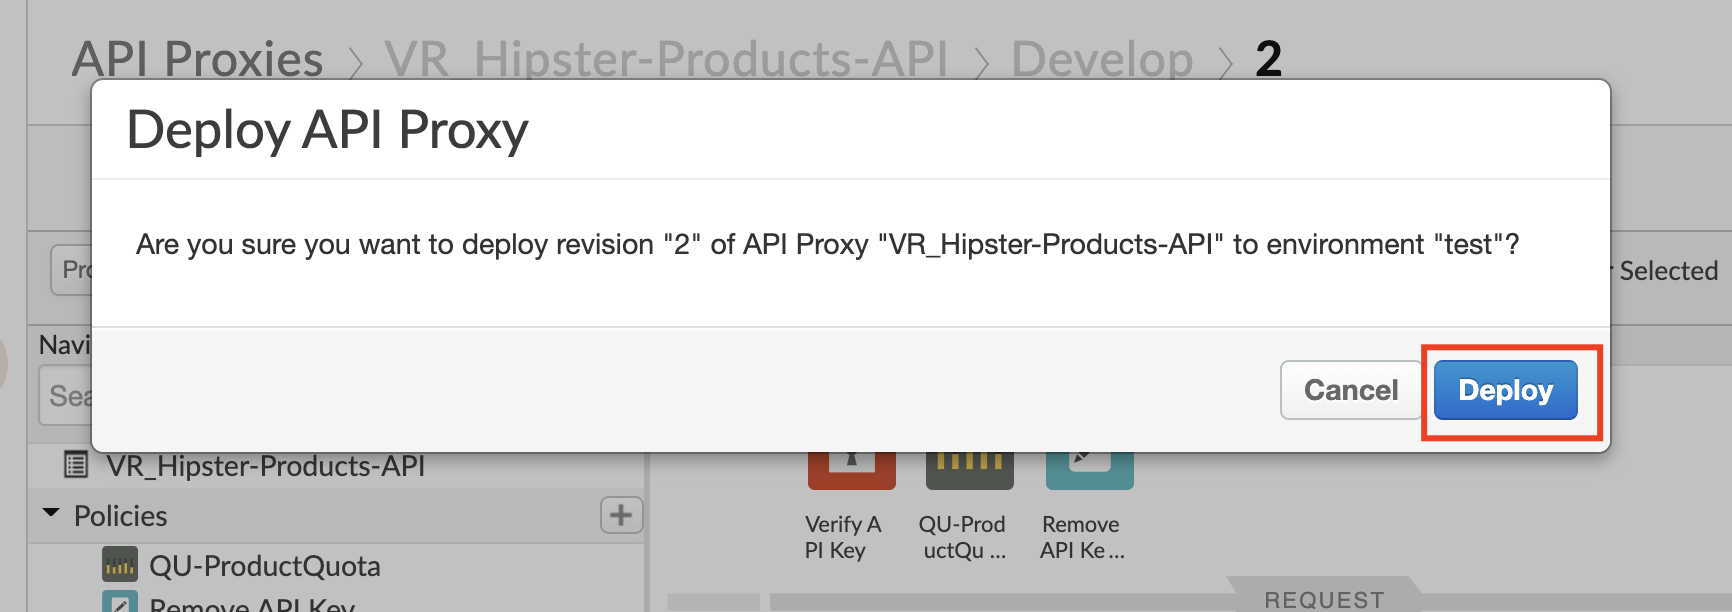
Your API proxy should now include configurations to support CORS processing.
Update the Open API Spec
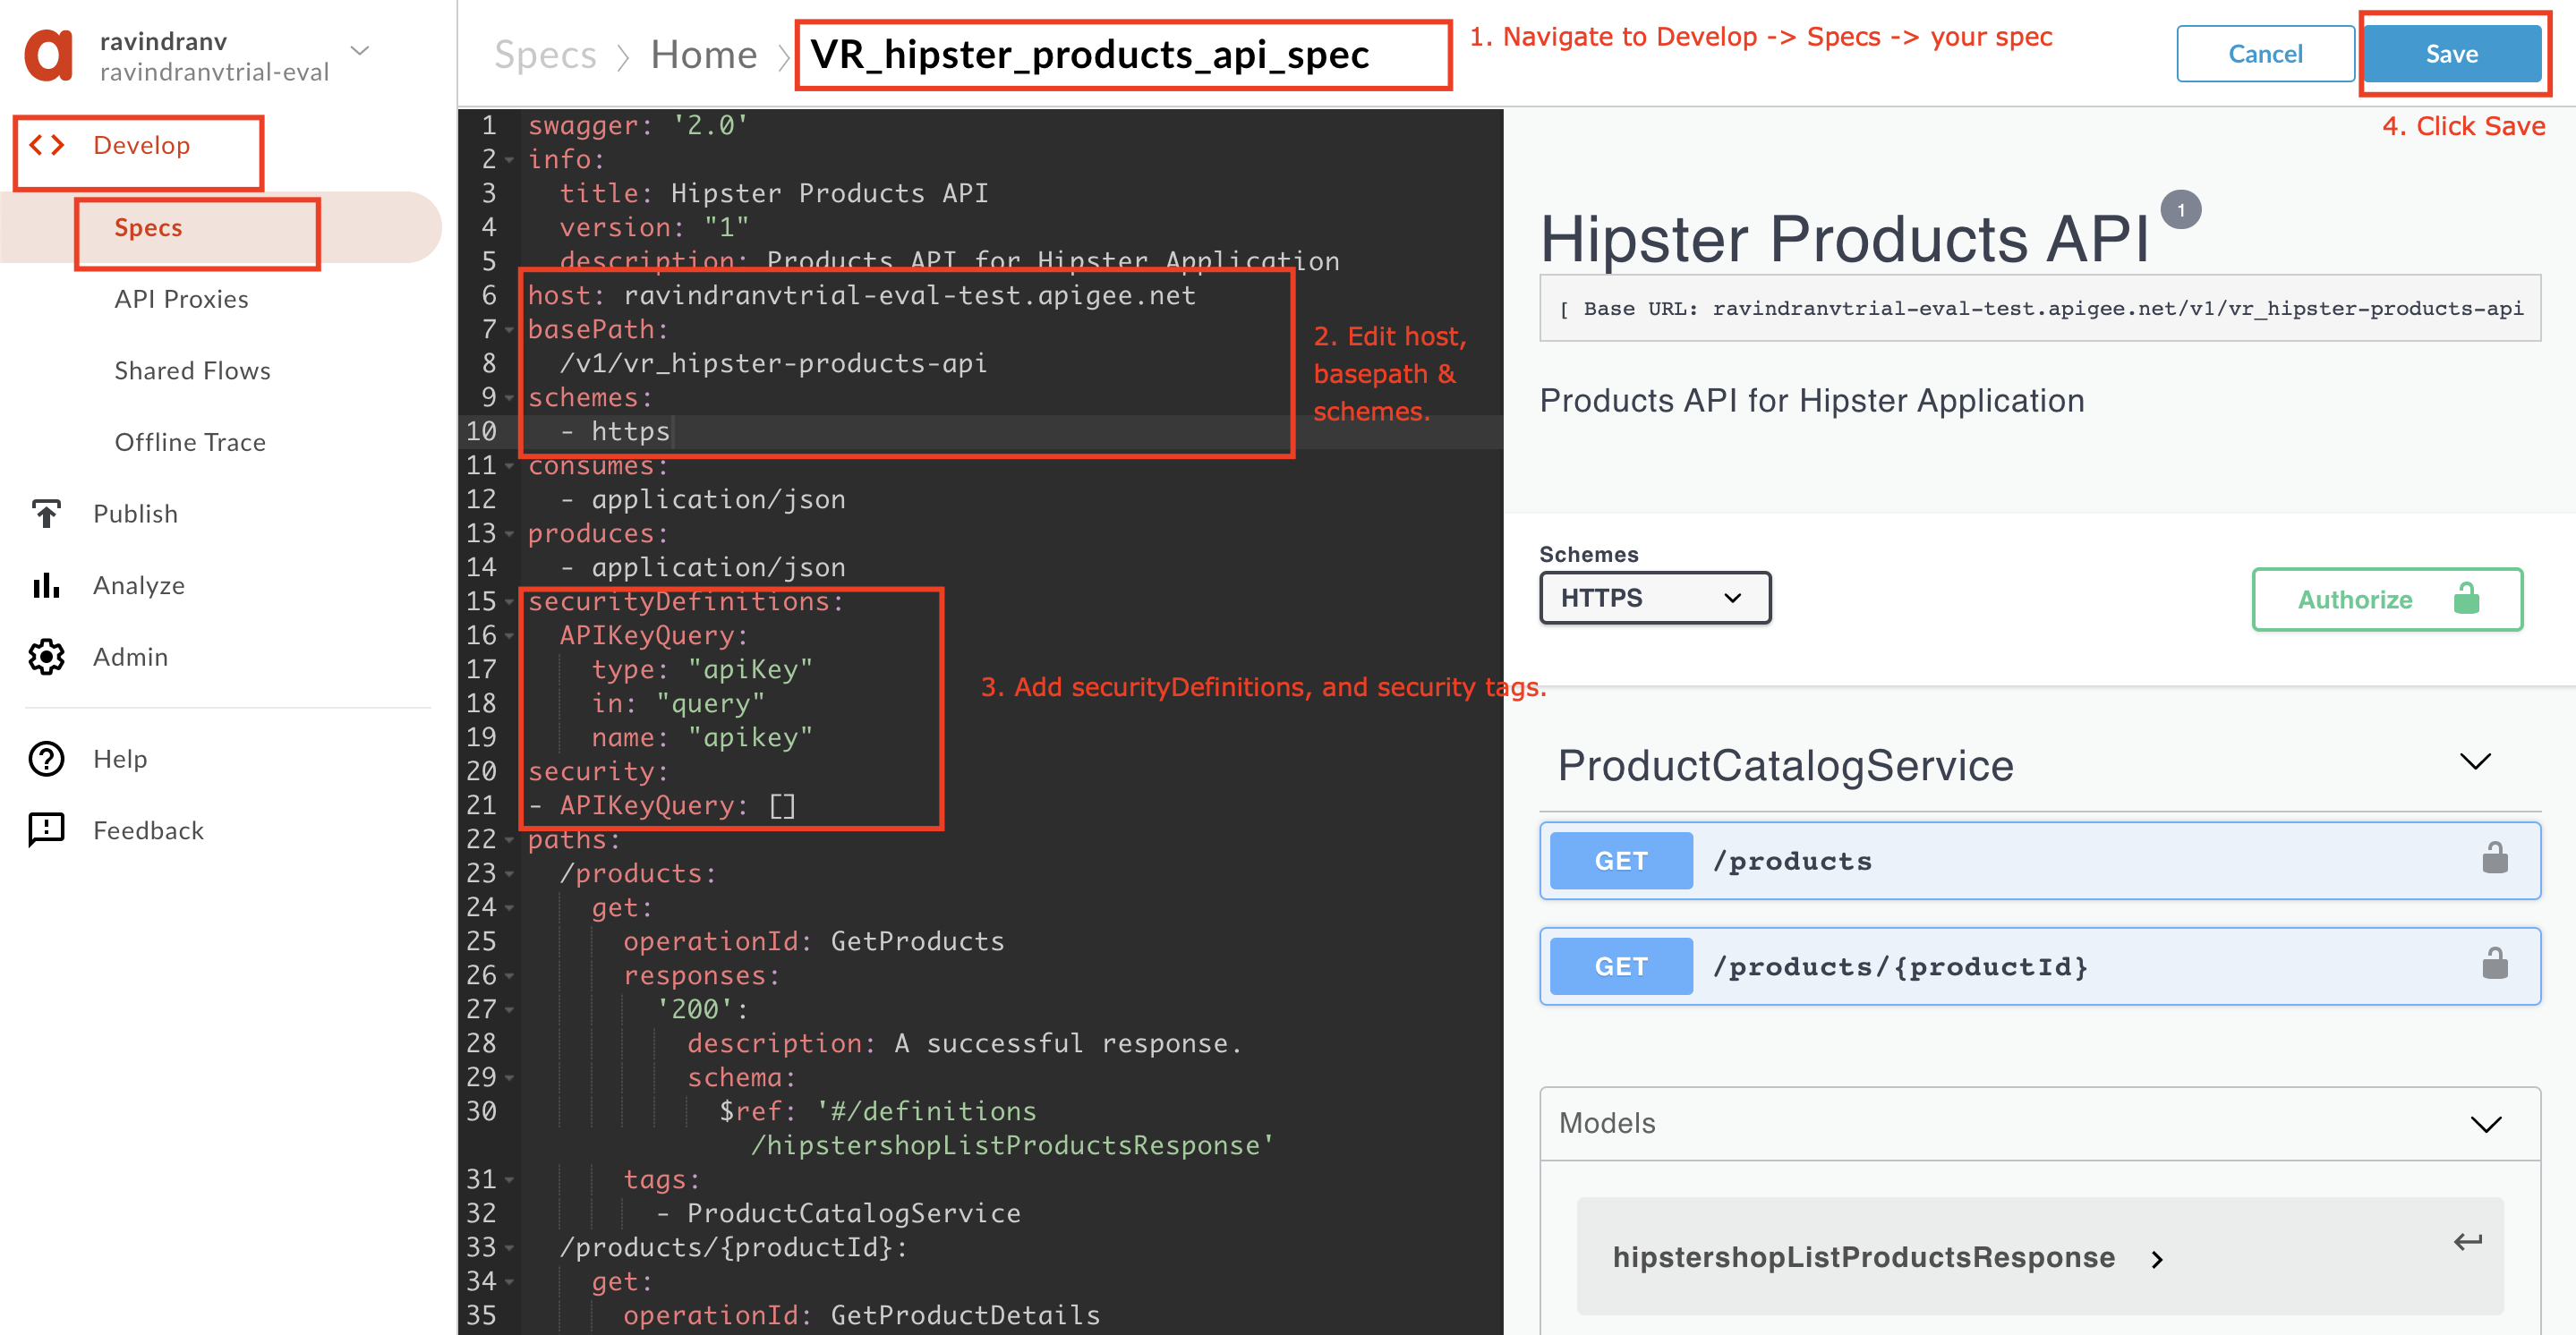
In order to ensure that we have an updated OpenAPI Spec that accurately describes the API endpoint exposed through our API Proxy, we must first modify the spec - specifically the host, basepath, securityDefinitions and security properties. To do this, navigate to Develop → Specs on the main menu, select the spec that we previously imported in Lab 1, and modify the the host, basepath, securityDefinitions and security properties as shown below:
host:
basePath: /v1/_hipster-products-api
securityDefinitions:
  APIKeyQuery:
    type: "apiKey"
    in: "query"
    name: "apikey"
security:
  - APIKeyQuery: []
schemes:
  - https
Where = -.apigee.net, in Apigee Trial orgs
Create a Developer Portal
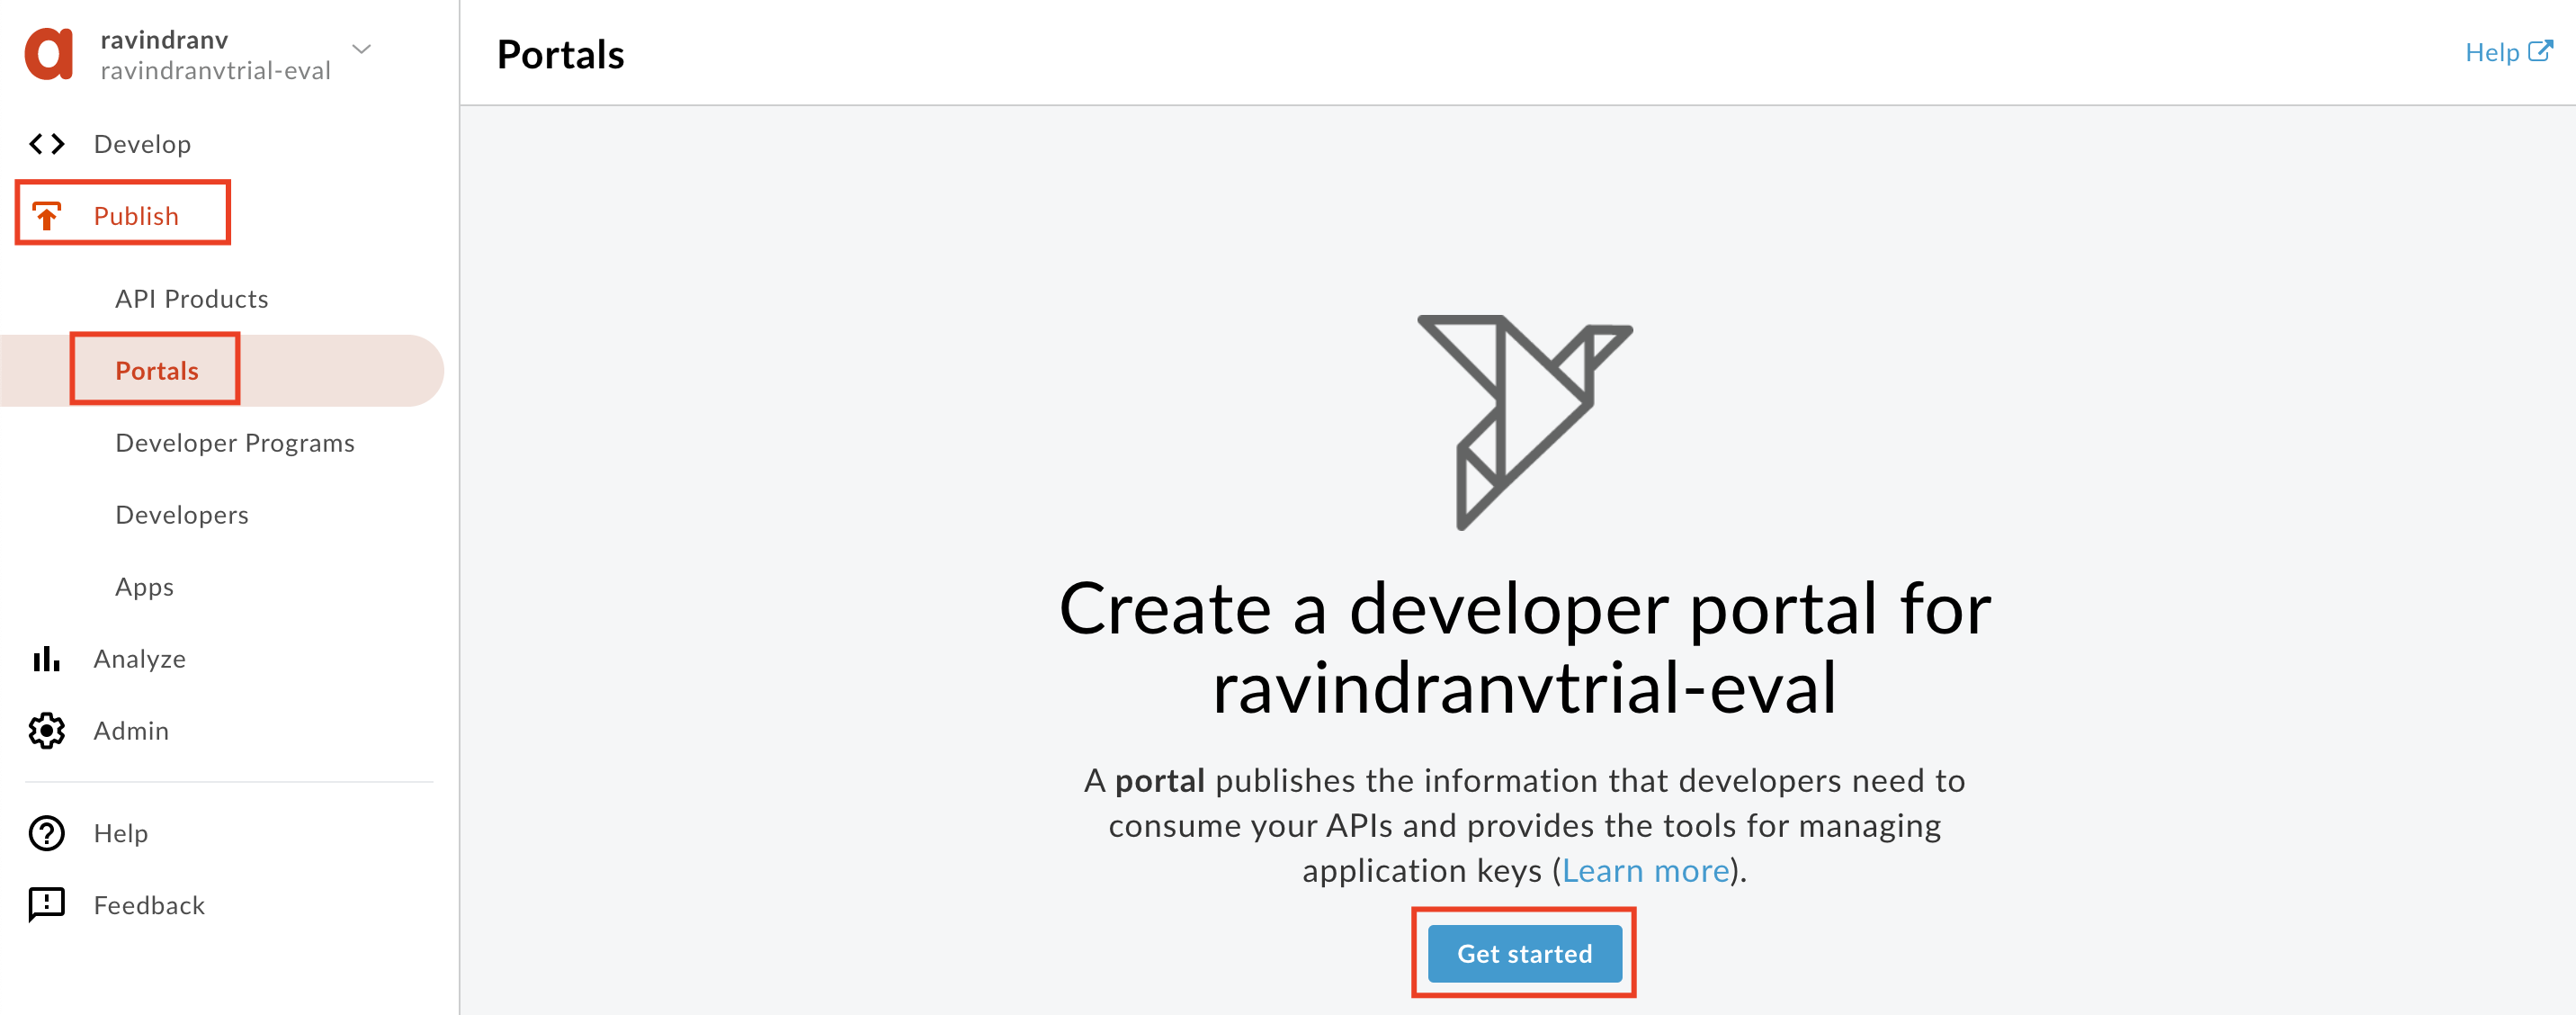
- Navigate to Publish → Portals and click +Portal, or Get started (if you haven’t created any portals yet within the org).
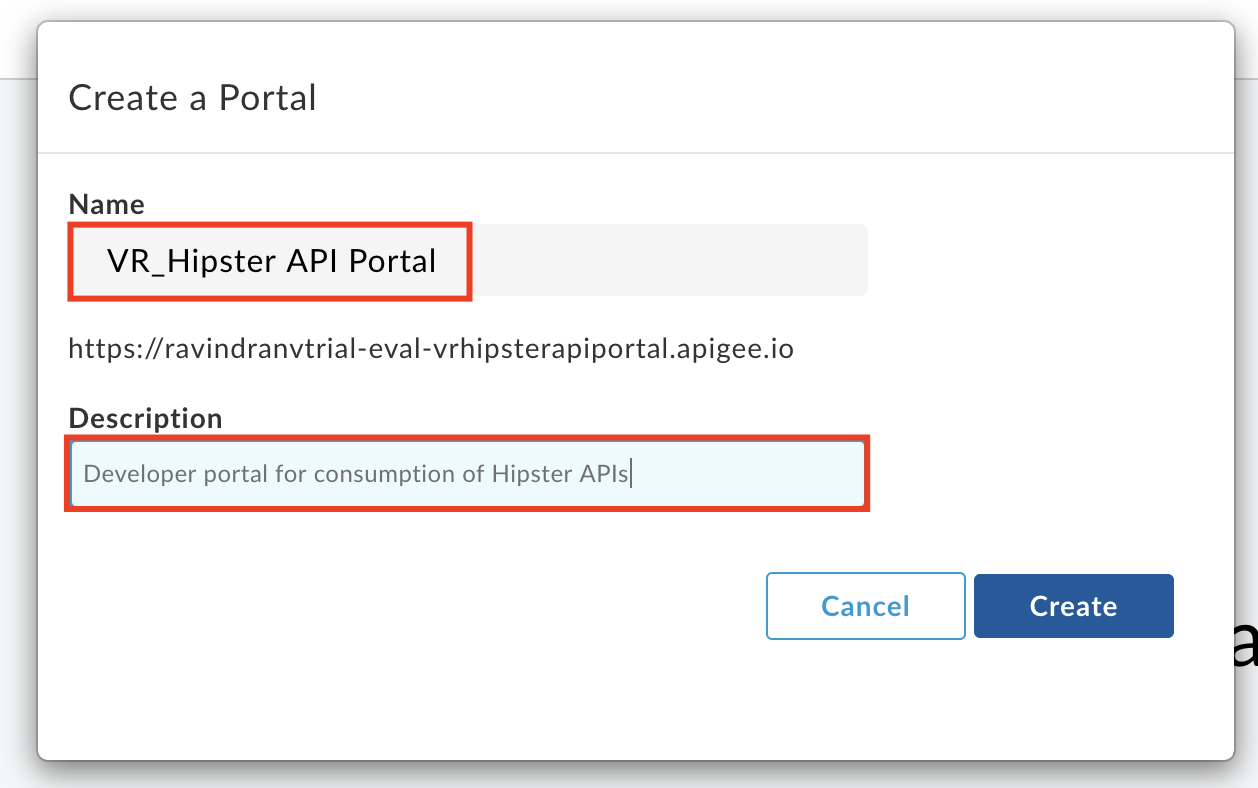
- Enter details in the portal creation wizard. Replace ** with the initials of your name.
-
Name:
_Hipster API Portal -
Description:
Developer portal for consumption of Hipster APIs.
- Click Create
Publish the Bronze (Free) API Product to the Portal
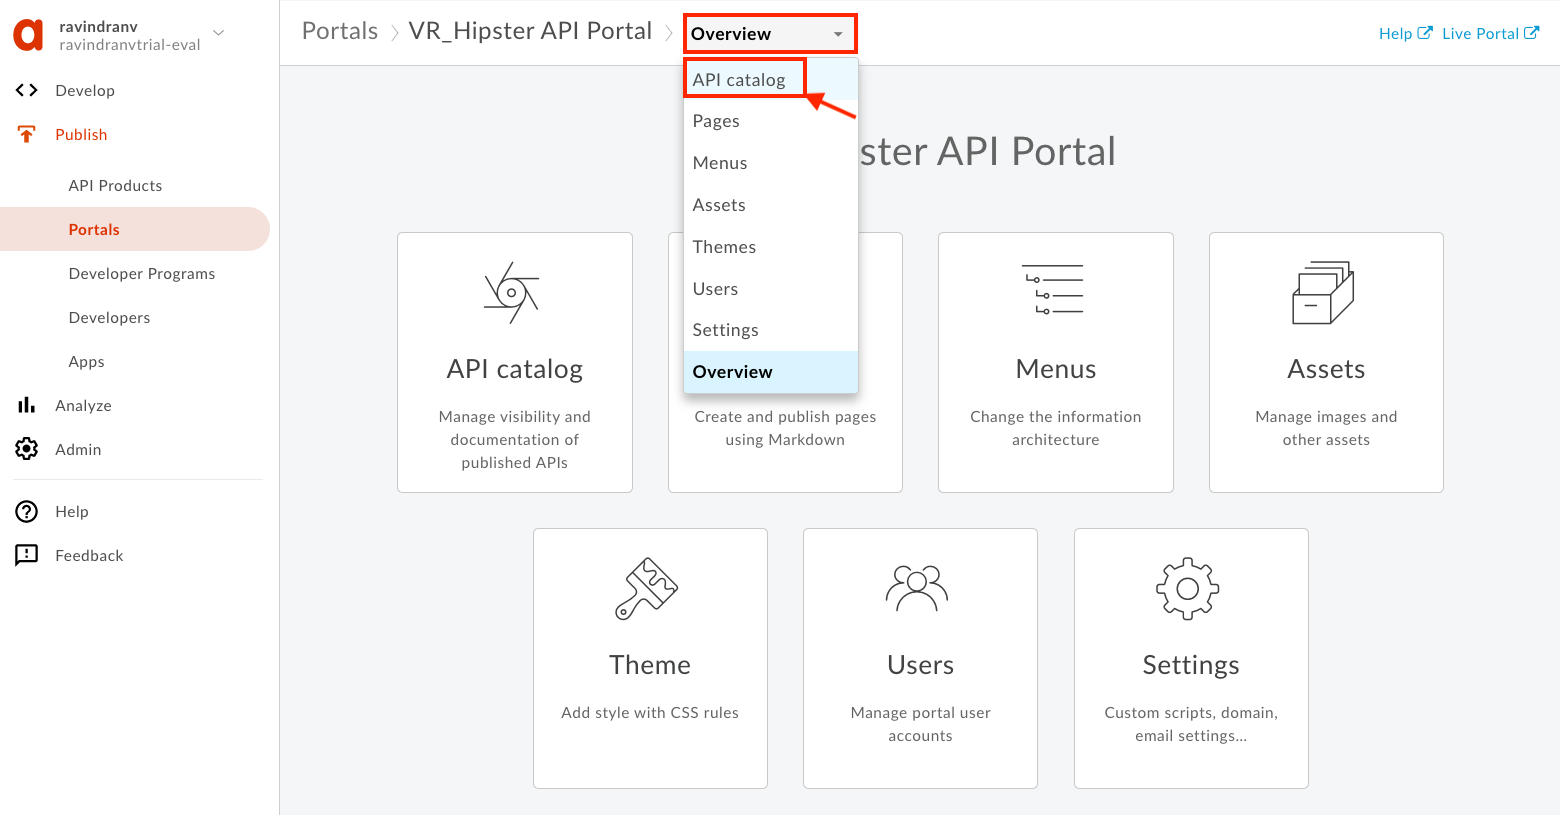
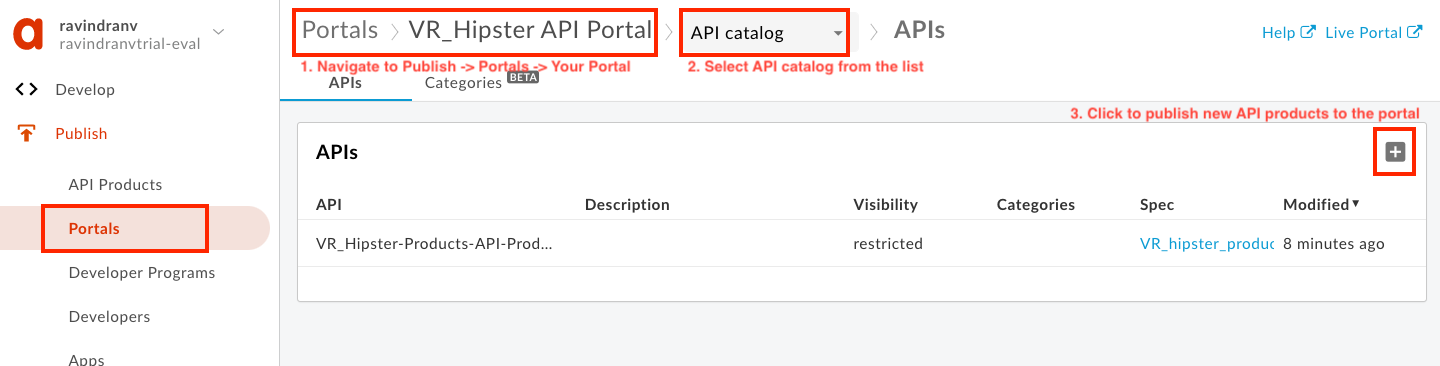
- Click the Portal Editor’s dropdown and select API catalog.
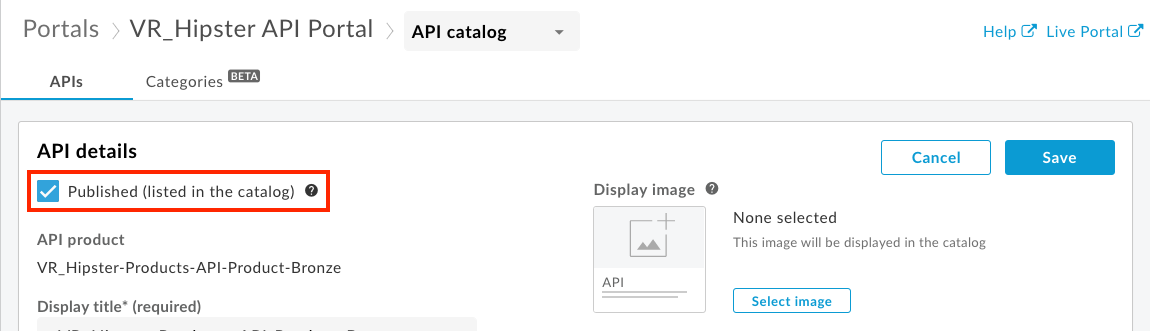
- Click + to select the Bronze API Product to publish to the Portal. Select the API Product to publish and click Next.

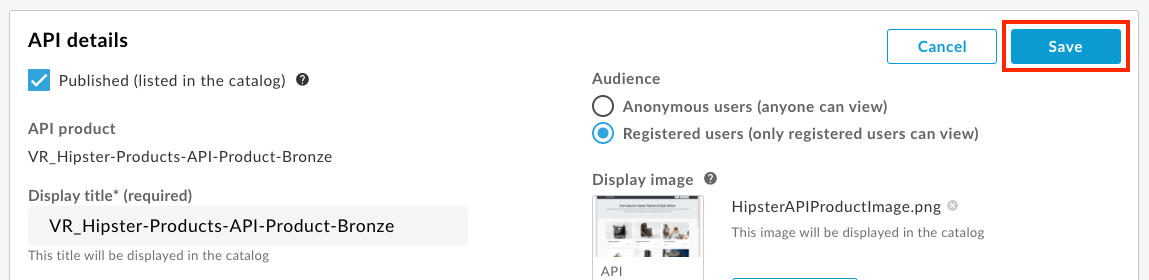
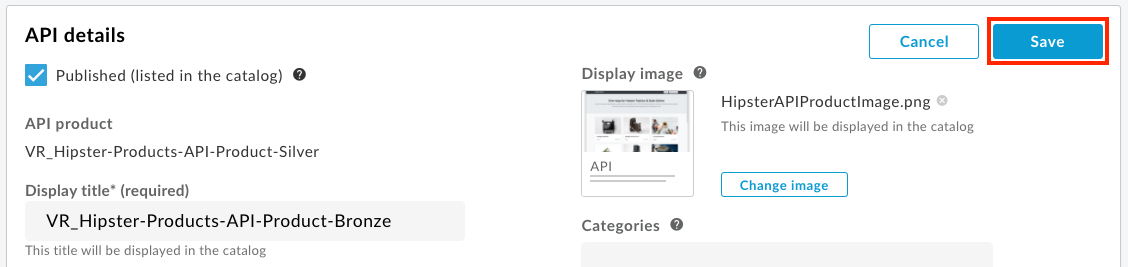
- Make sure that the Published checkbox is checked, so that the Bronze API Product is visible to authorized App developers through the API catalog, during App creation.
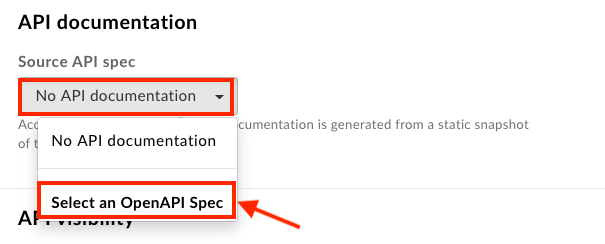
- Click the Source API spec dropdown and select Choose a different spec….
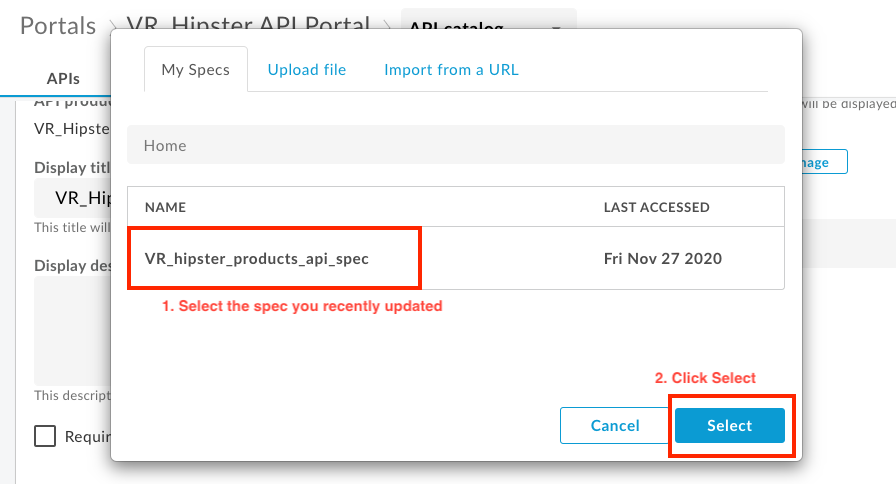
- Select the recently updated OpenAPI Specification to use as a source. The current version (snapshot) of the selected OpenAPI Specification will be used to generate the documentation for this API product in the portal.
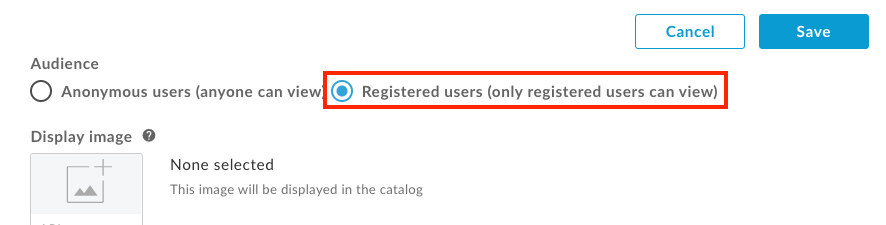
- Select the Registered users option so registered developers on the Developer Portal can view this API through the portal. Click Next.
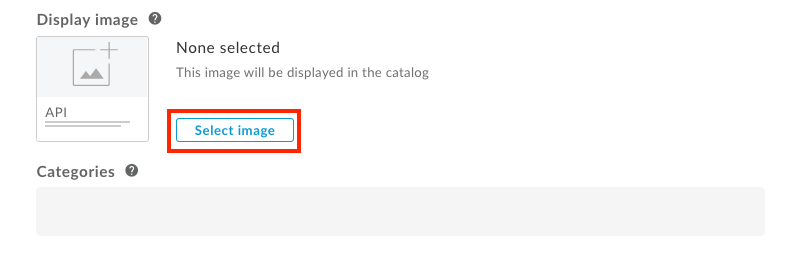
- Select the Image button to update the icon image associated with this API product.
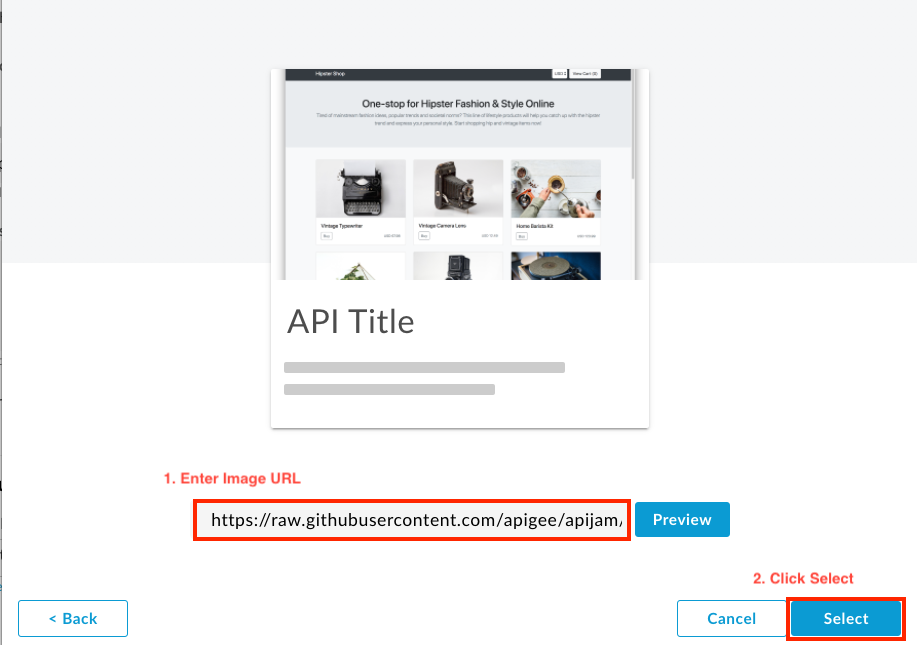
- Then select Image URL and provide the following URL to import image.
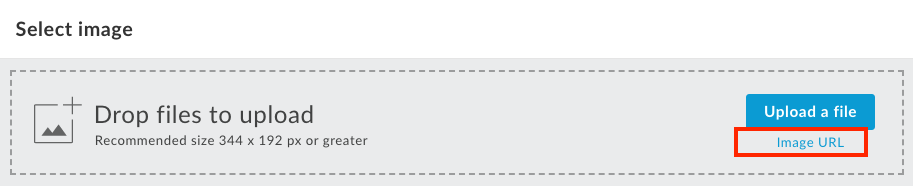
Image URL: https://raw.githubusercontent.com/apigee/apijam/master/Module-1/Labs/Lab%204/media/HipsterAPIProductImage.png
- Click Save.
The API product is now published to the developer portal.
App Developer sign-up
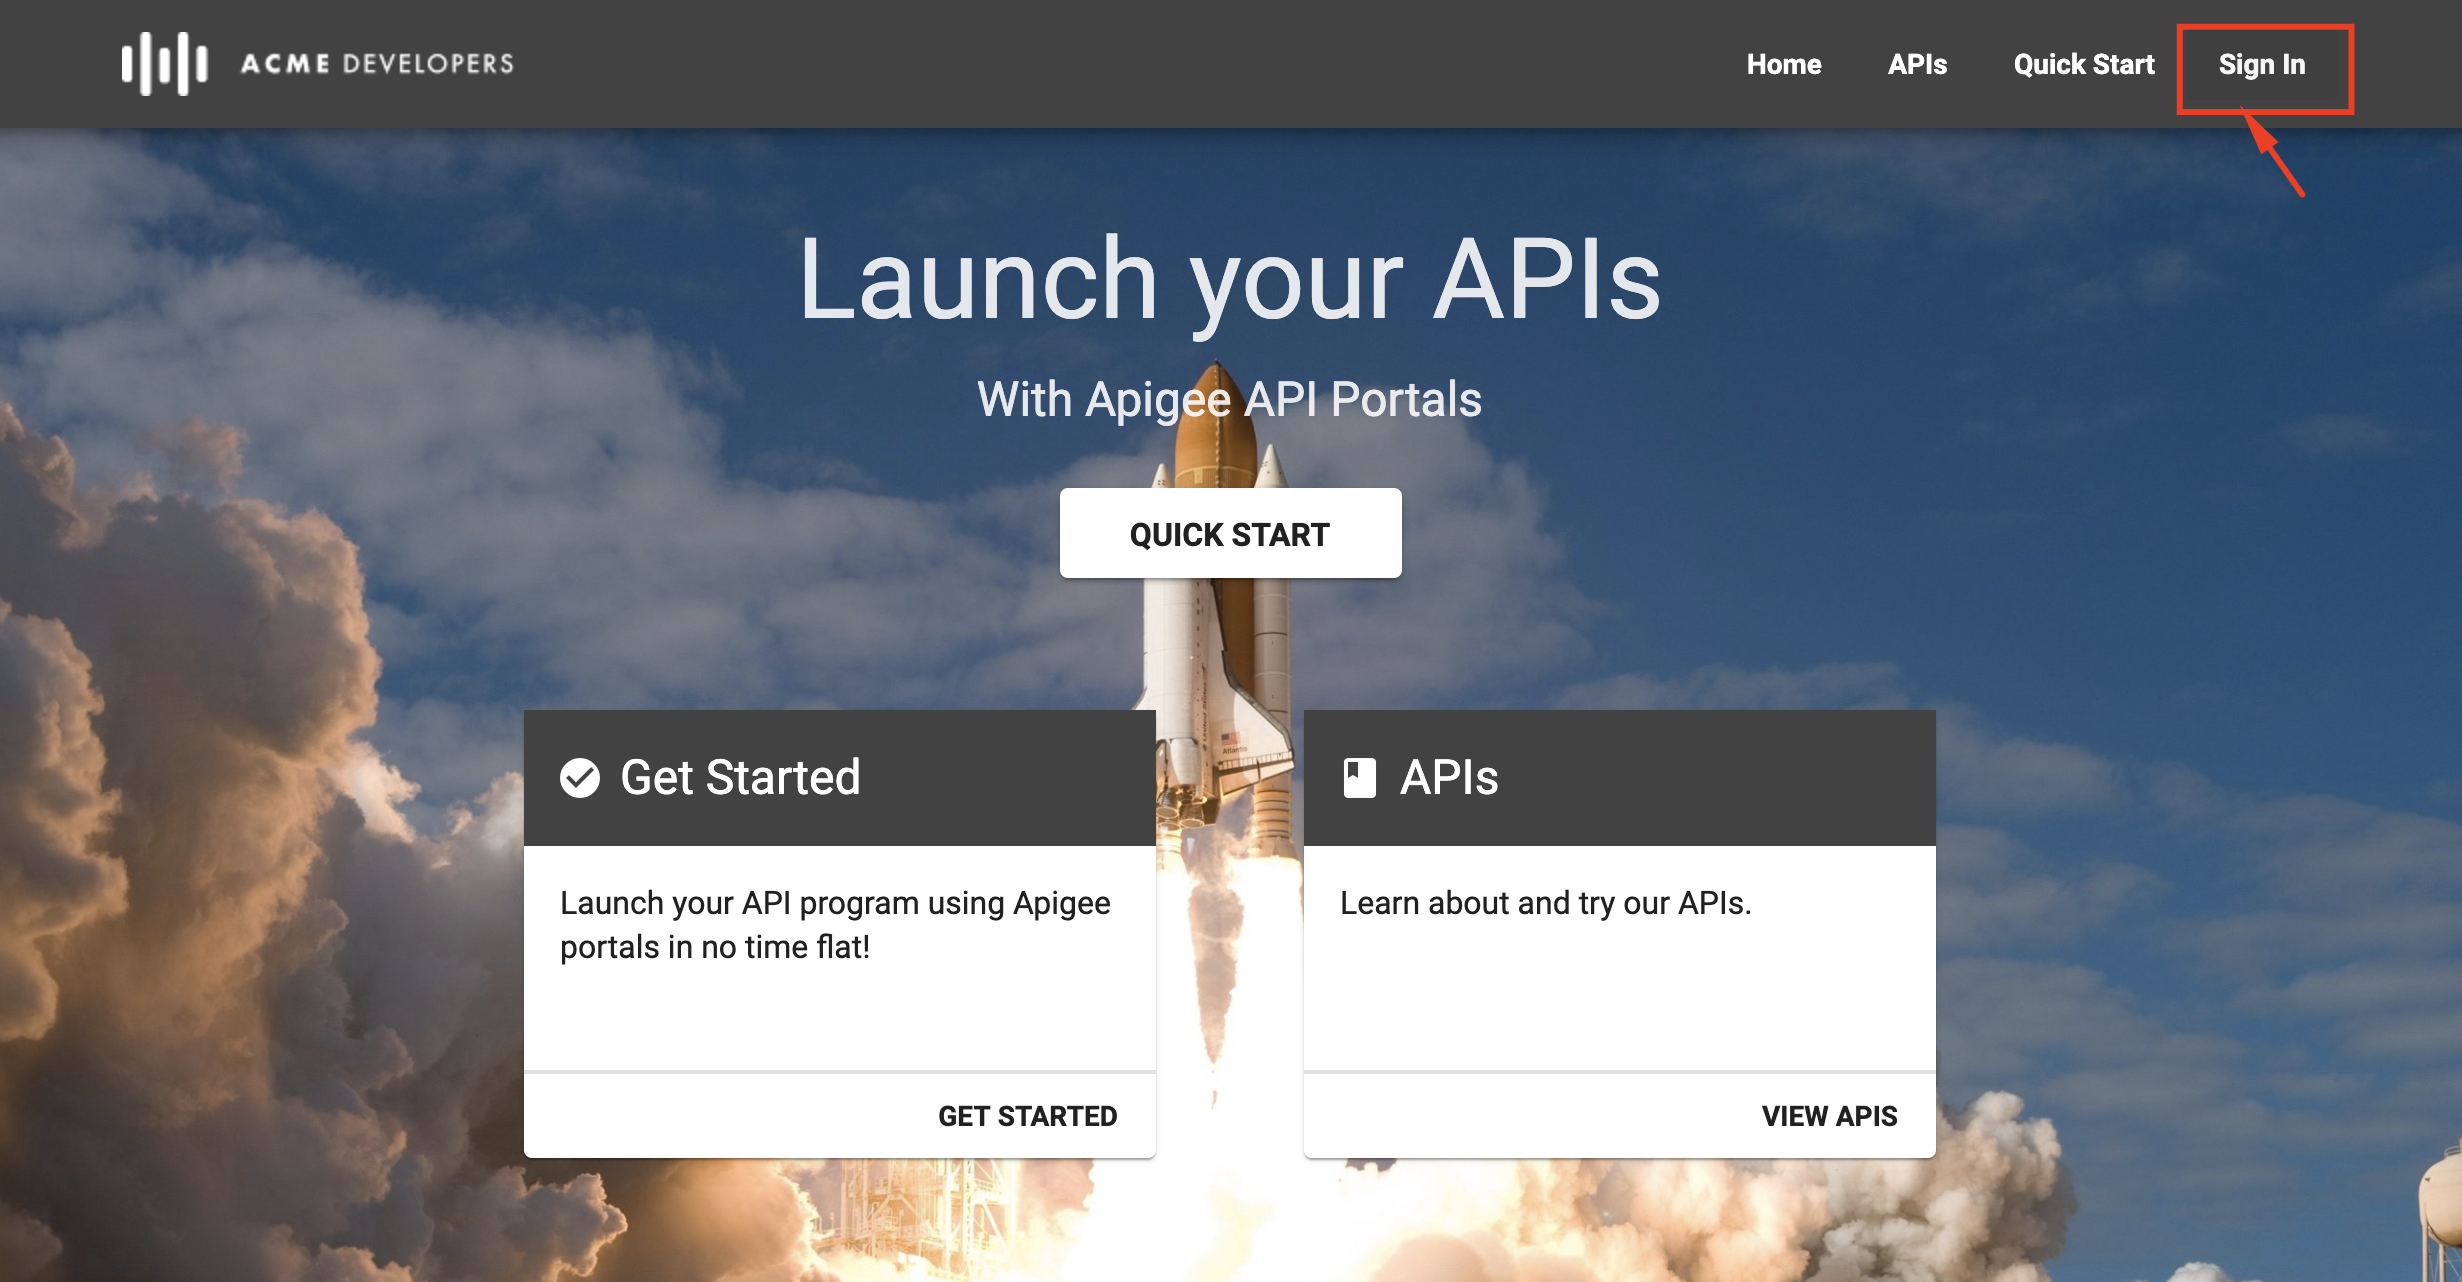
- Click the Live Portal link to launch a browser tab/window with the new Developer Portal.

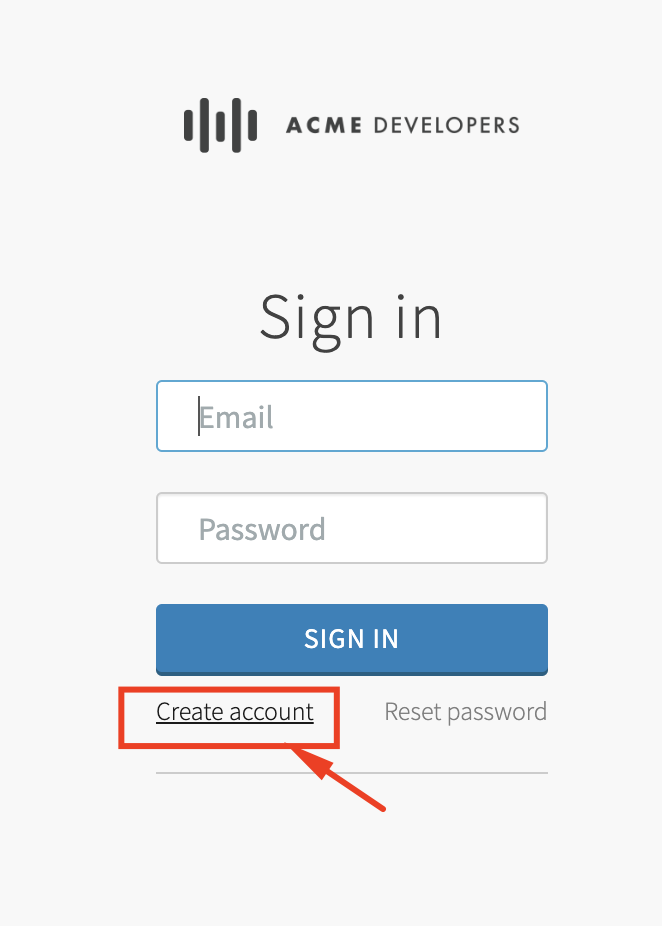
- On the developer portal, click the main menu option labeled Sign In. This will take you to the App Developer login page. Here, click Create Account.
-
Provide the following details, and then click Create Account.
 First Name:
 Last Name:
 Email:
 Password:
 Check the "I agree to terms." box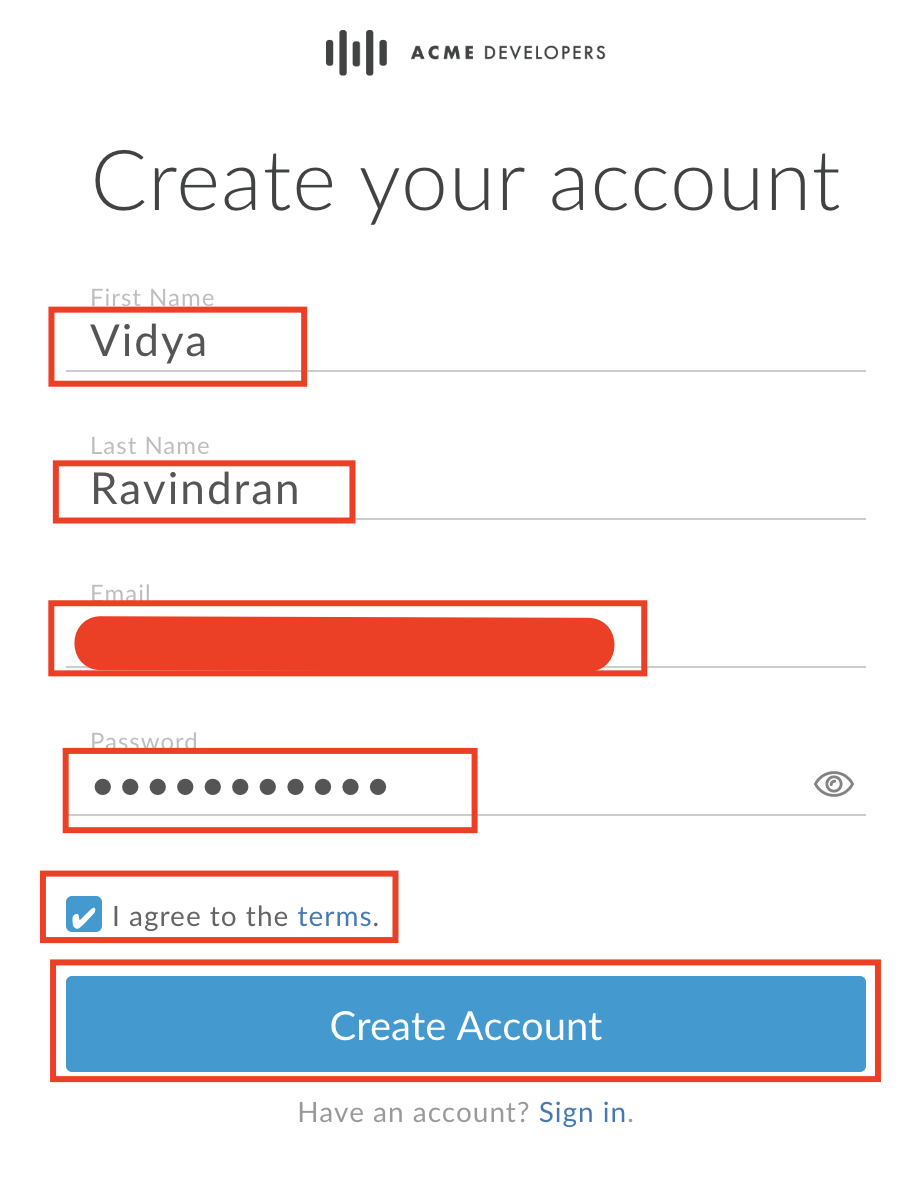
-
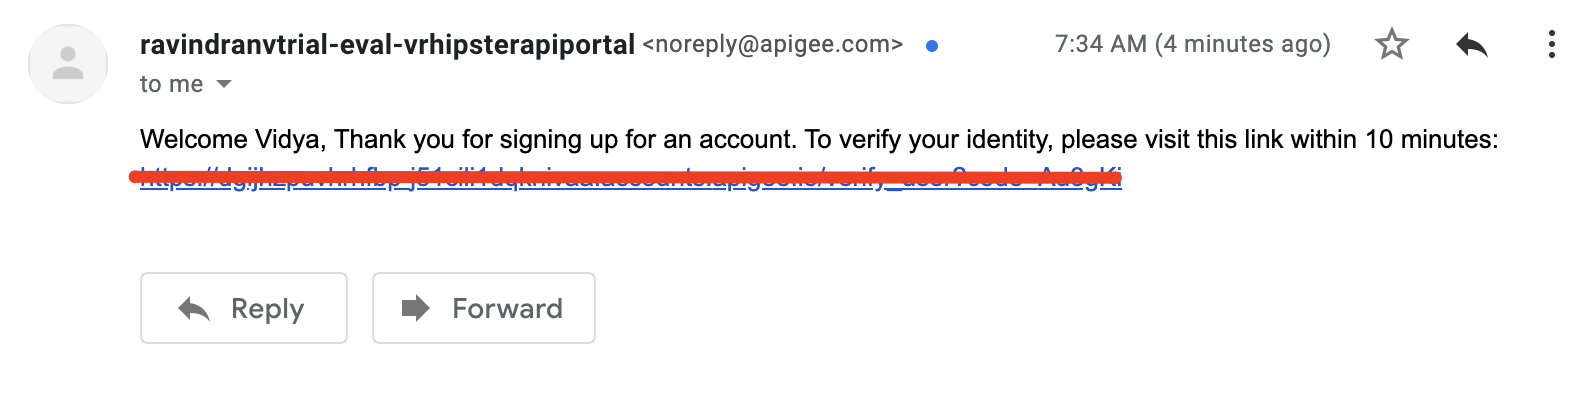
On account creation, the App Developer will receive an email notification with an account verification link.
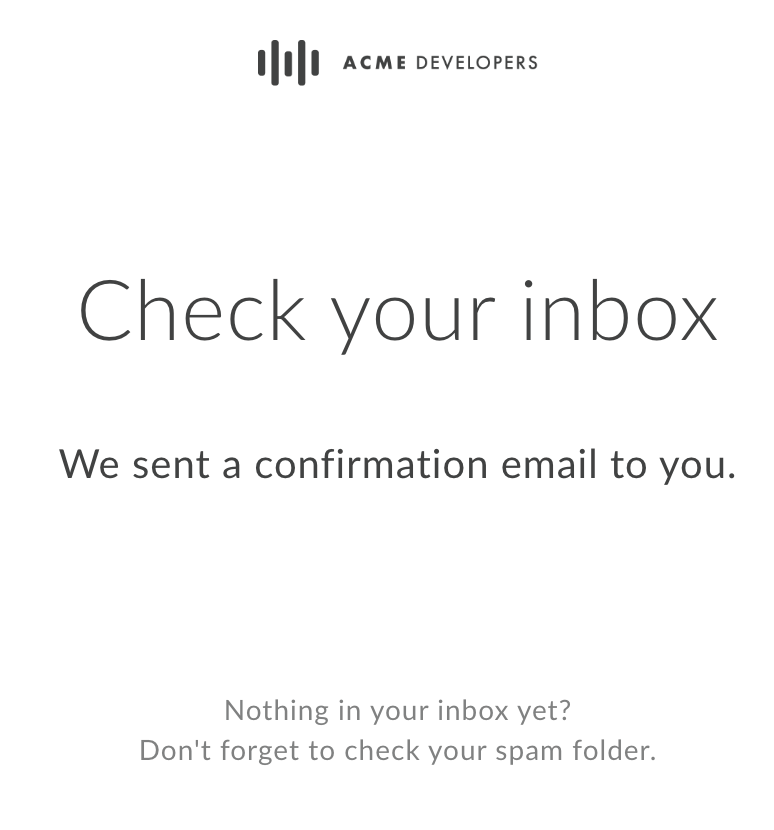
Since we you have provided your own email address as the App Developer in this lab, you should have received this notification. Click the link or copy and paste it into the browser to verify the account.
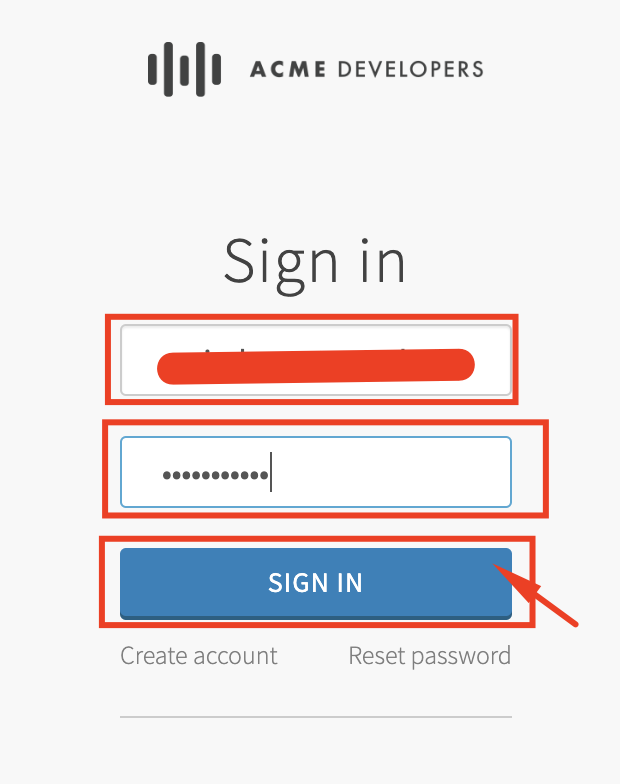
- Once account is verified, the App Developer can sign into the portal using their credentials.
View API Documentation
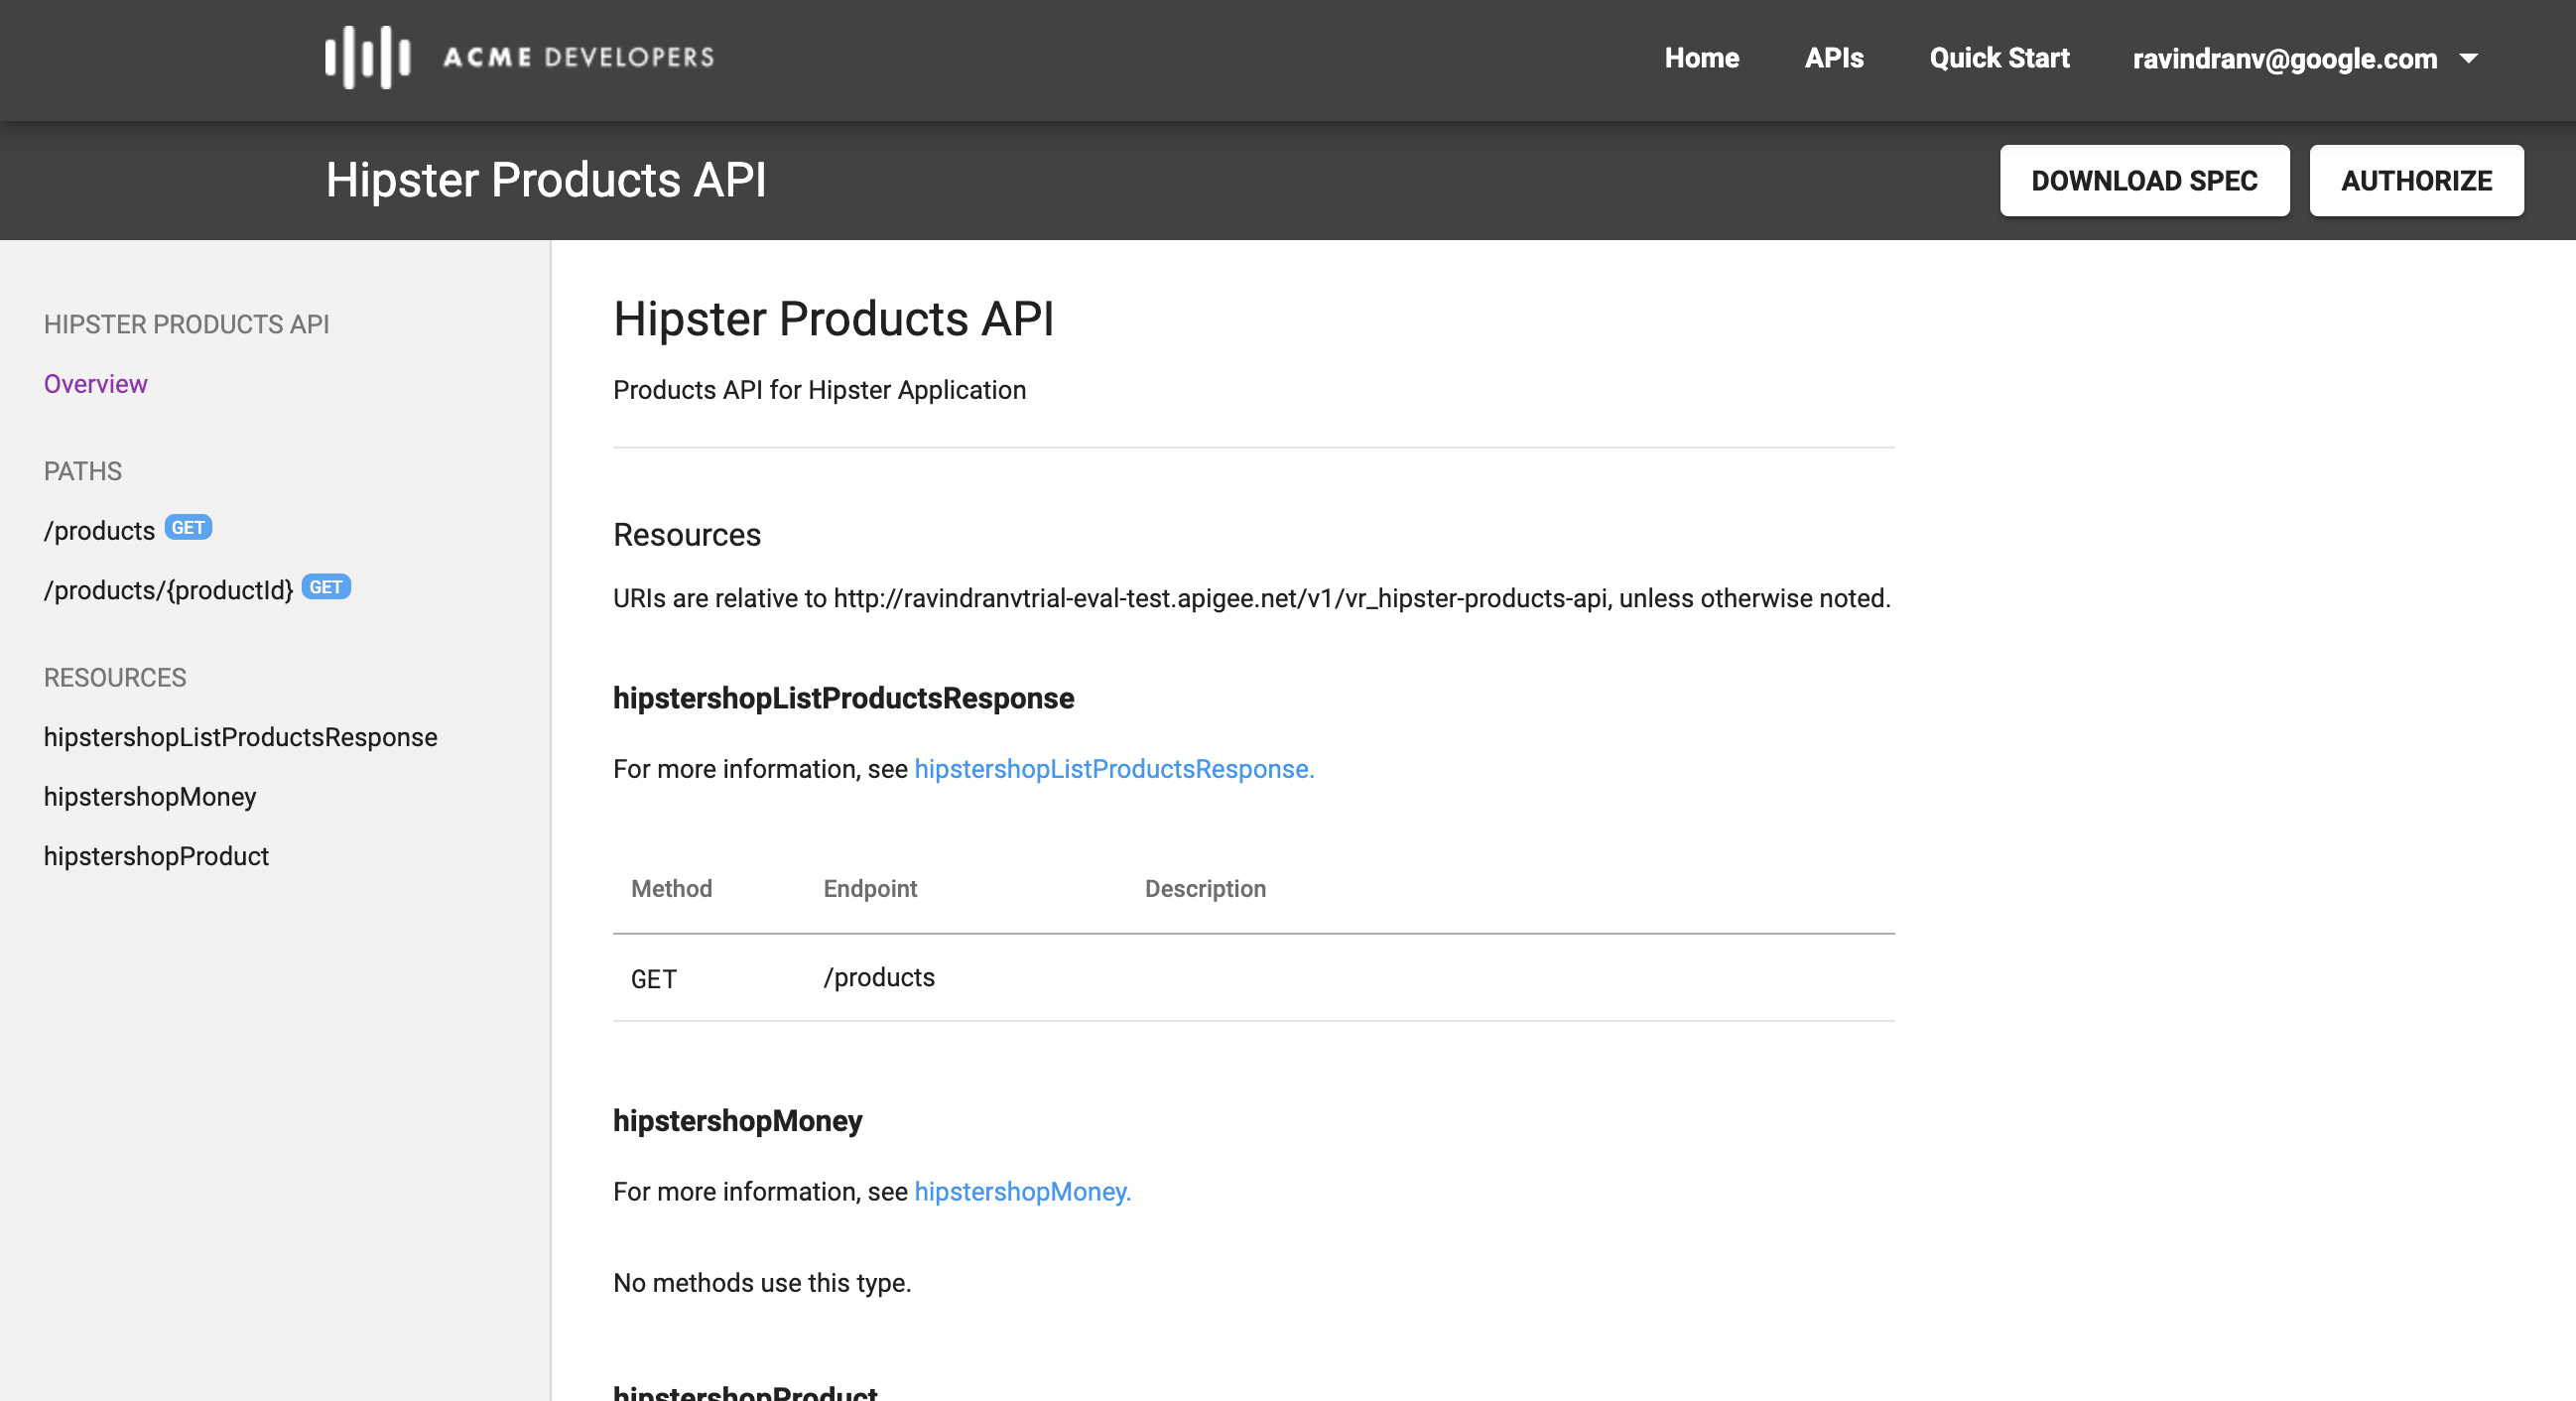
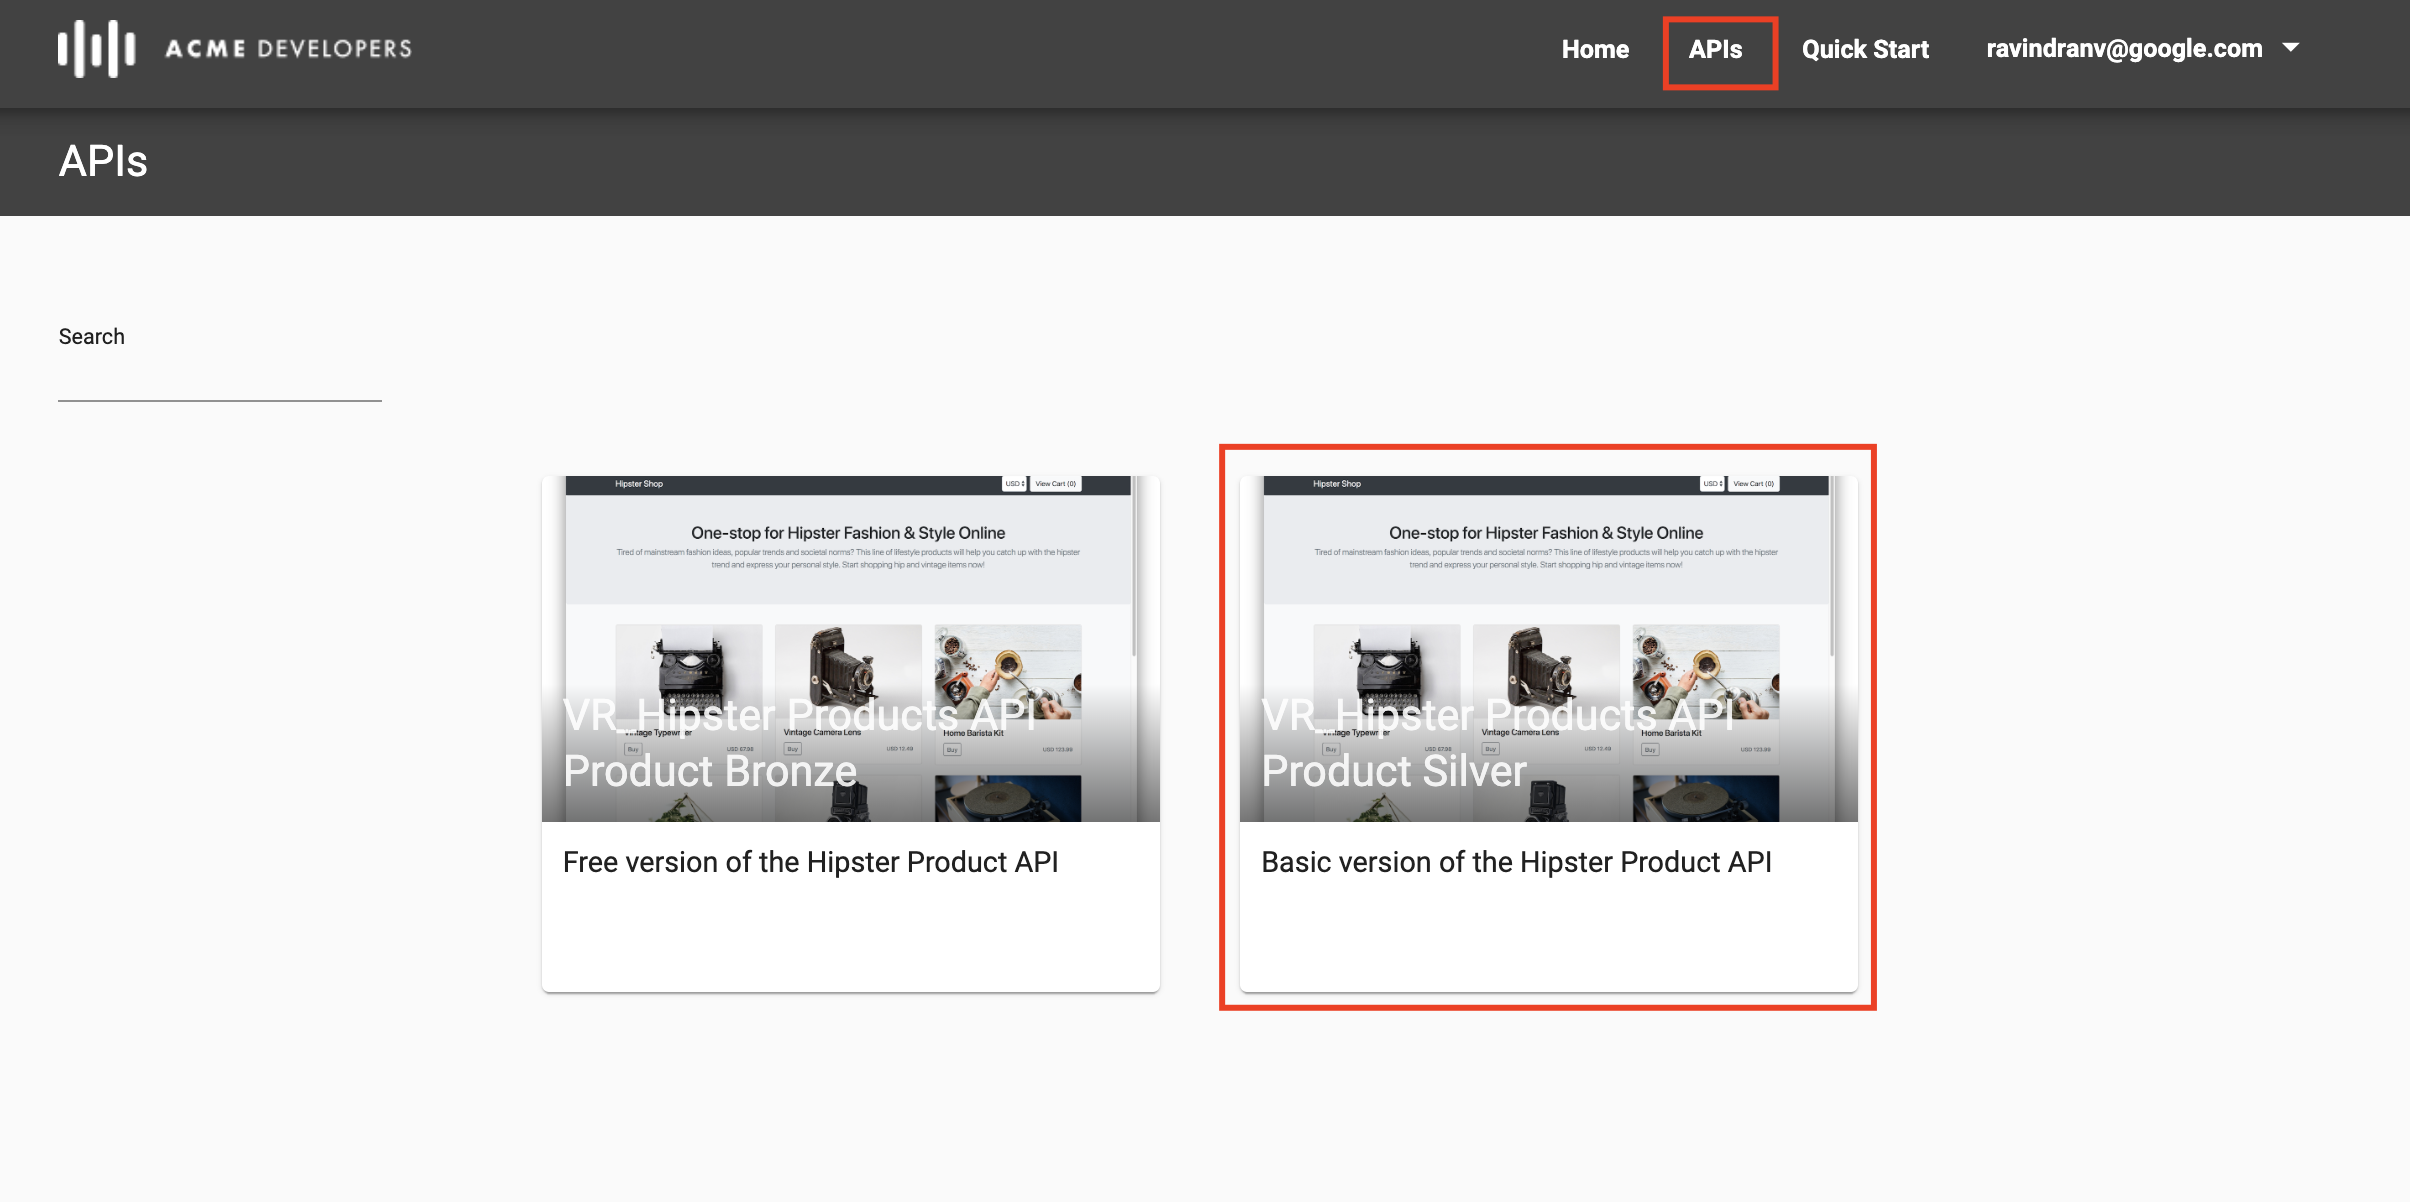
- Log in as App Developer using the account credentials created in the previous steps. Click on the APIs menu link on the Developer Portal. This will take you to the API catalog page. Here’ you will see that API product we previously published to be visible to all registered developers.
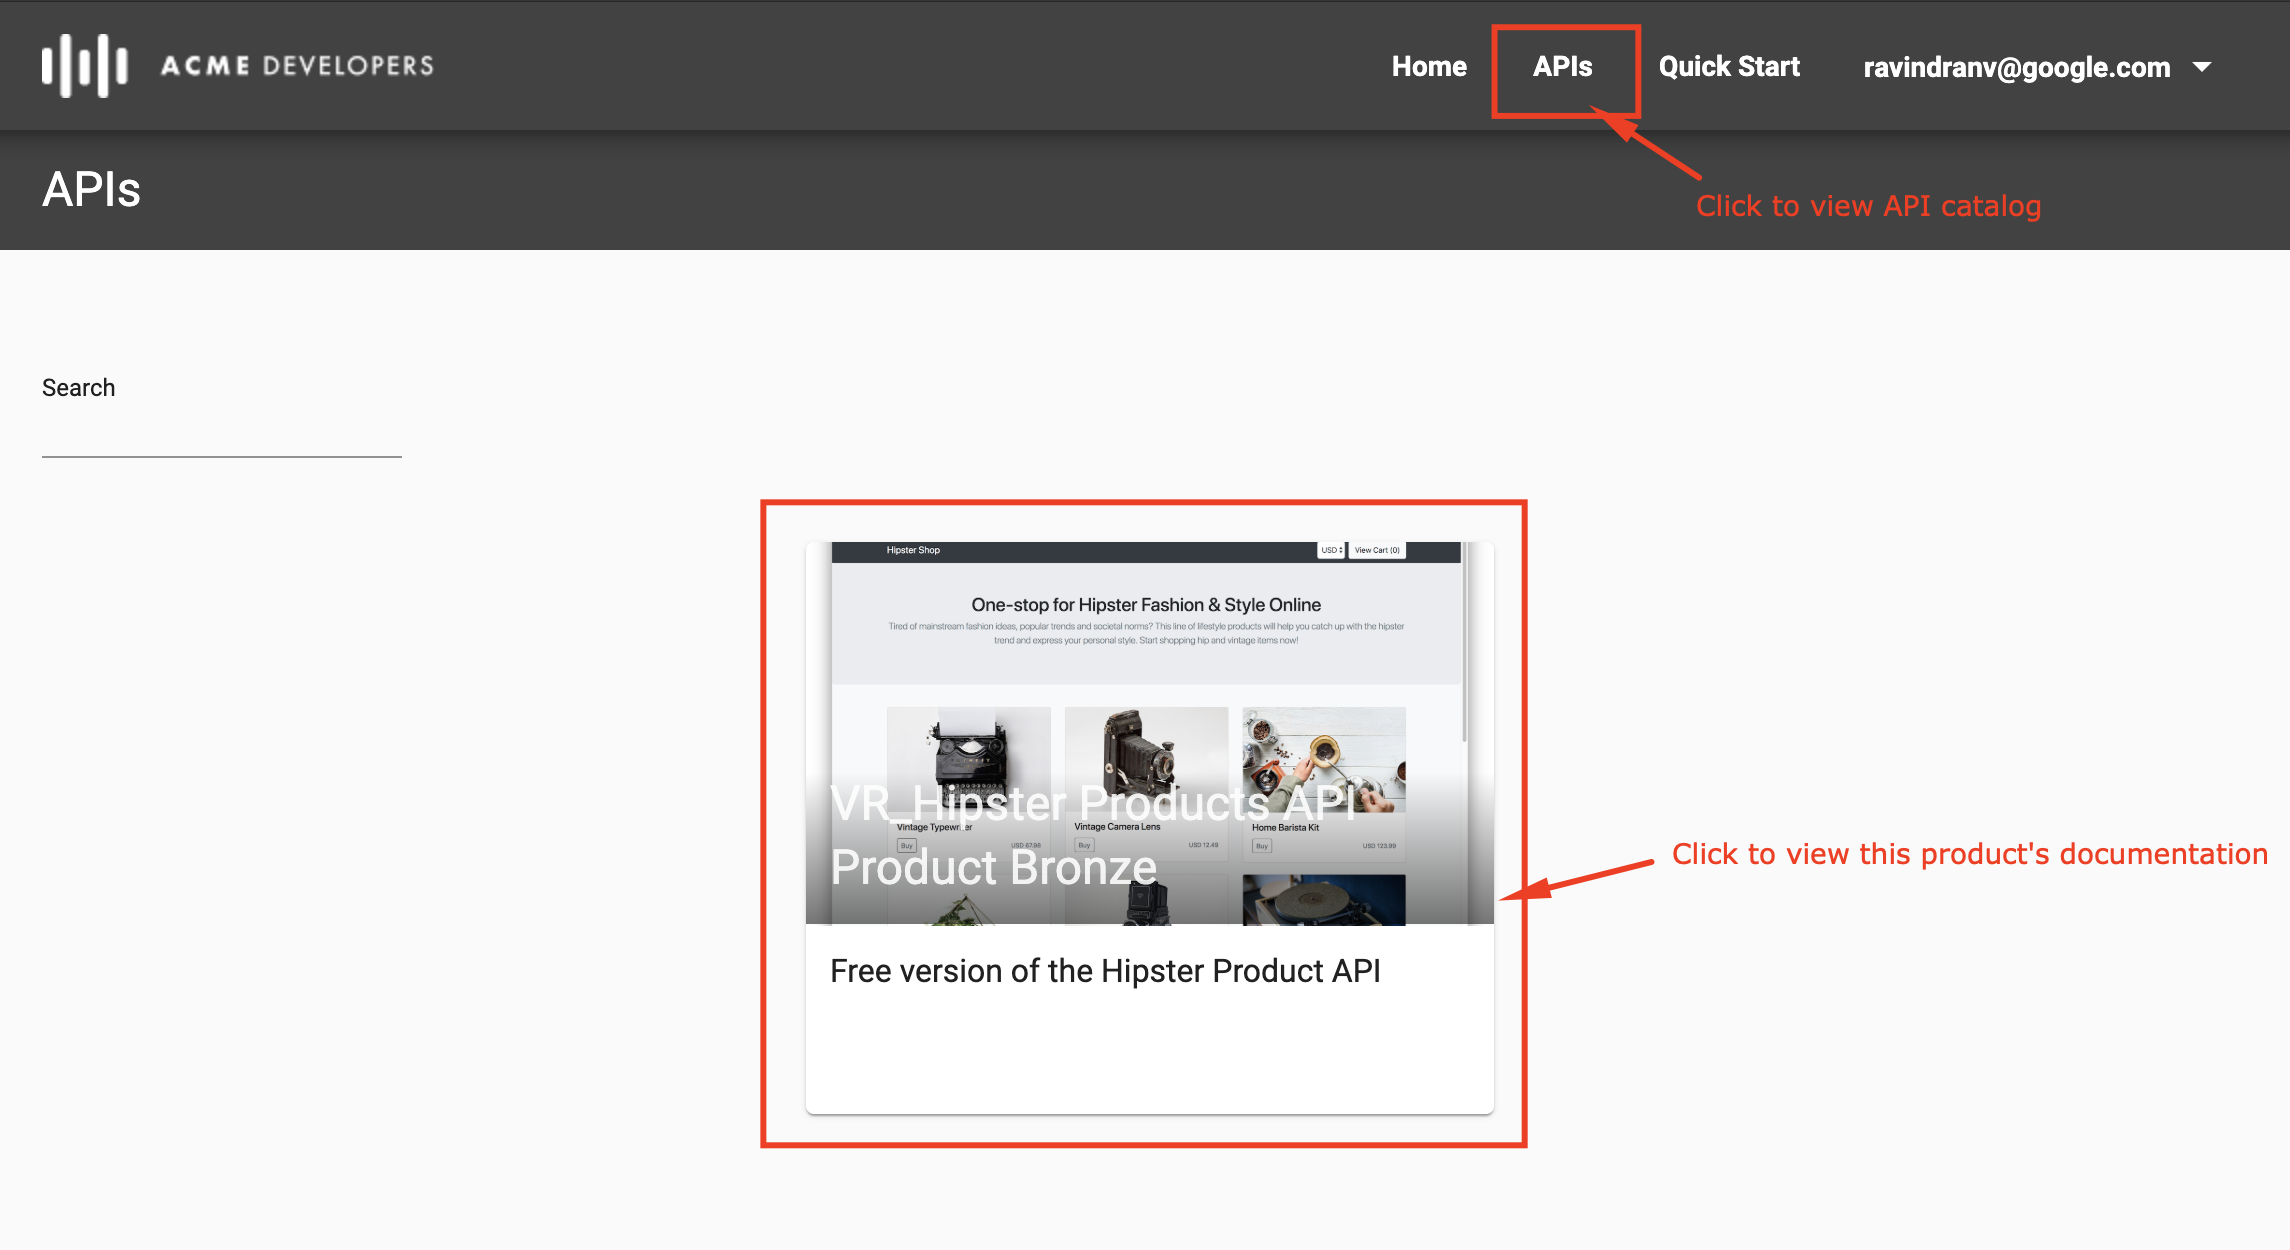
- Click the API Product icon for the Bronze product in the catalog, to view it’s documentation. This will take you to an interactive documentation page generated from the OpenAPI spec that we associated to the API product at the time of publishing.
-
Select one of the API resource paths from the left pannel of the docs and click Execute. You will then see a 401 Unauthorized response in the right pannel.
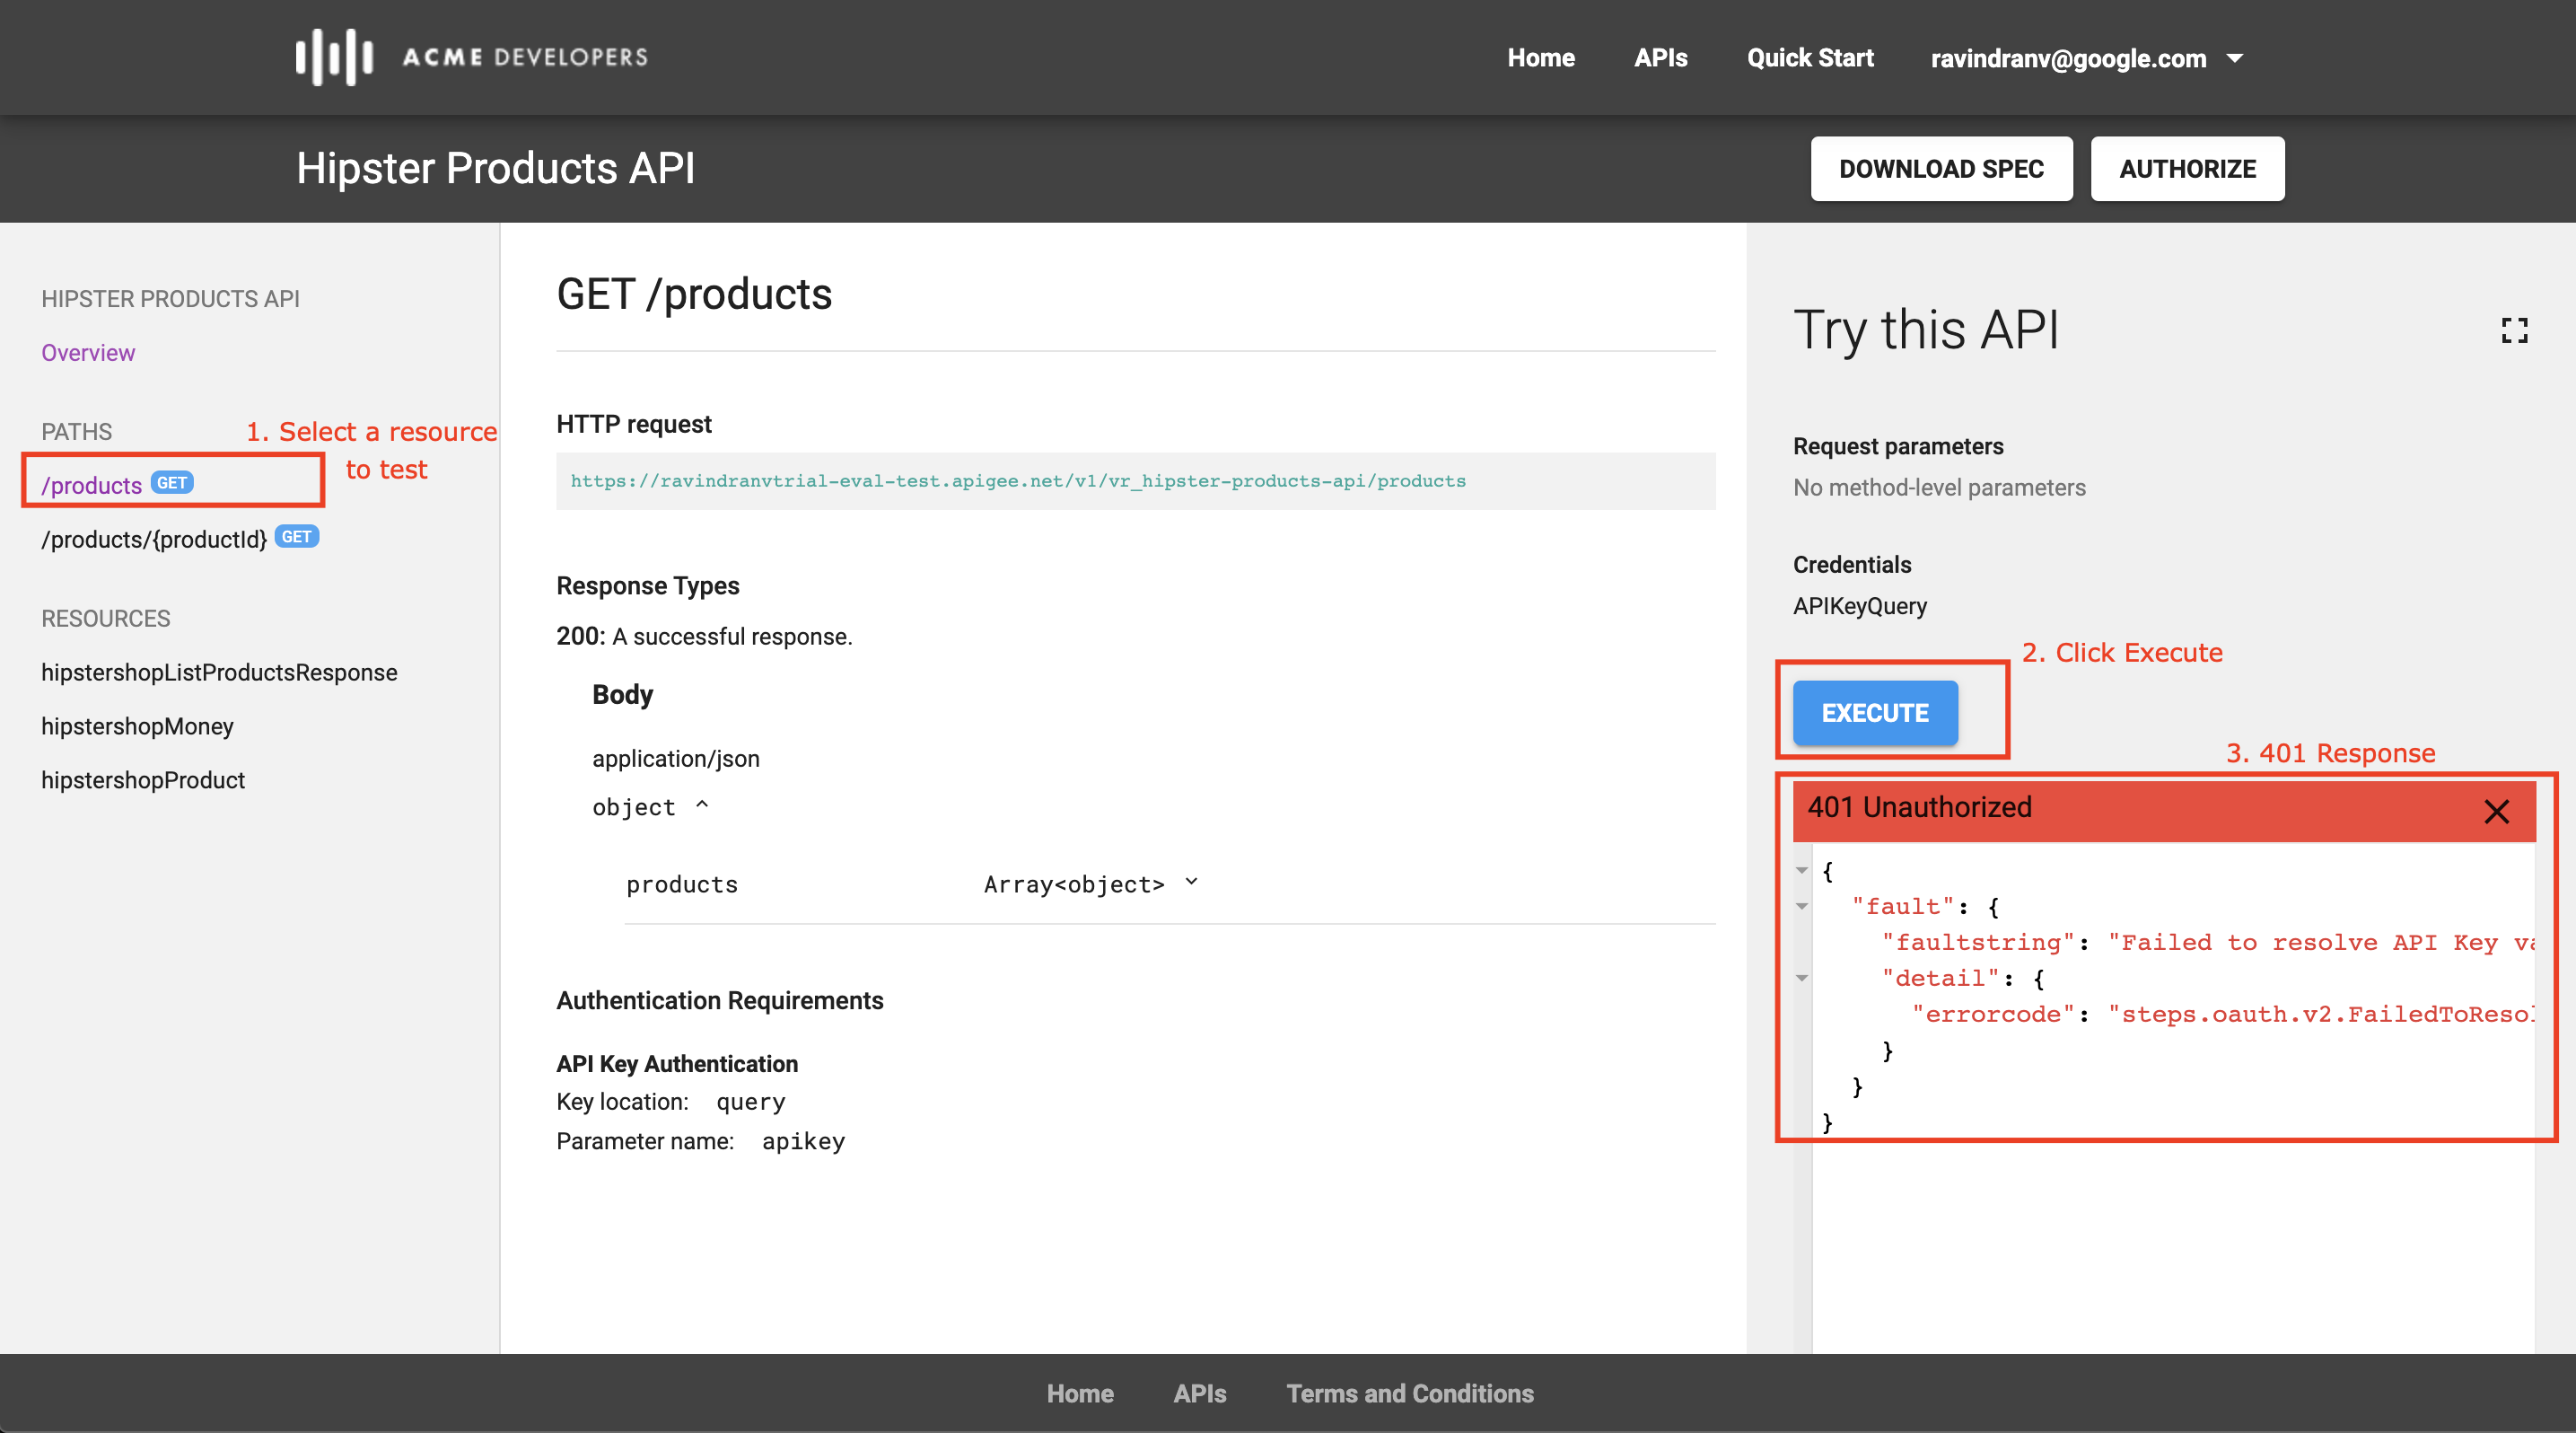
This is because you haven’t yet registered any Apps and therefore have no API Keys to use for an authorized API call.
Register Apps
-
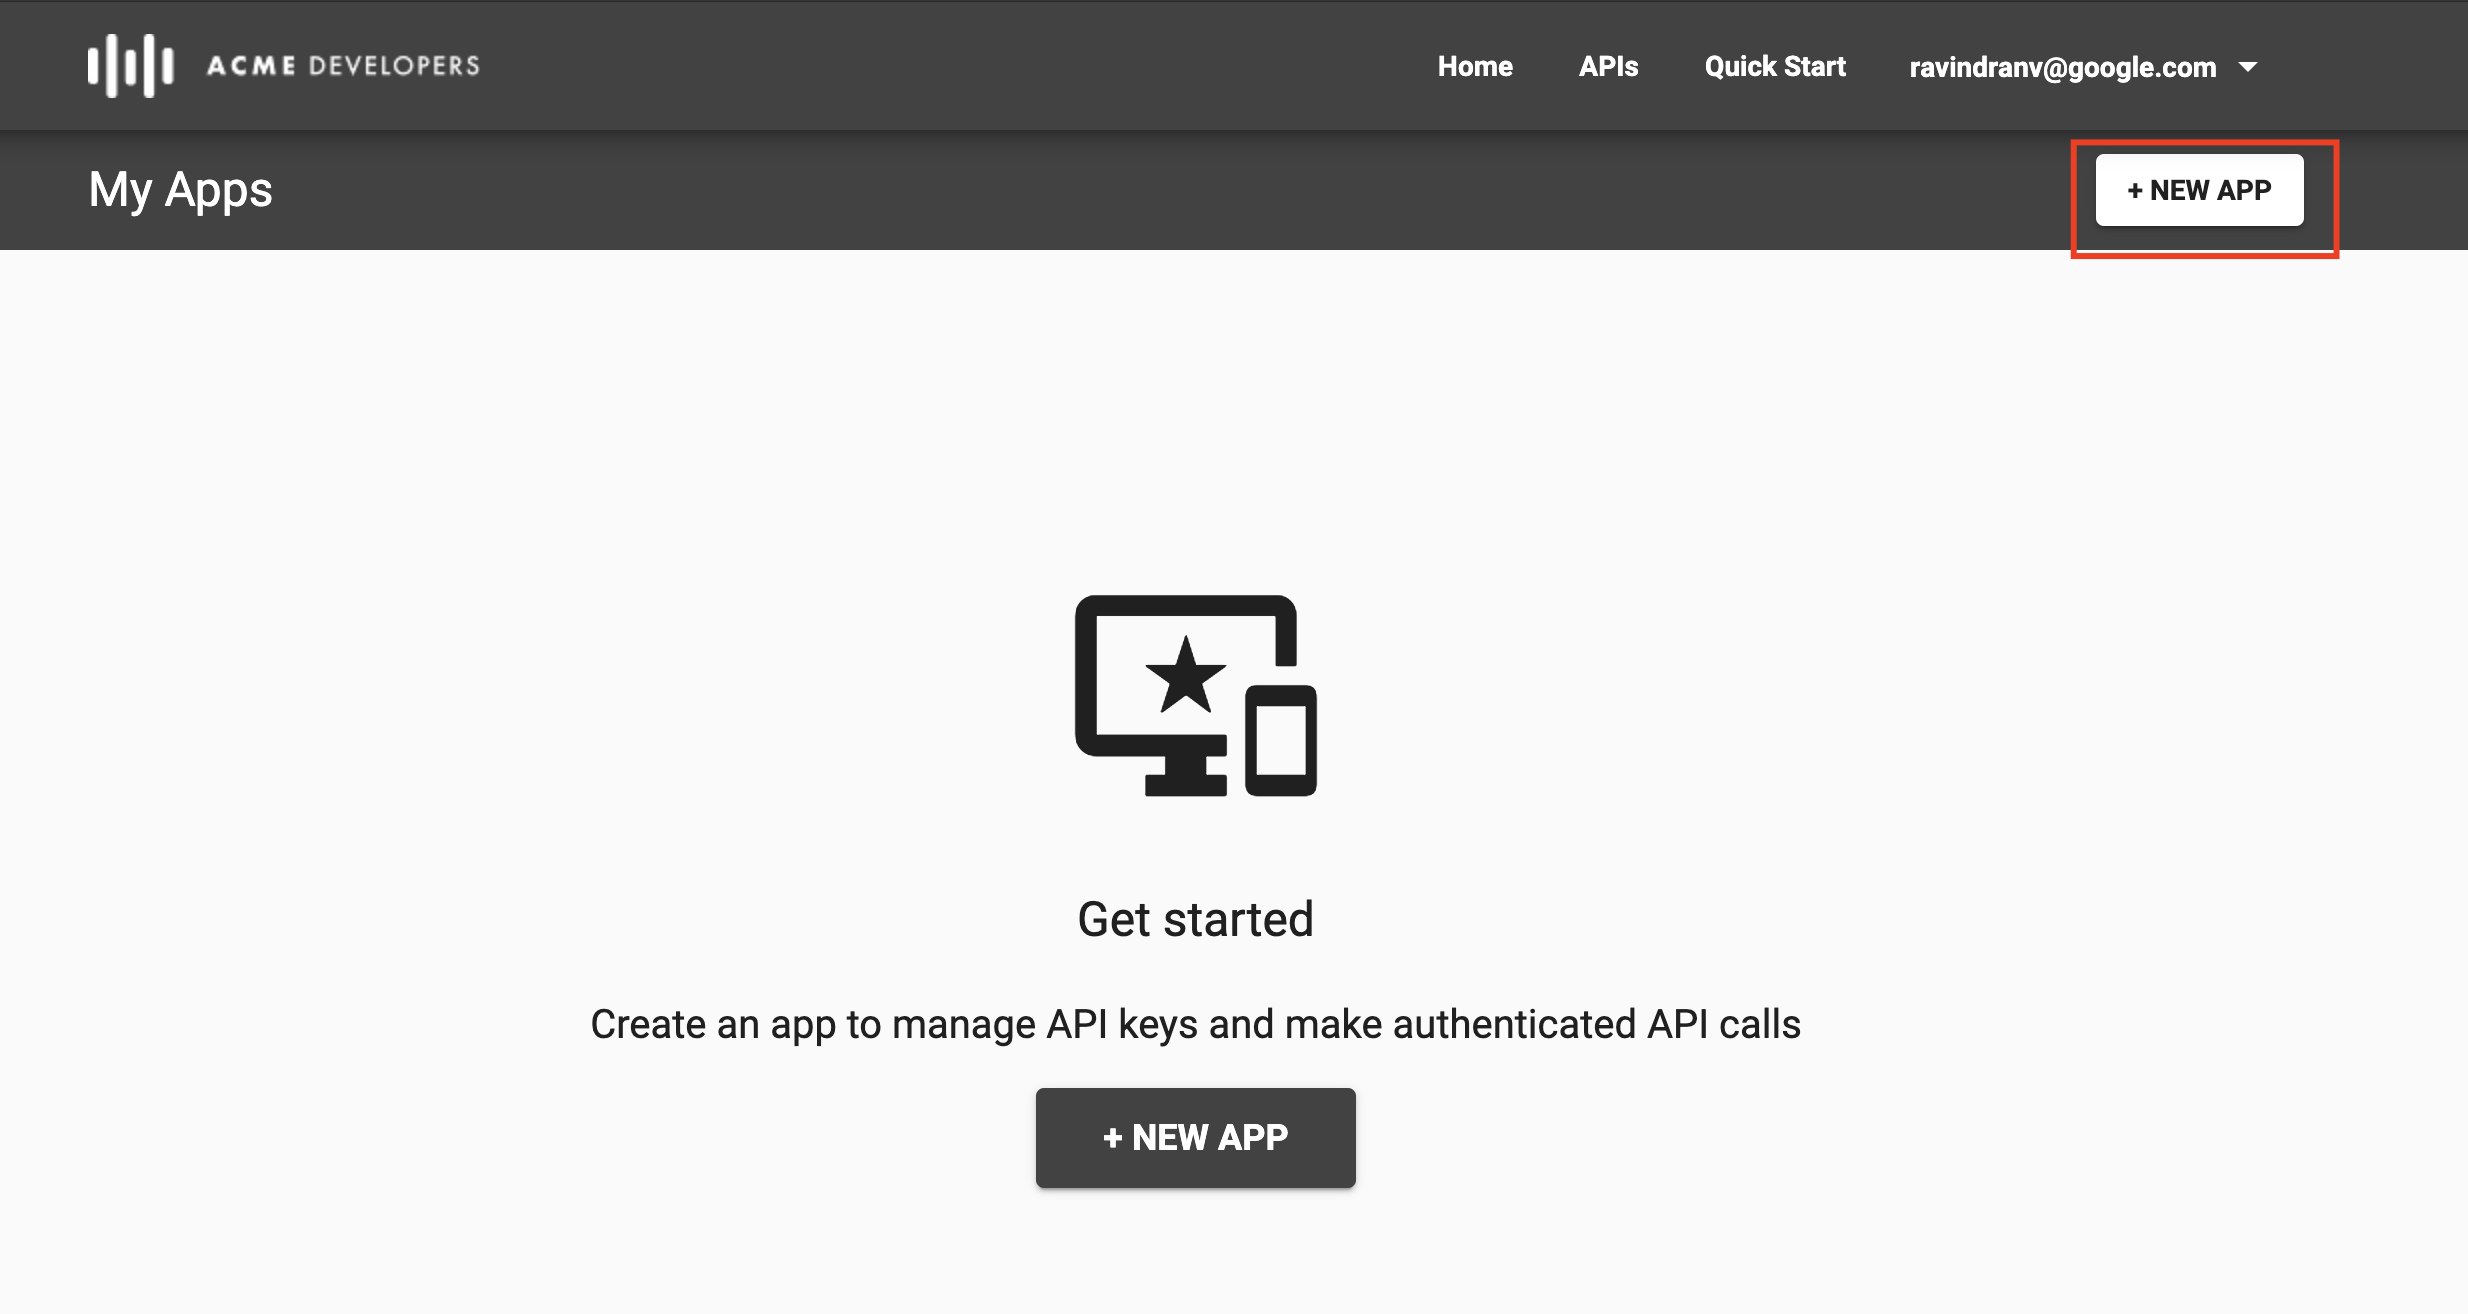
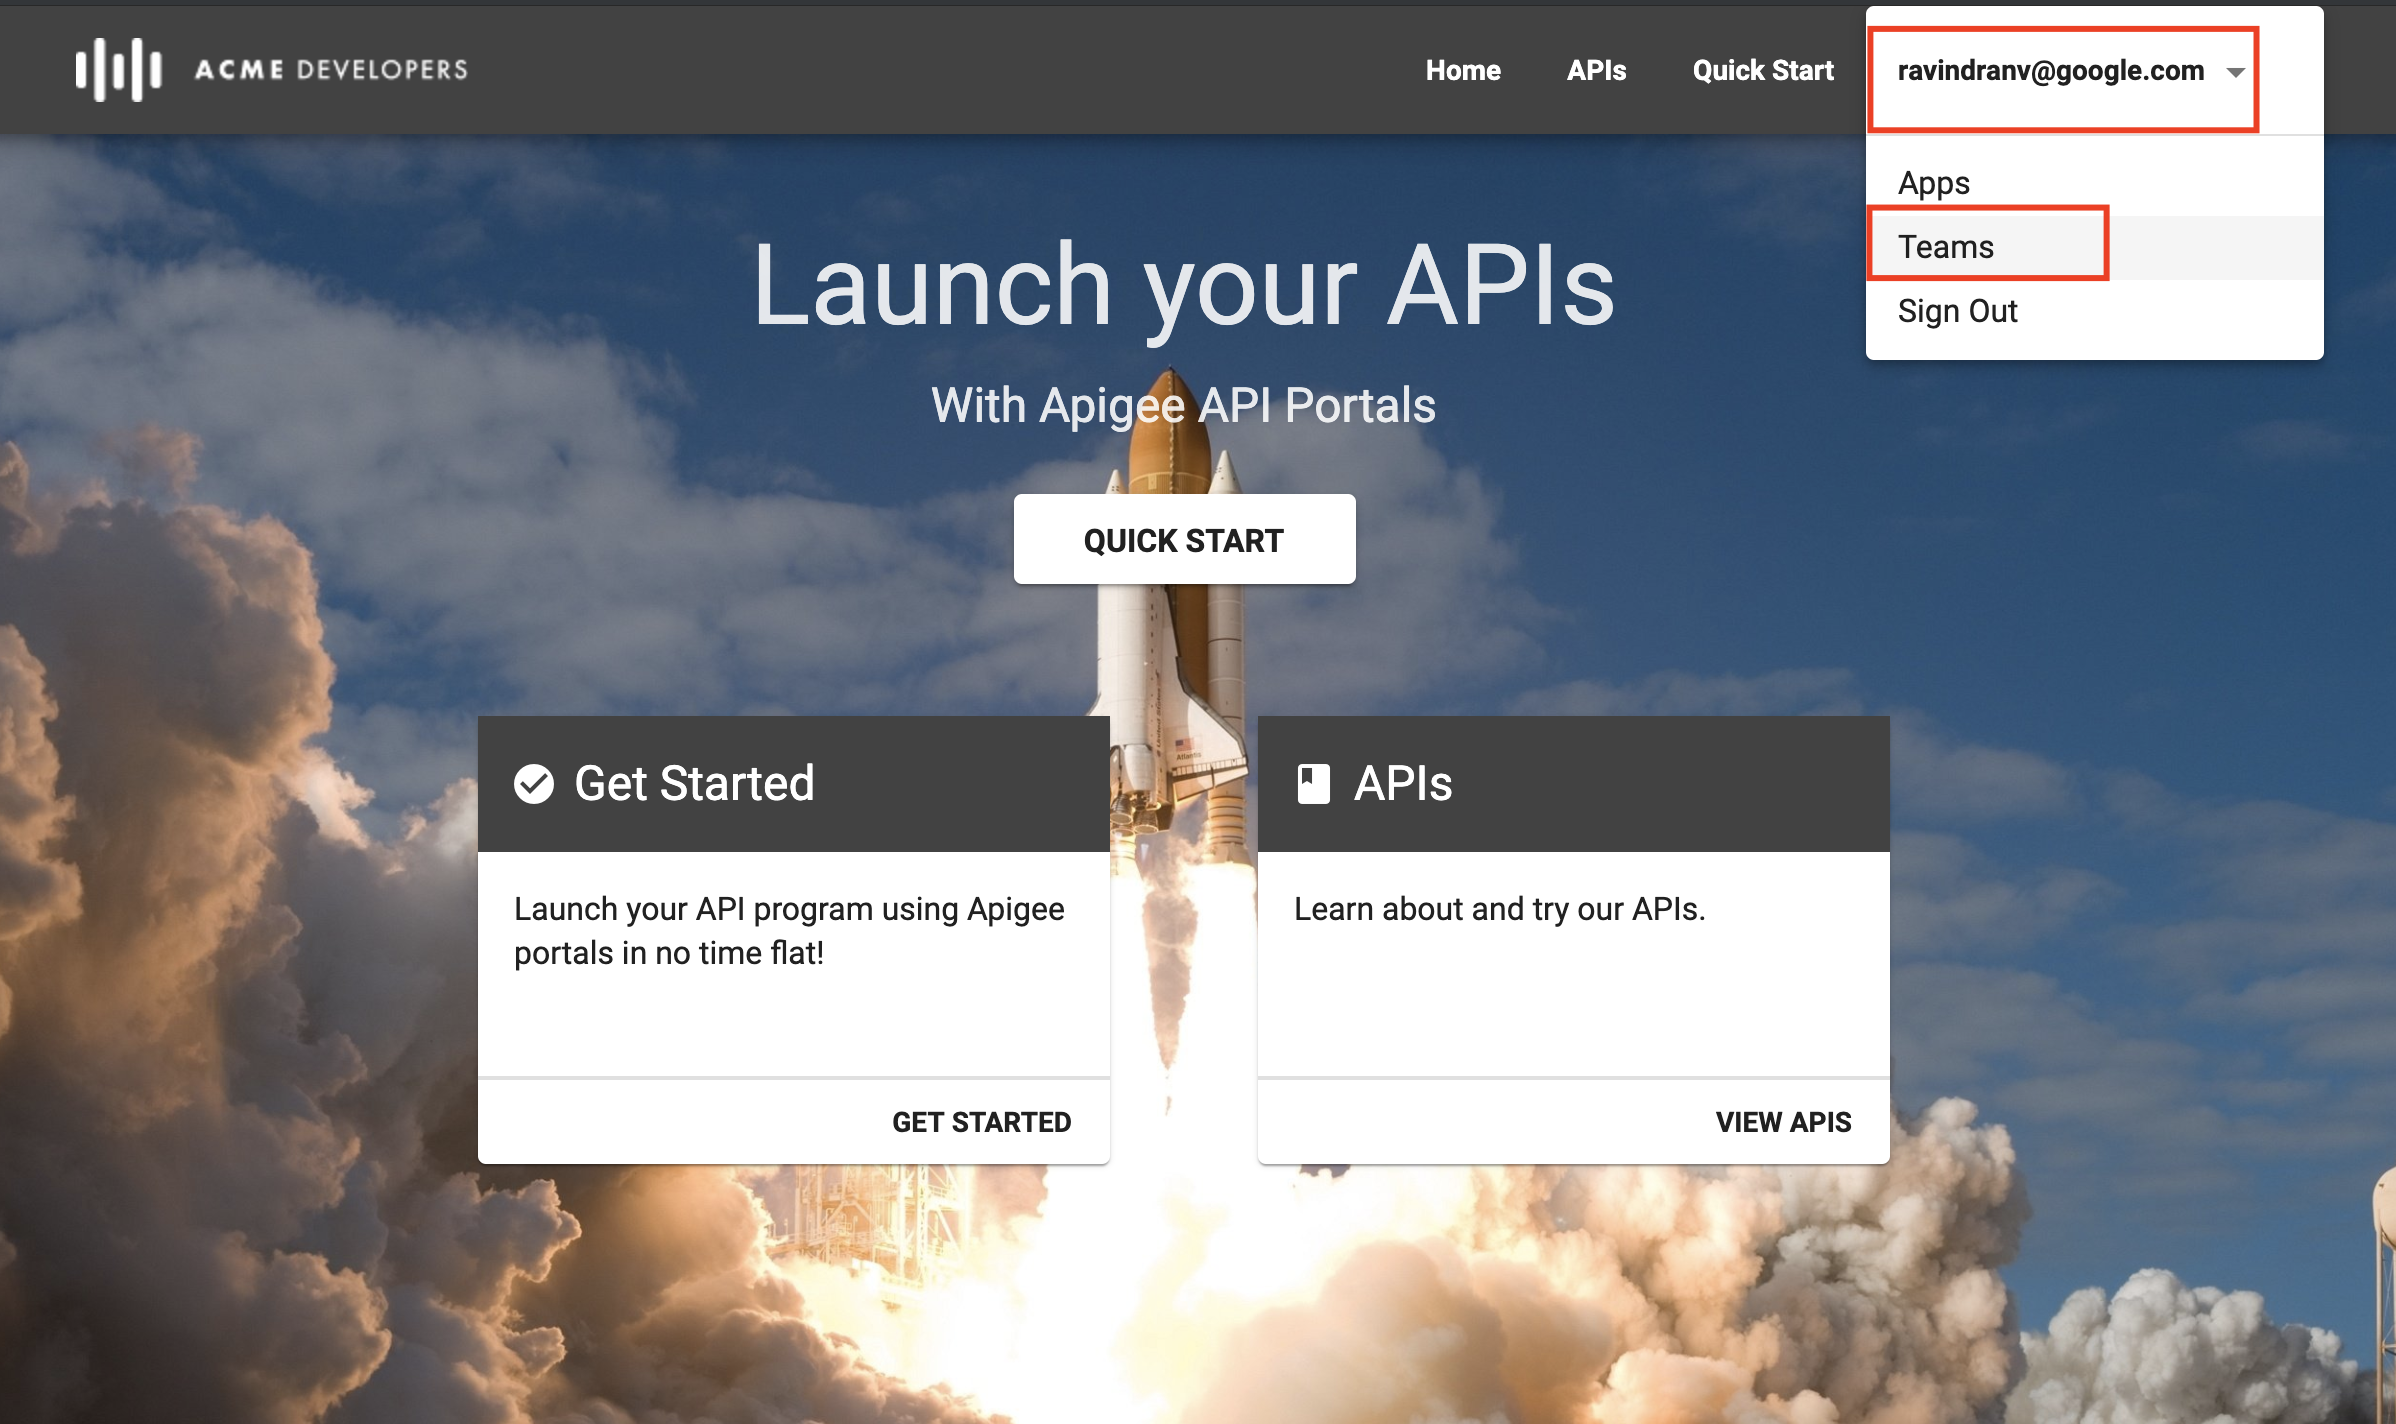
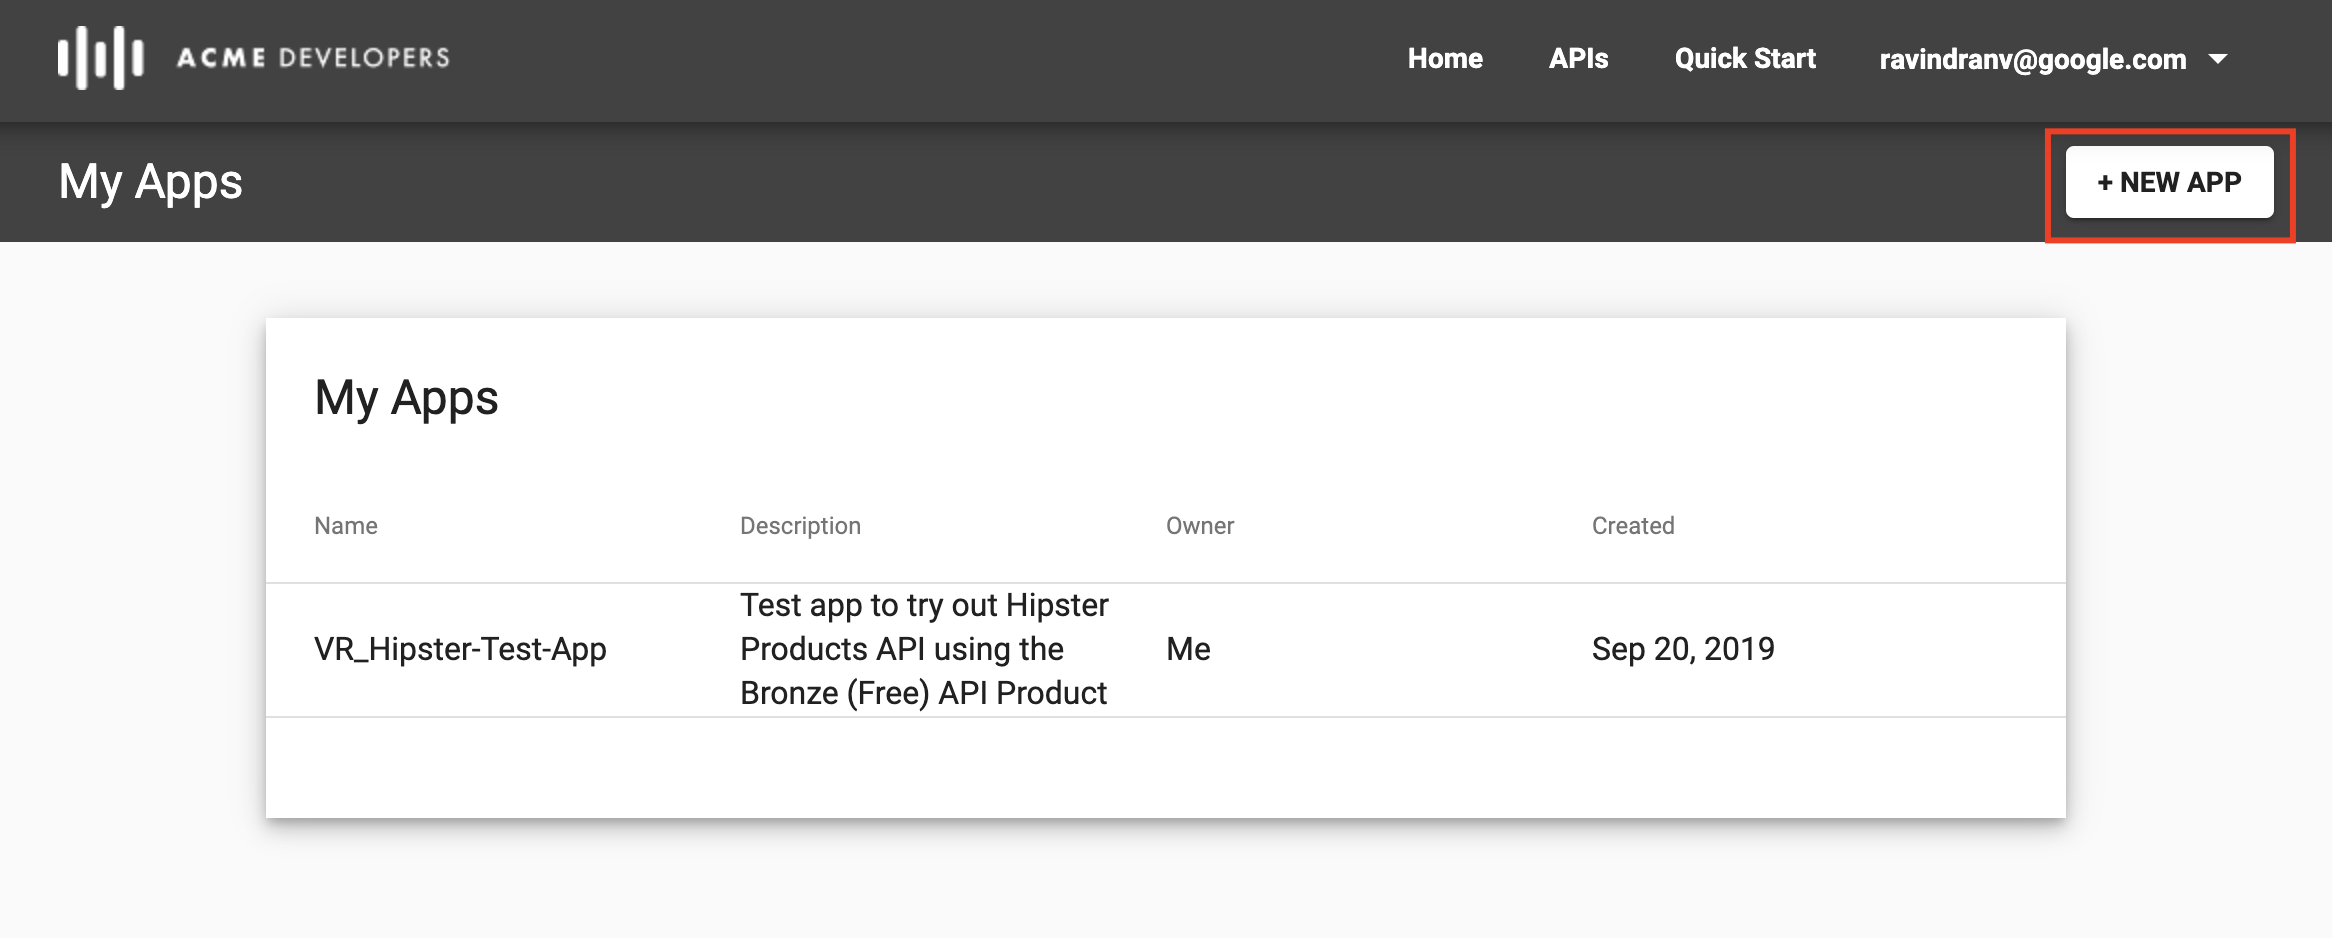
Navigate to the developer account drop down menu on the top right corner, and select the Apps link.

-
Click the New App button (either on the page itself or on the top panel, as shown below).
-
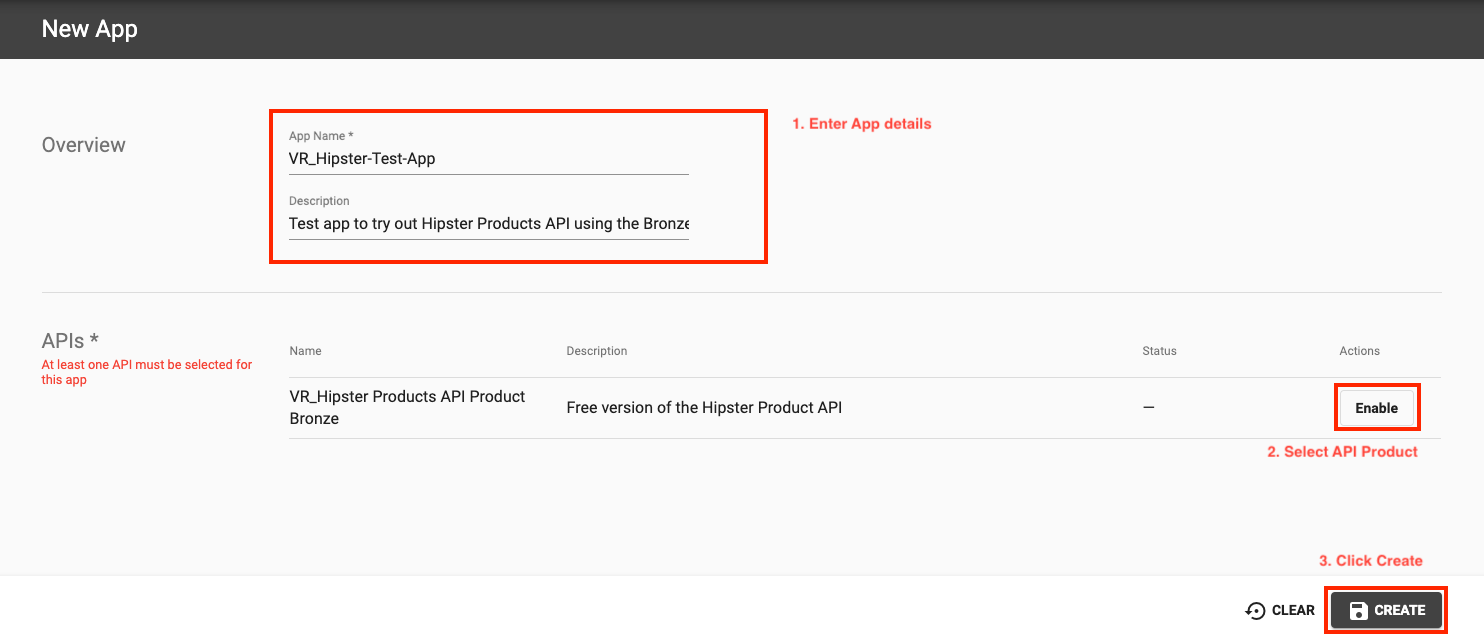
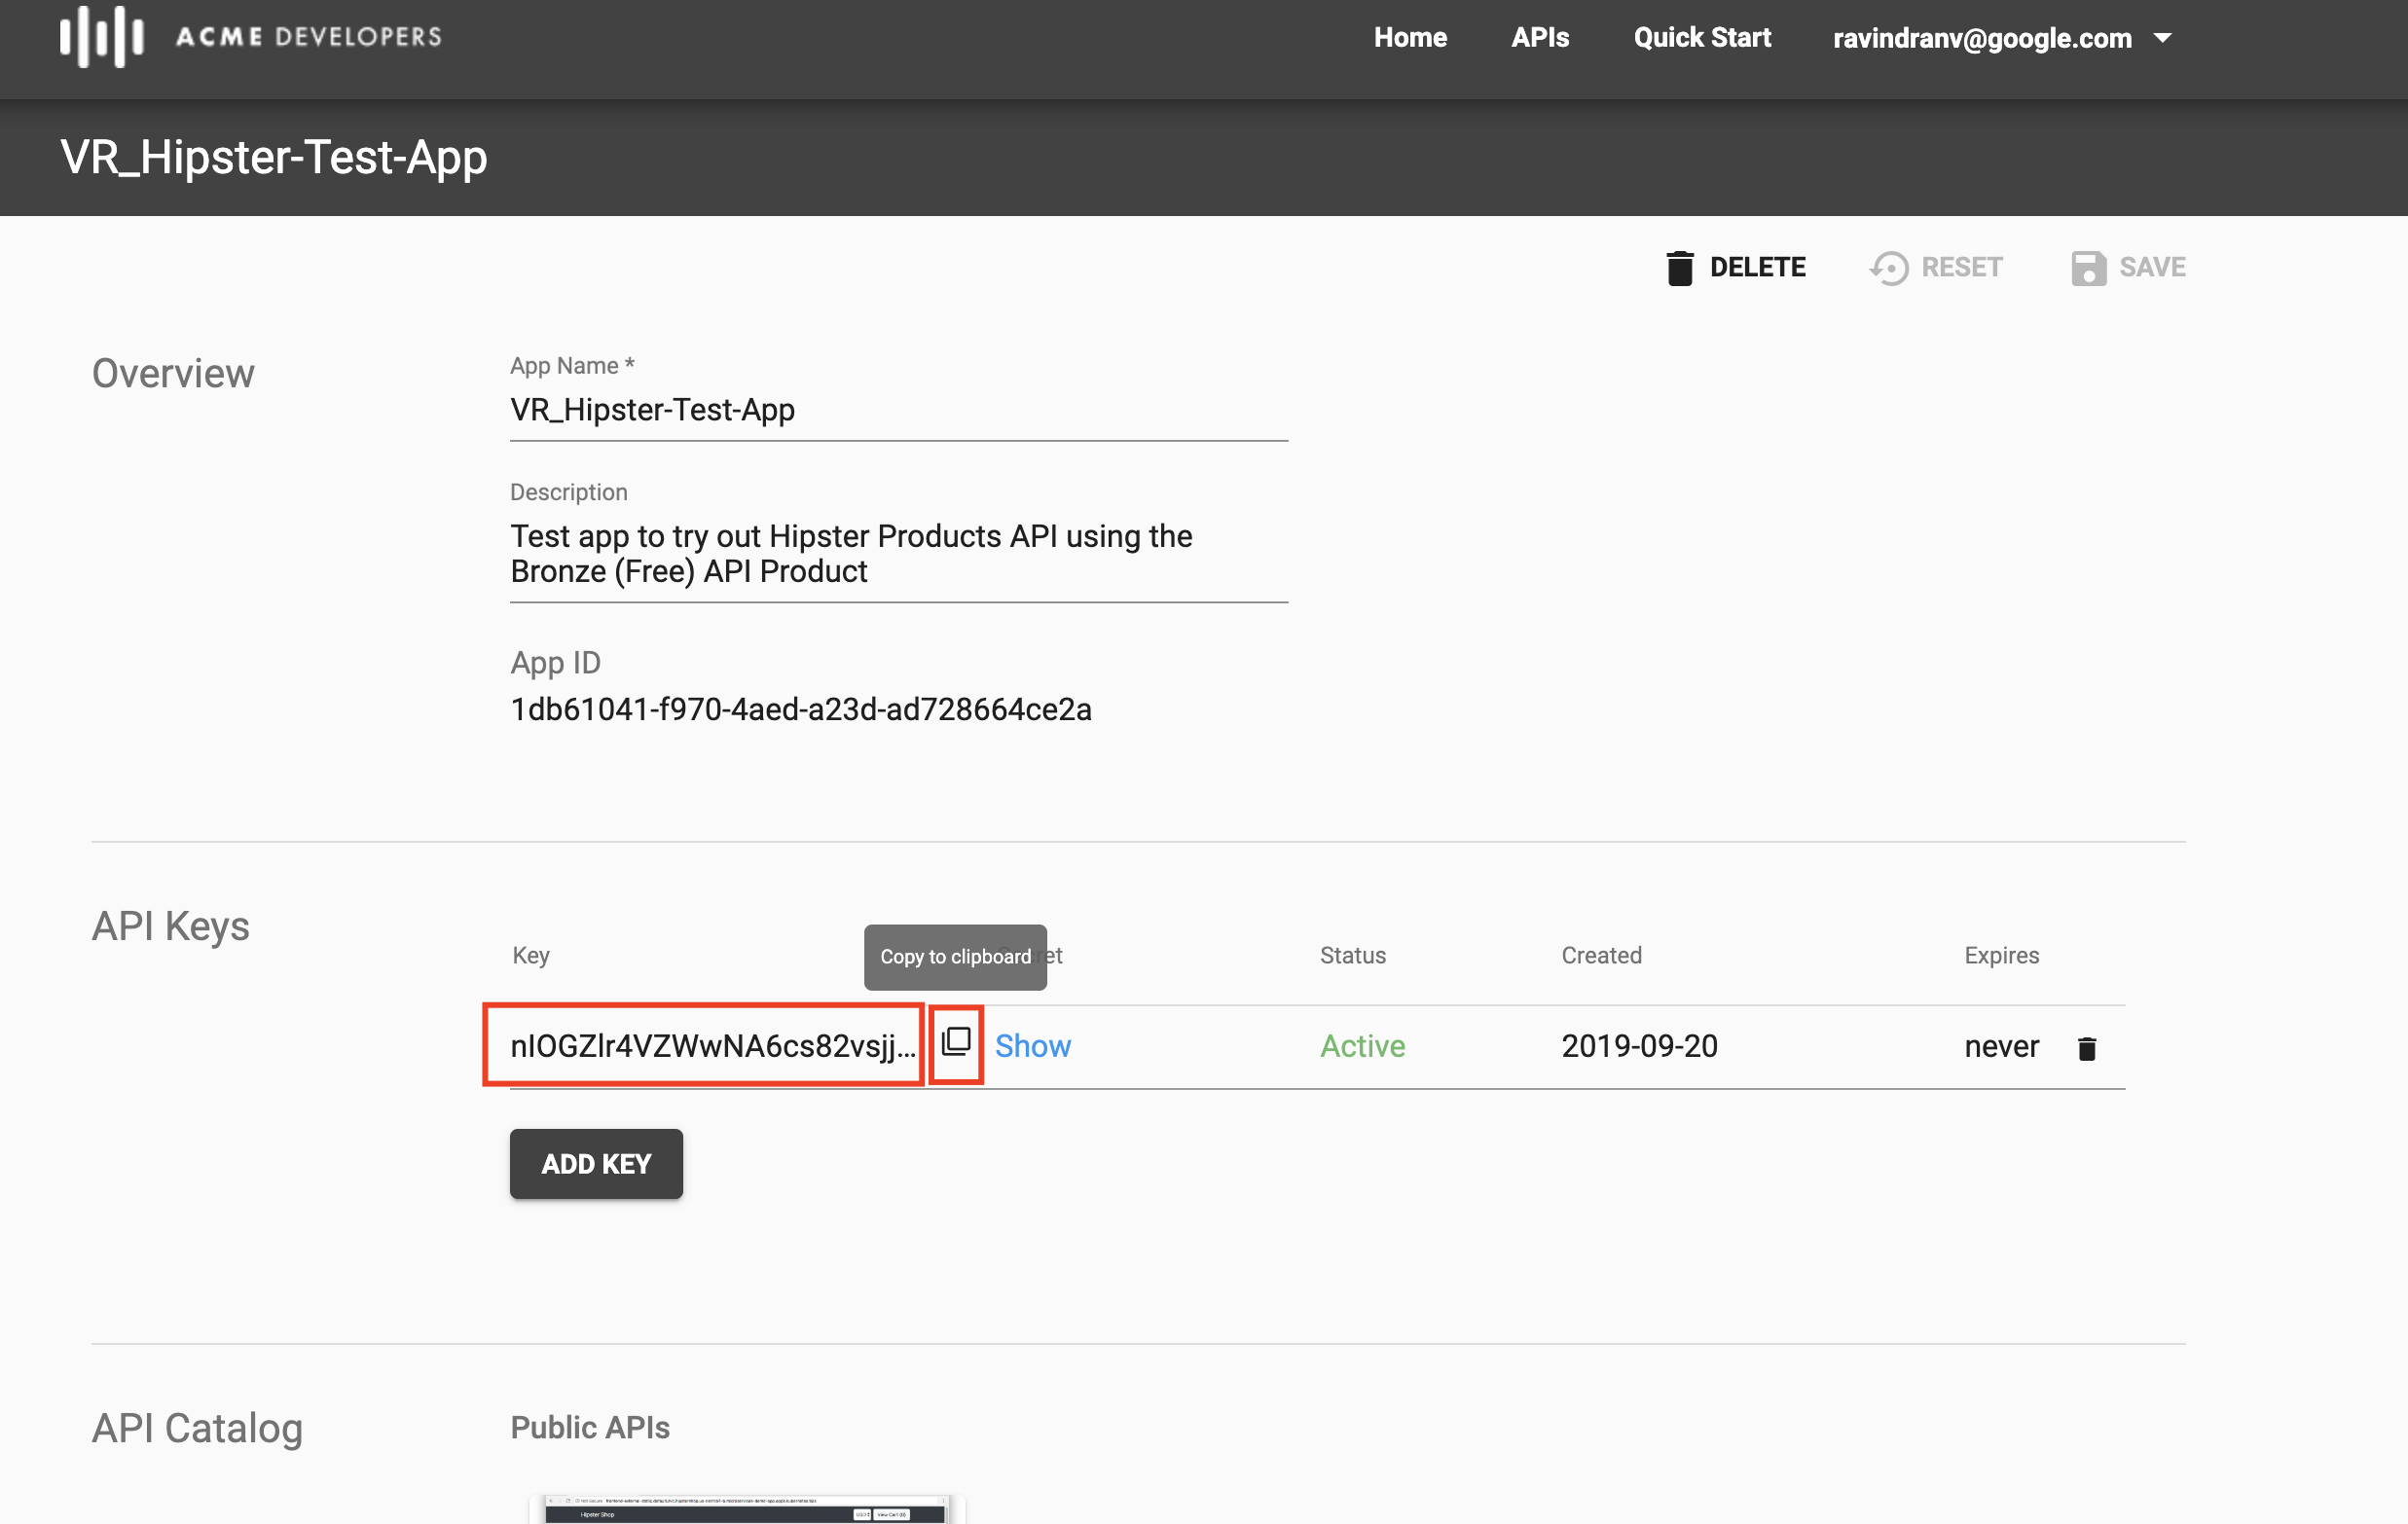
Enter the following App details and click Create: App Name:
_Hipster-Test-AppDescription:Test app to try out Hipster Products API using the Bronze (Free) API ProductSelect the Bronze (Free) API Product that is available for subscription.
-
You will find that an API Key/Secret pair has been generated for your newly created App. You can now use this API Key to test the API.
-
Navigate to the API Catalog, select the Bronze API Product docs, and test out the GET
/productsresource again. This time though, first click on the Authorize button and select the newly created App’s credentials to set authorization information (API Key) for the API call.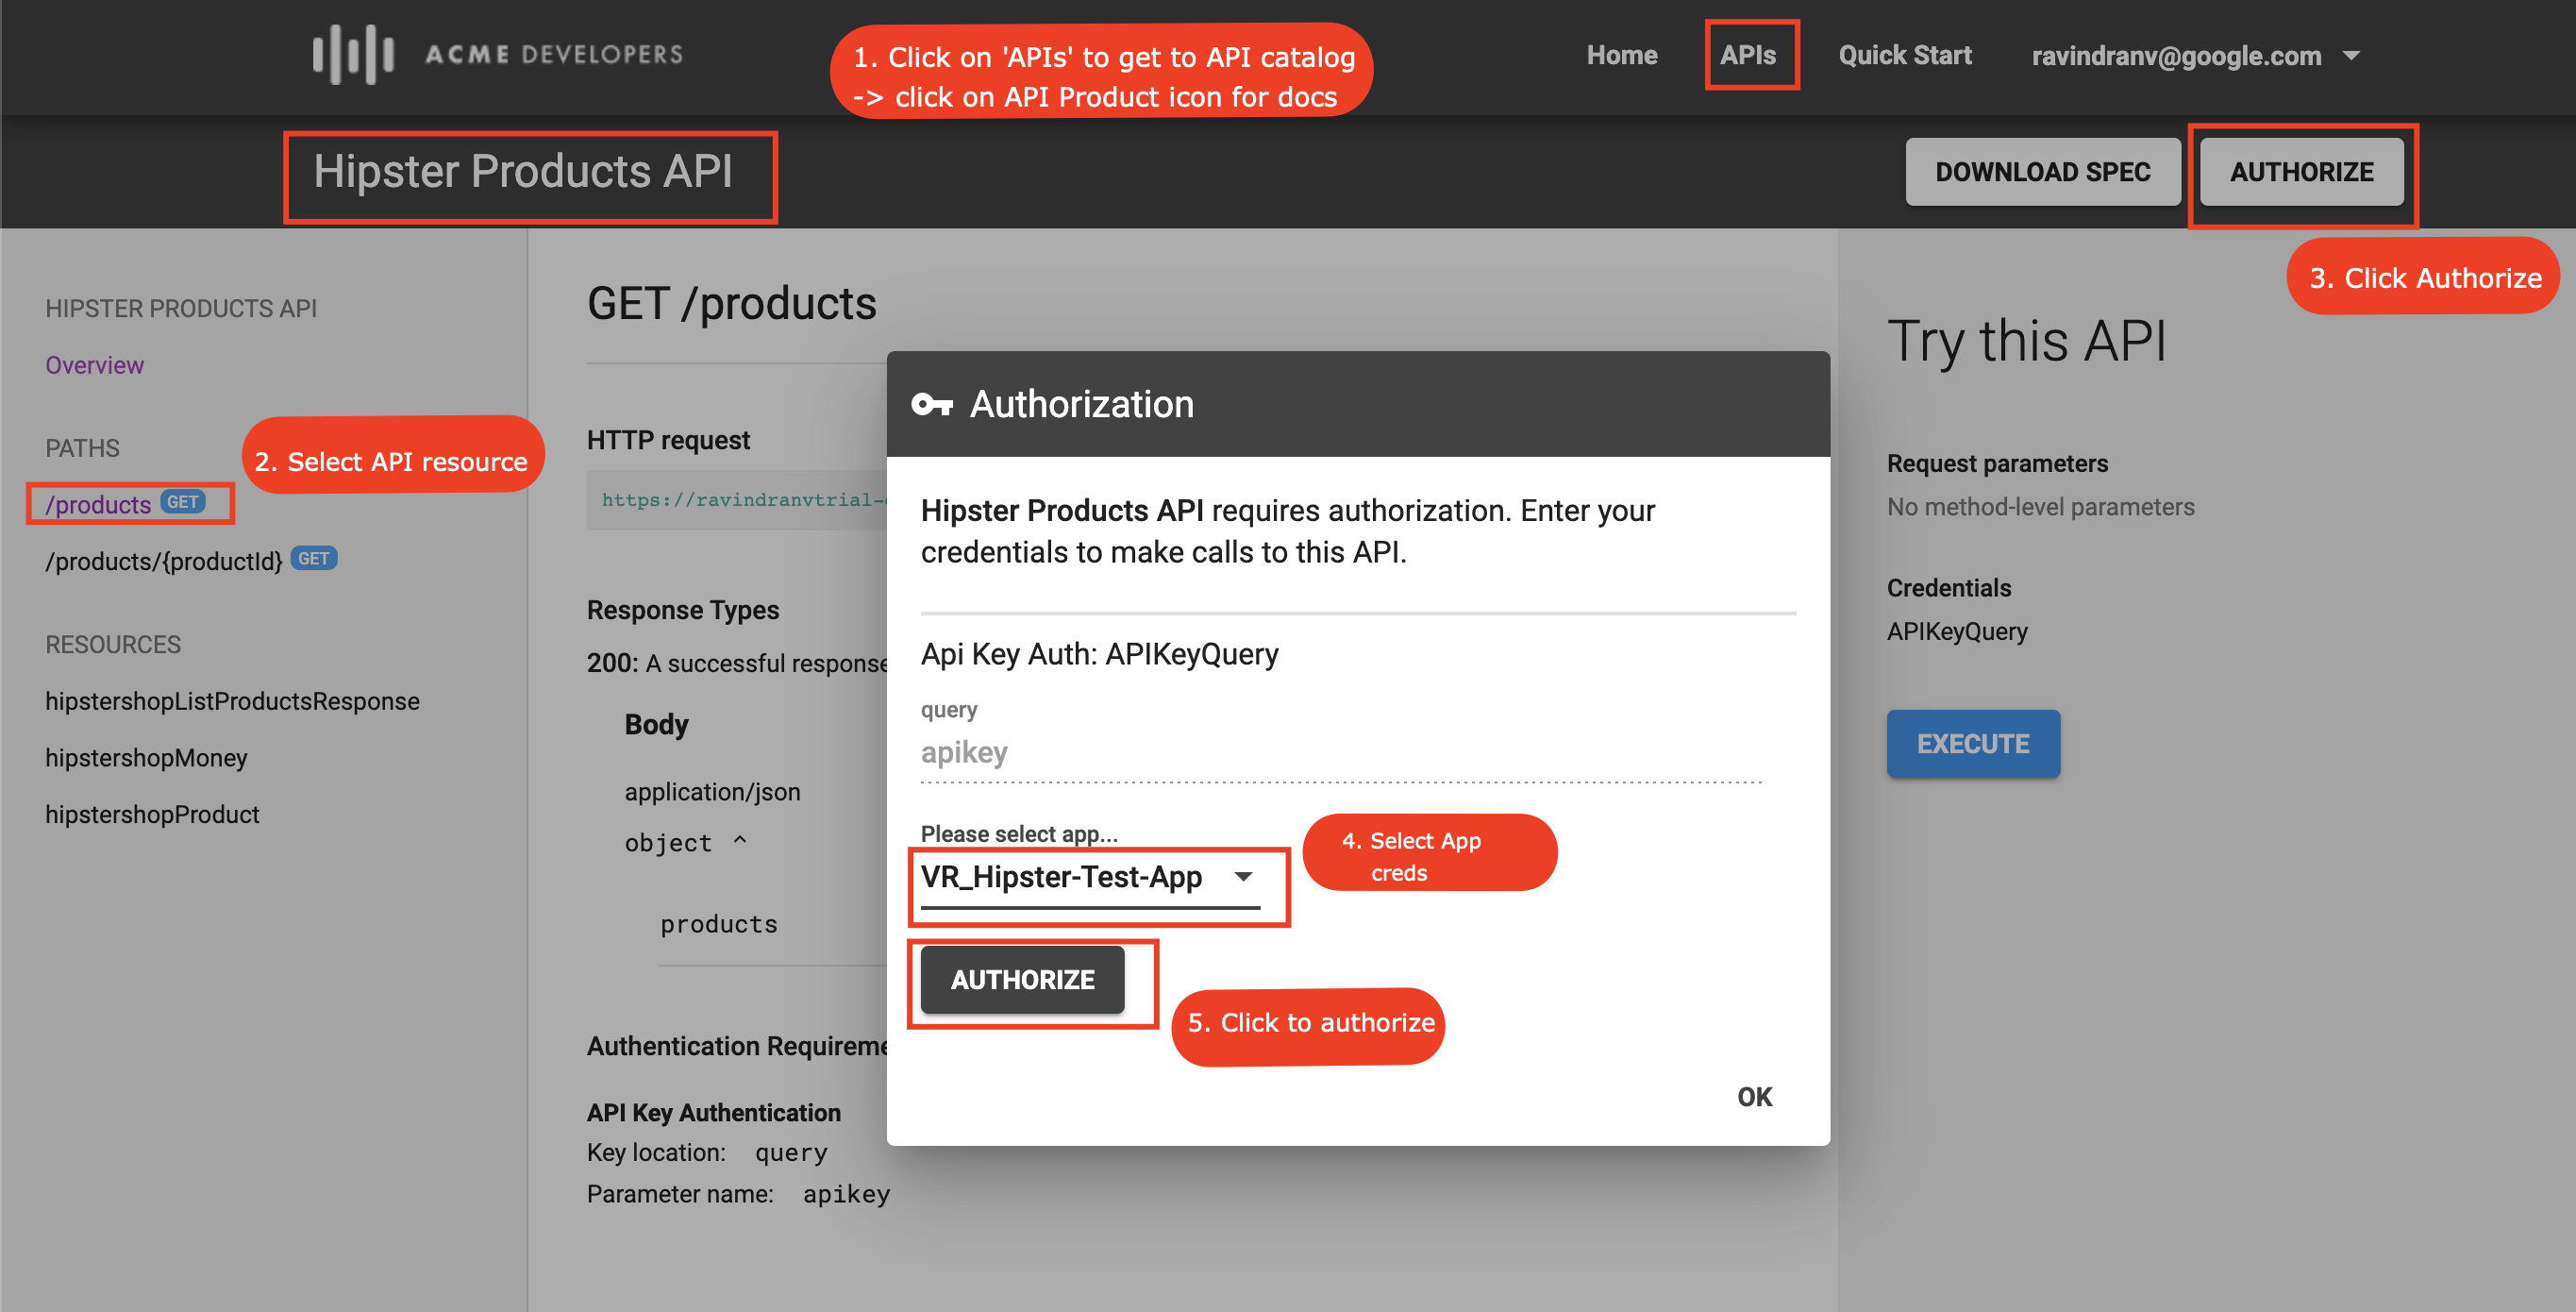
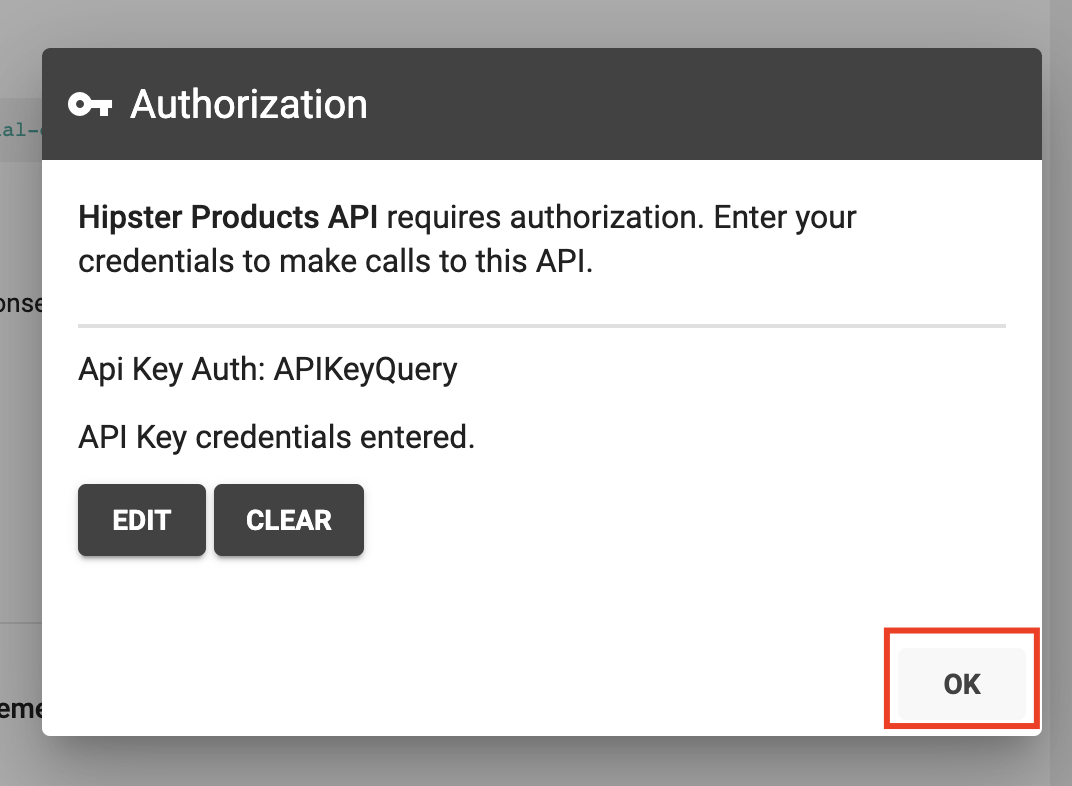
Click OK after authorization information is set.
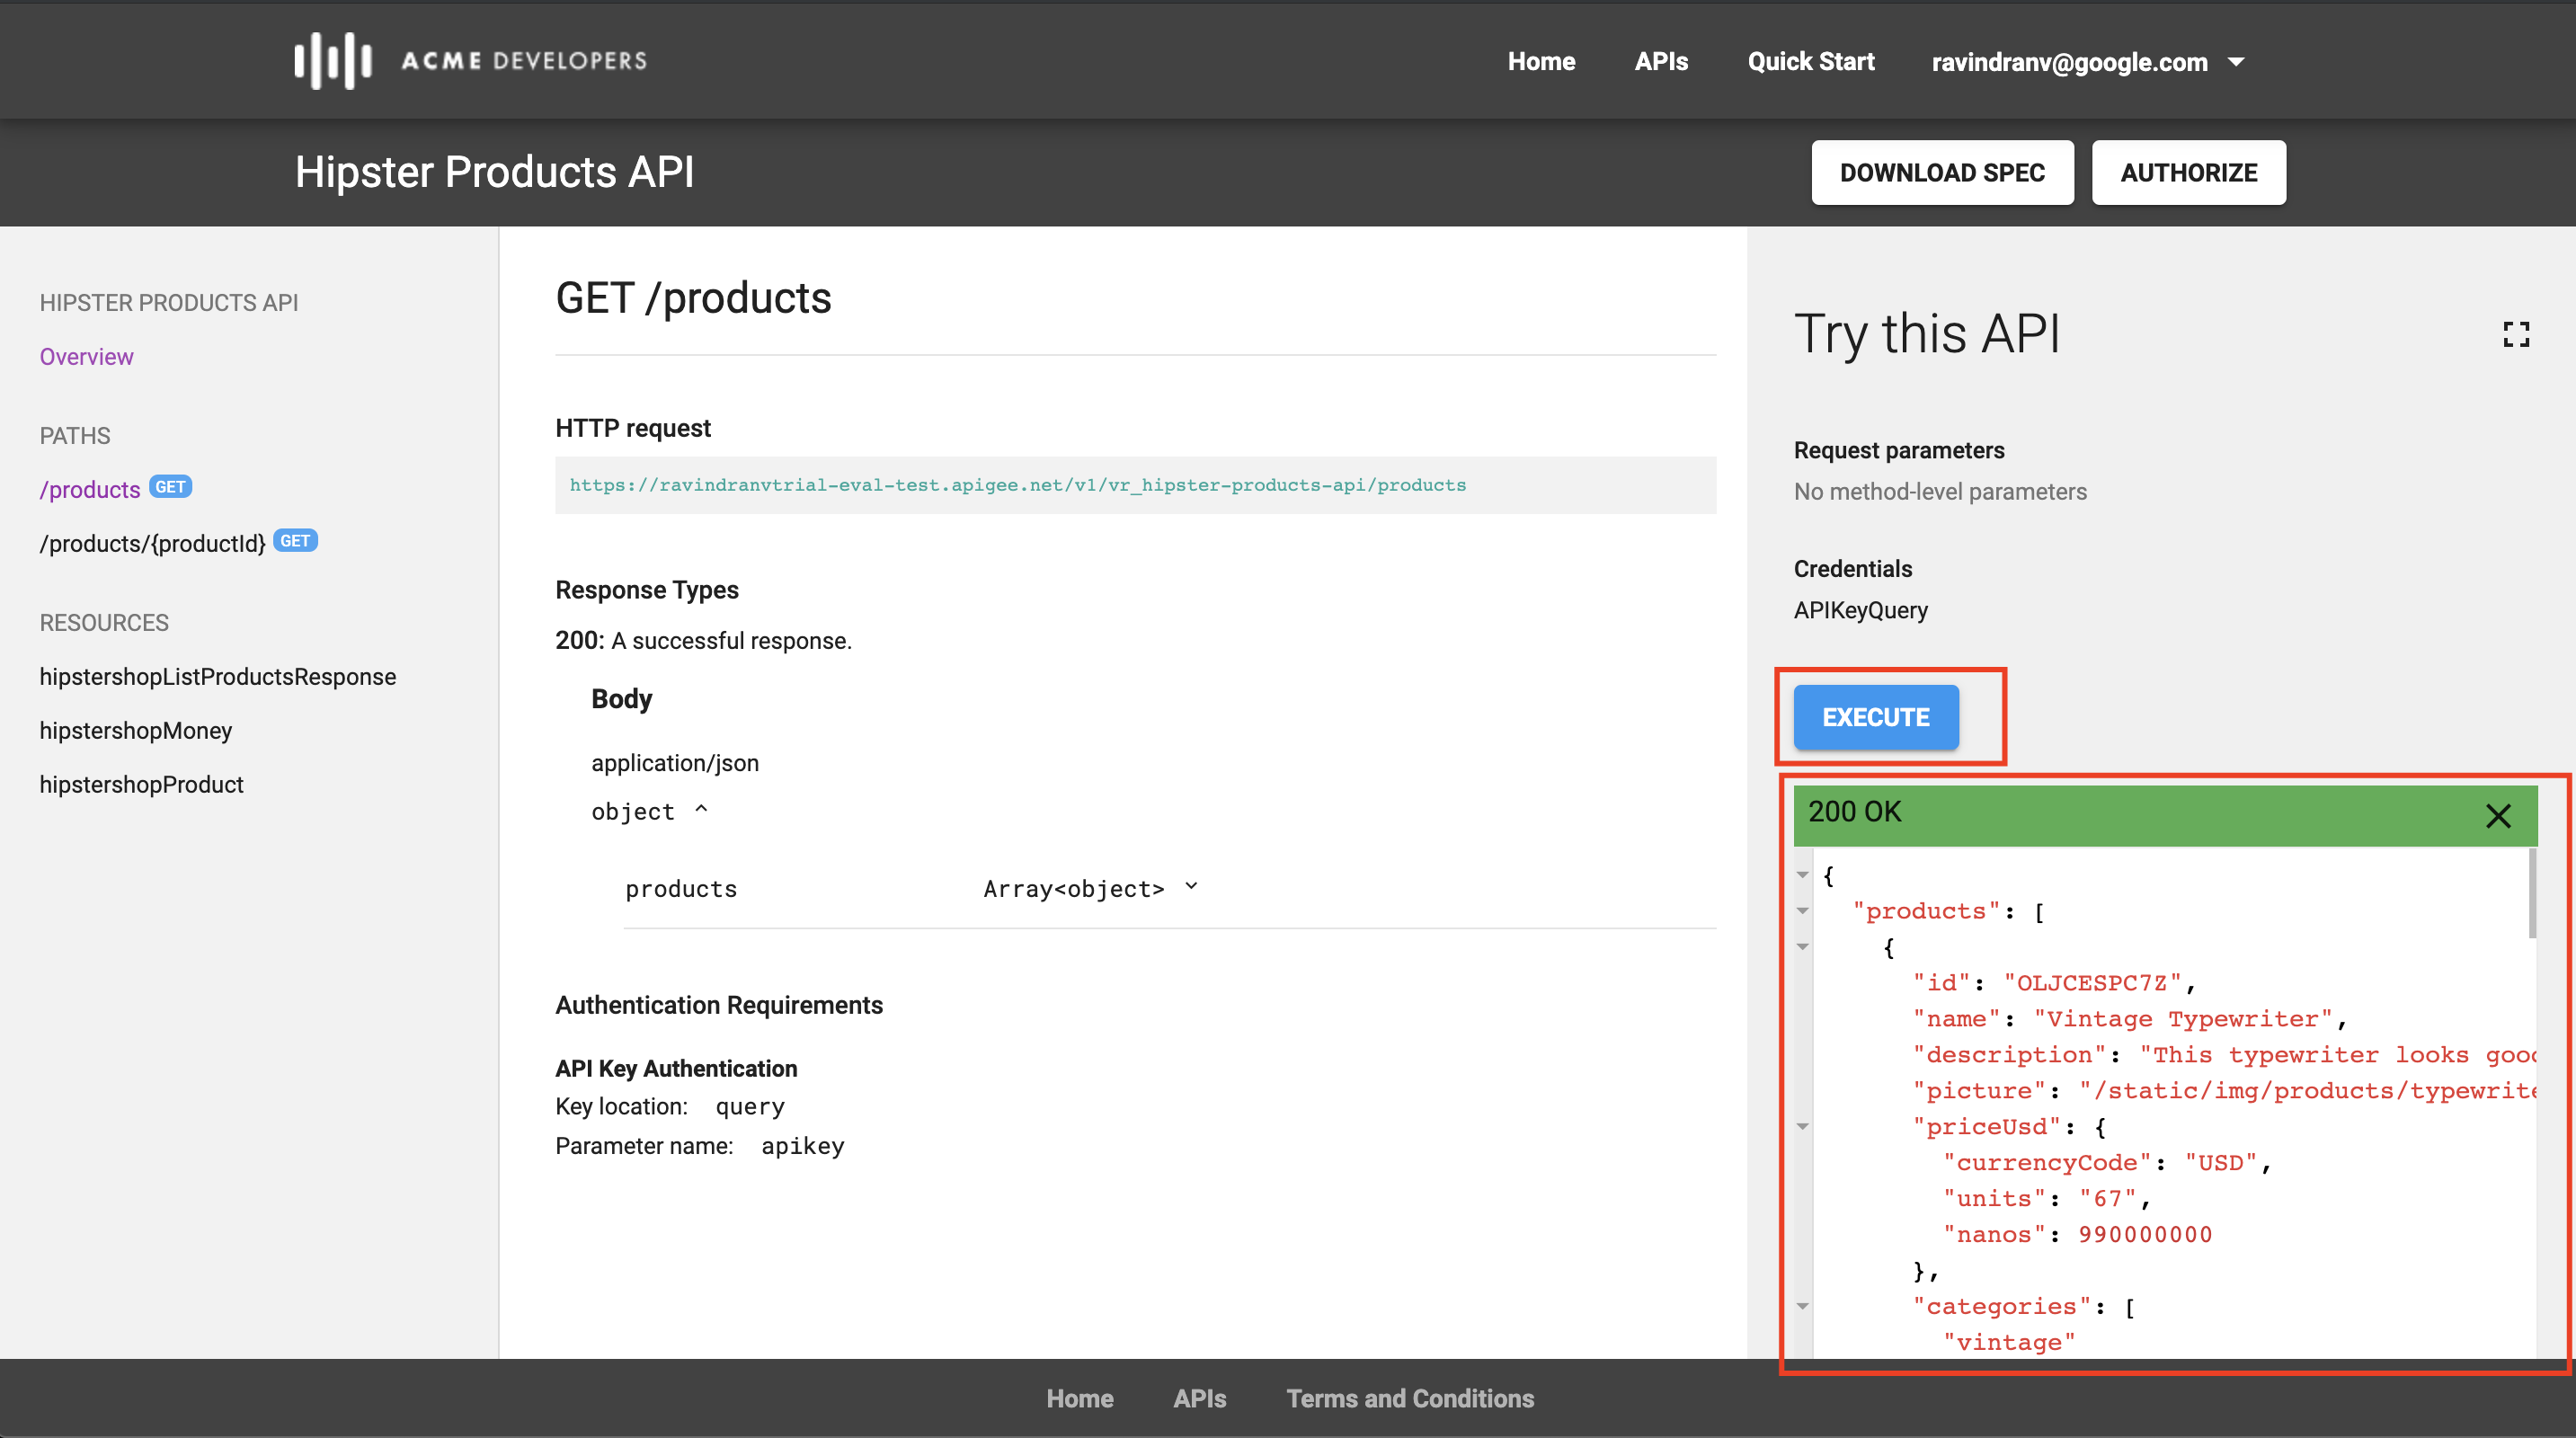
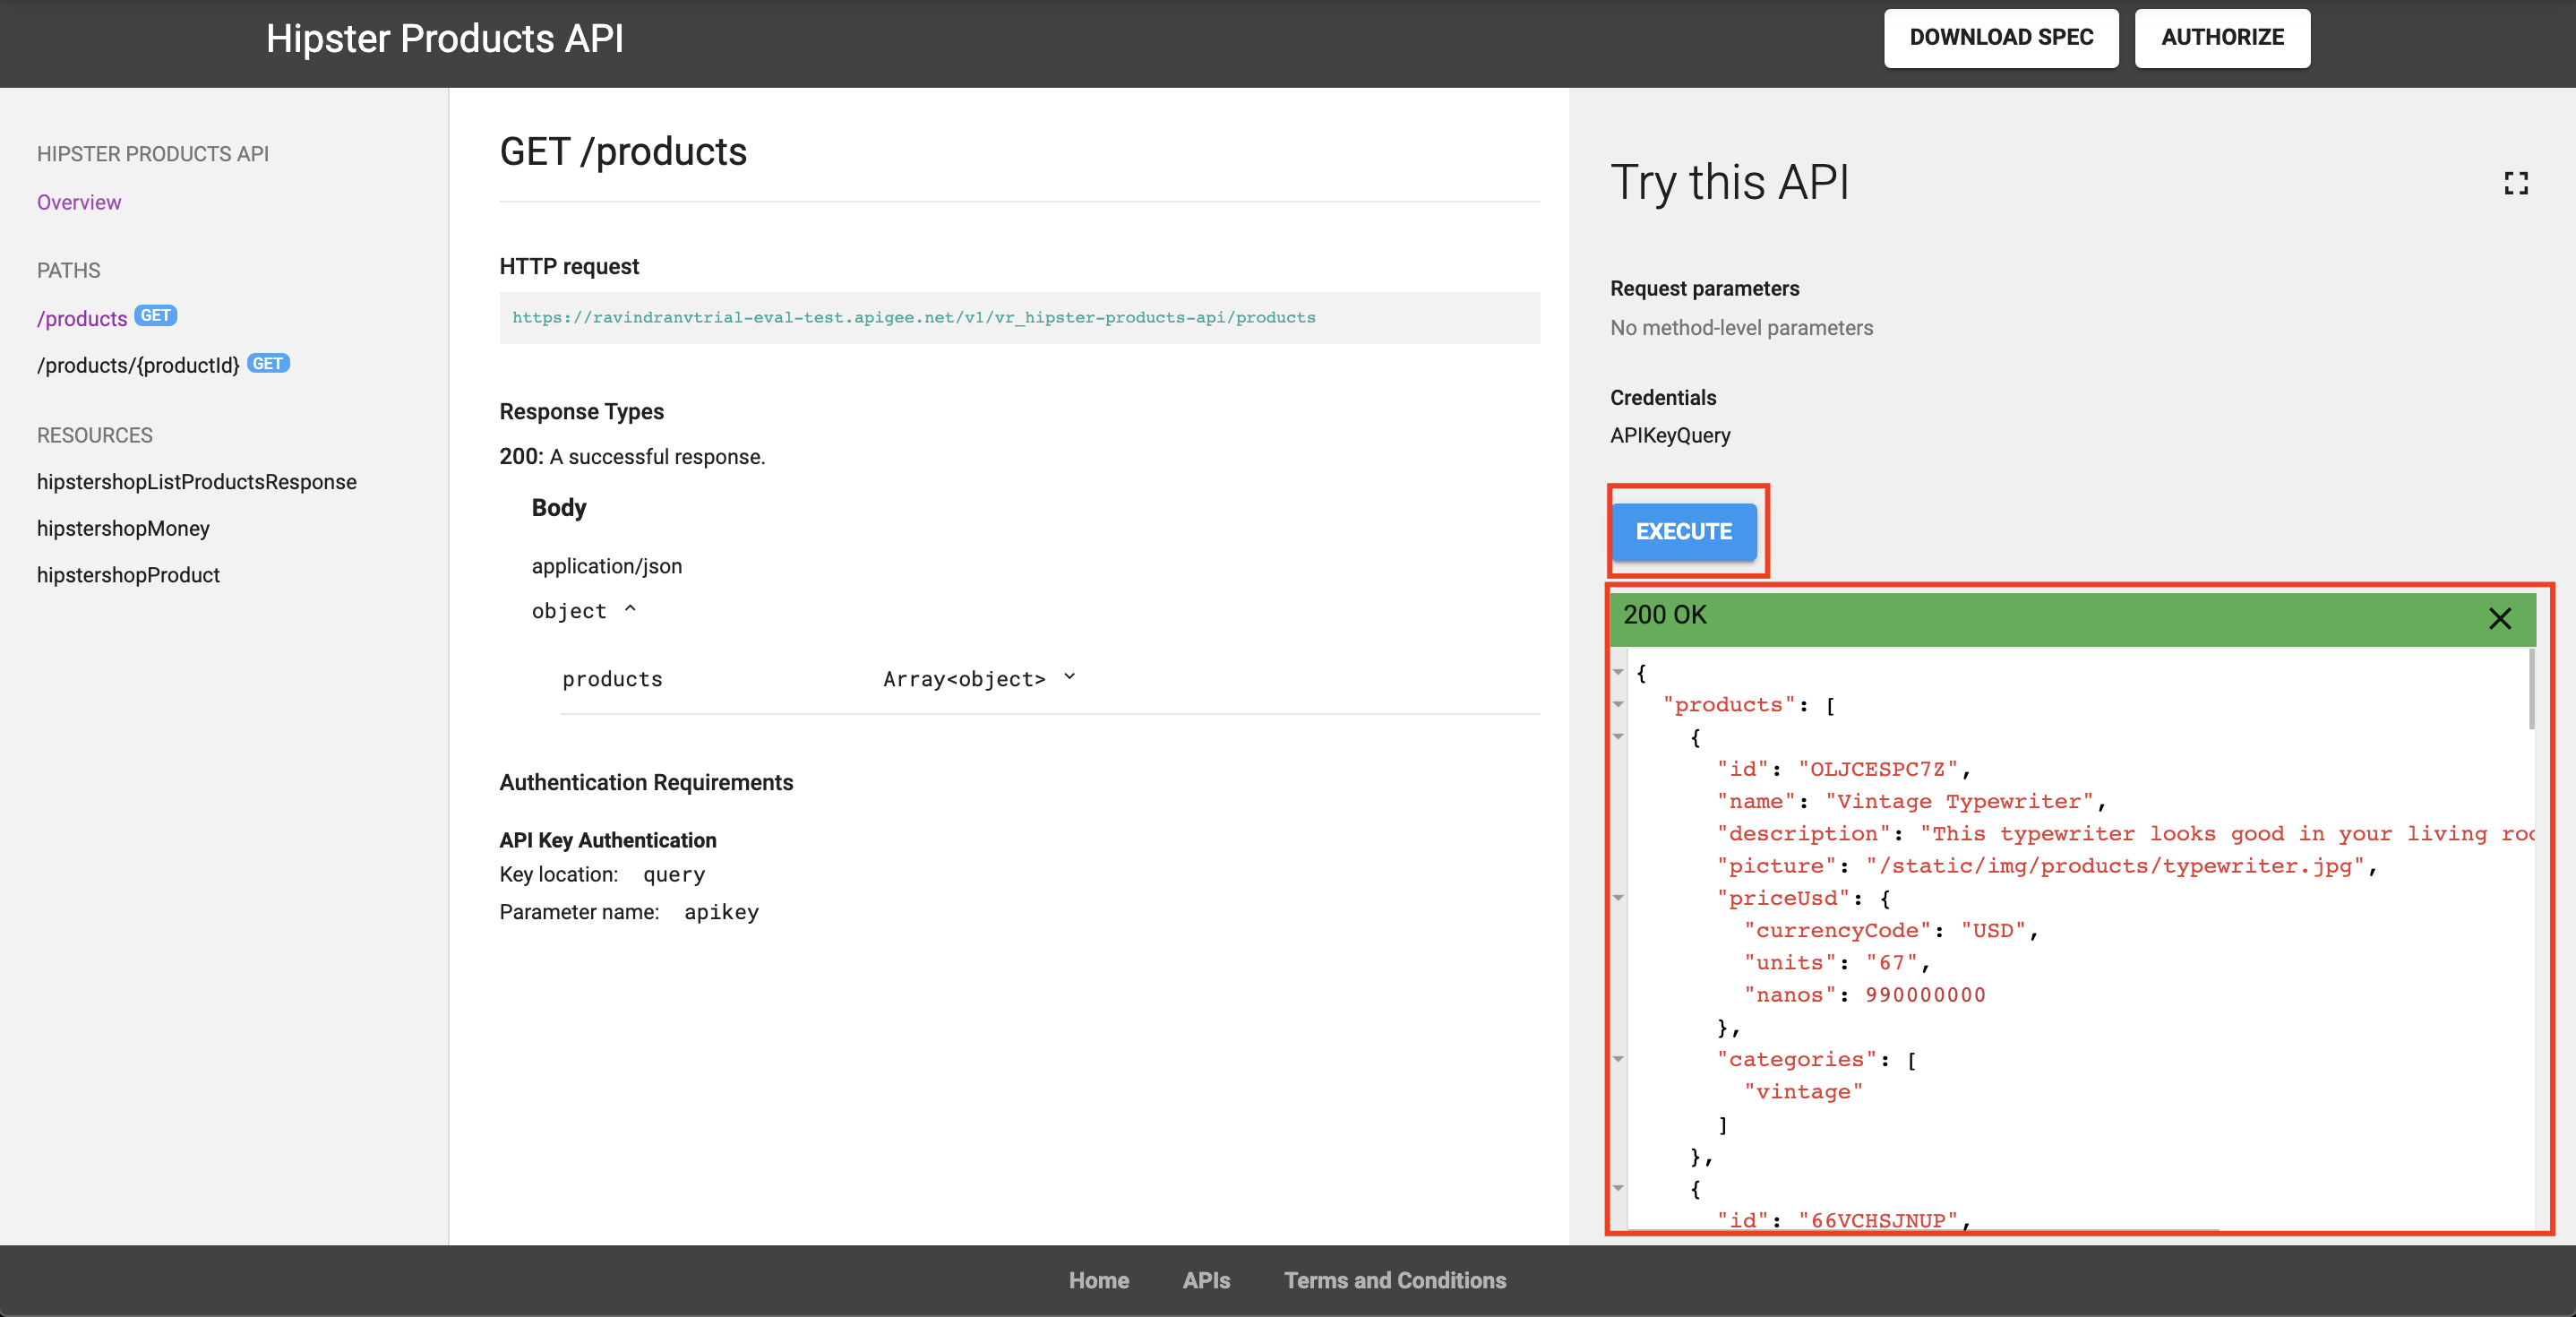
Now, click Execute. You will see that a valid 200 OK API response is received.
Optional: Try out Developer Program, Teams and Audience Management features
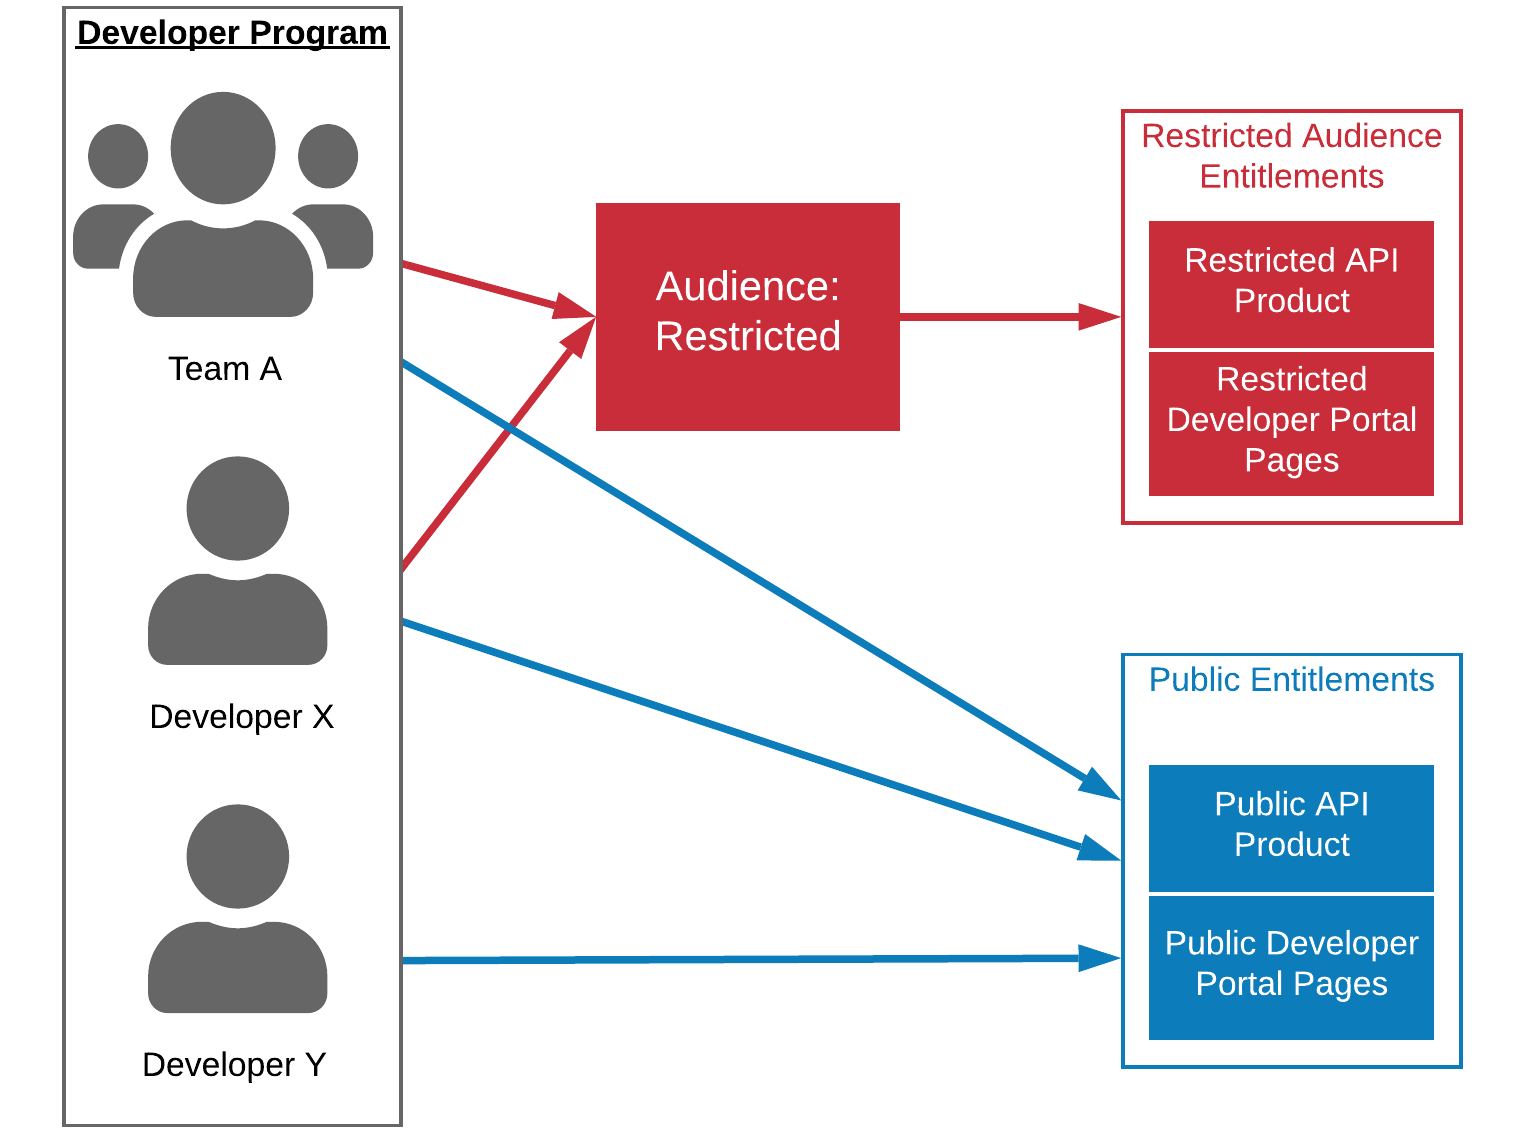
On Apigee Edge, a Developer Program is the configuration set associated to each Developer Portal - specifically, App Developer accounts, App Developer identity management configuration, App Developer Teams, and Audience configuration for access to content published on the portal.
App Developers have the option of creating Teams to share responsibility for an app with other developers. Each developer within a Team is assigned a role (Owner, App Admin or Viewer ) that defines their access level to the shared apps.
Audience configurations are used to segment portal users or developer teams to control access to the following resources:
- Pages in your portal
- Published API products
The following figure shows how audiences are used to control access to a set of resources.
Enable Teams and Audience Management features
-
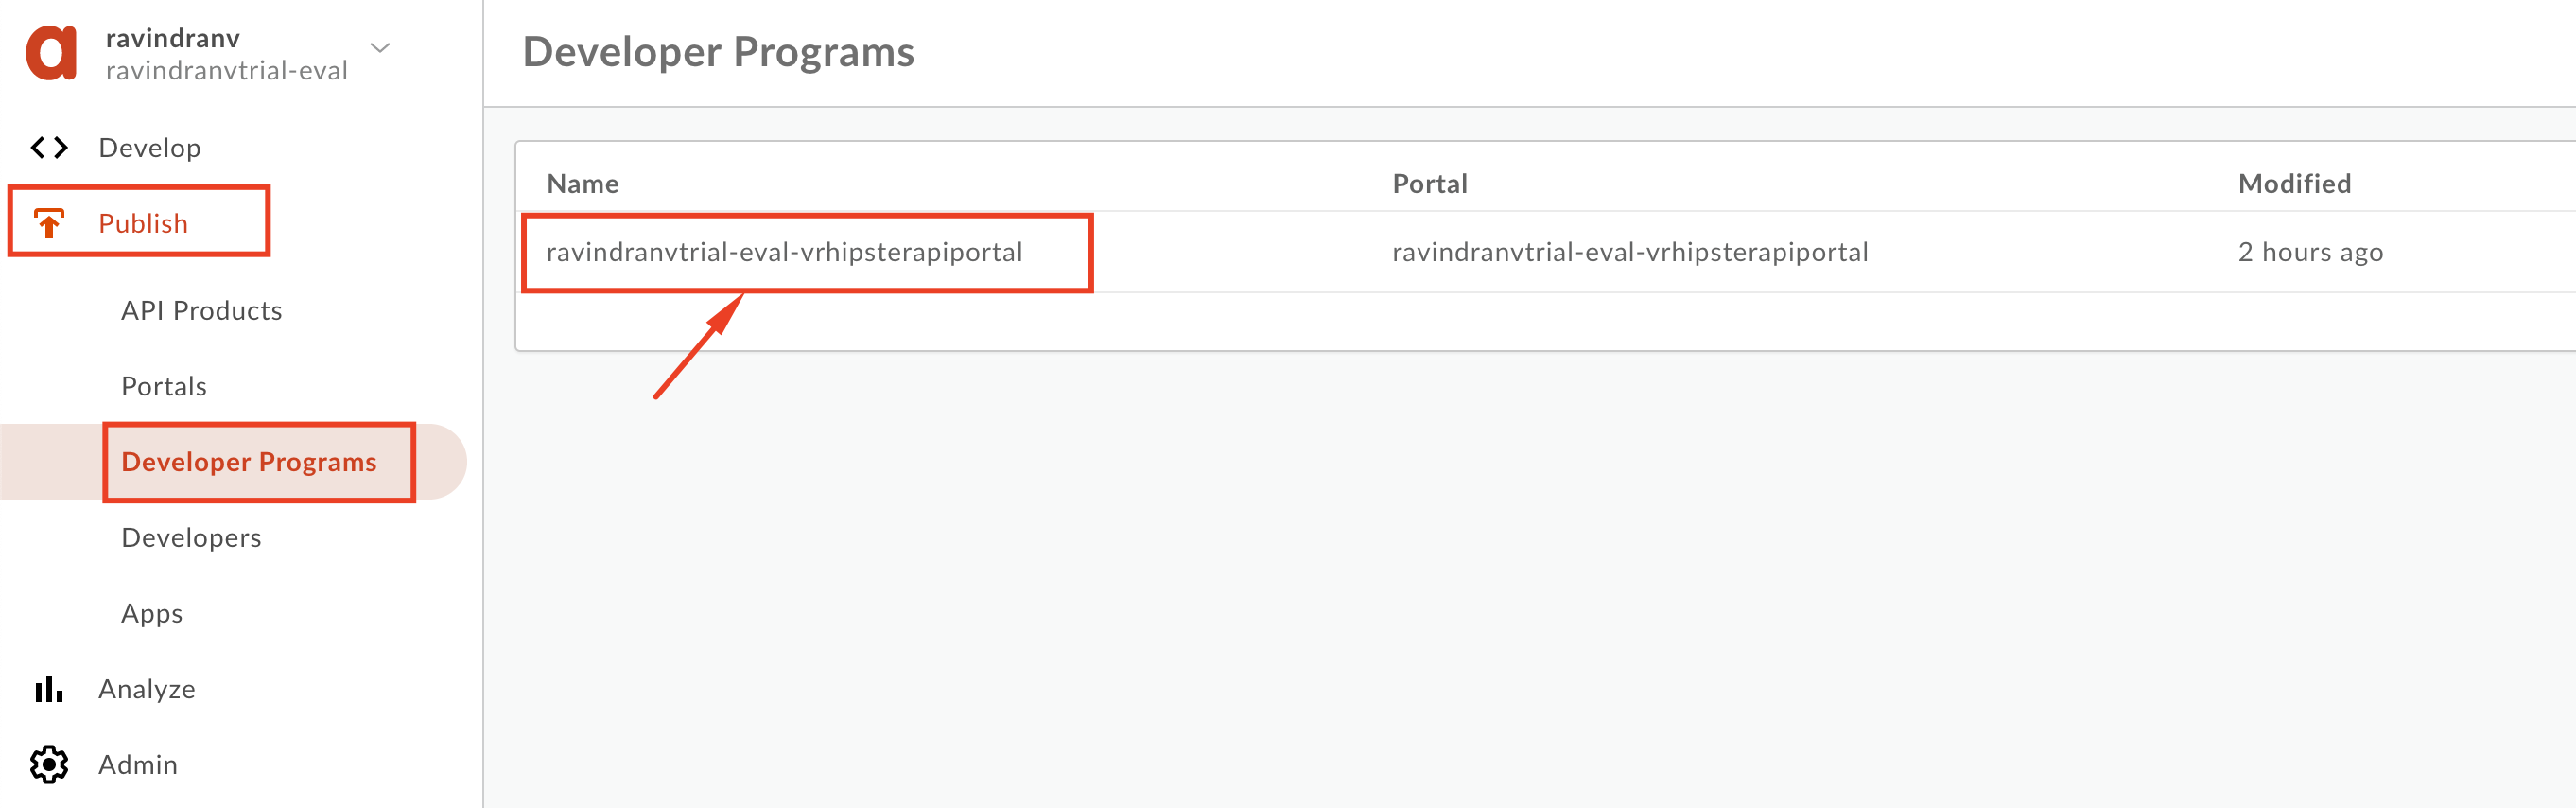
To utilize Teams and Audience Management features, you must first enroll into the Beta program within your Apigee Edge org. To do this, navigate to the Publish -> Developer Programs menu on the Management UI, and select the developer program associated with your Integrated Developer Portal.
-
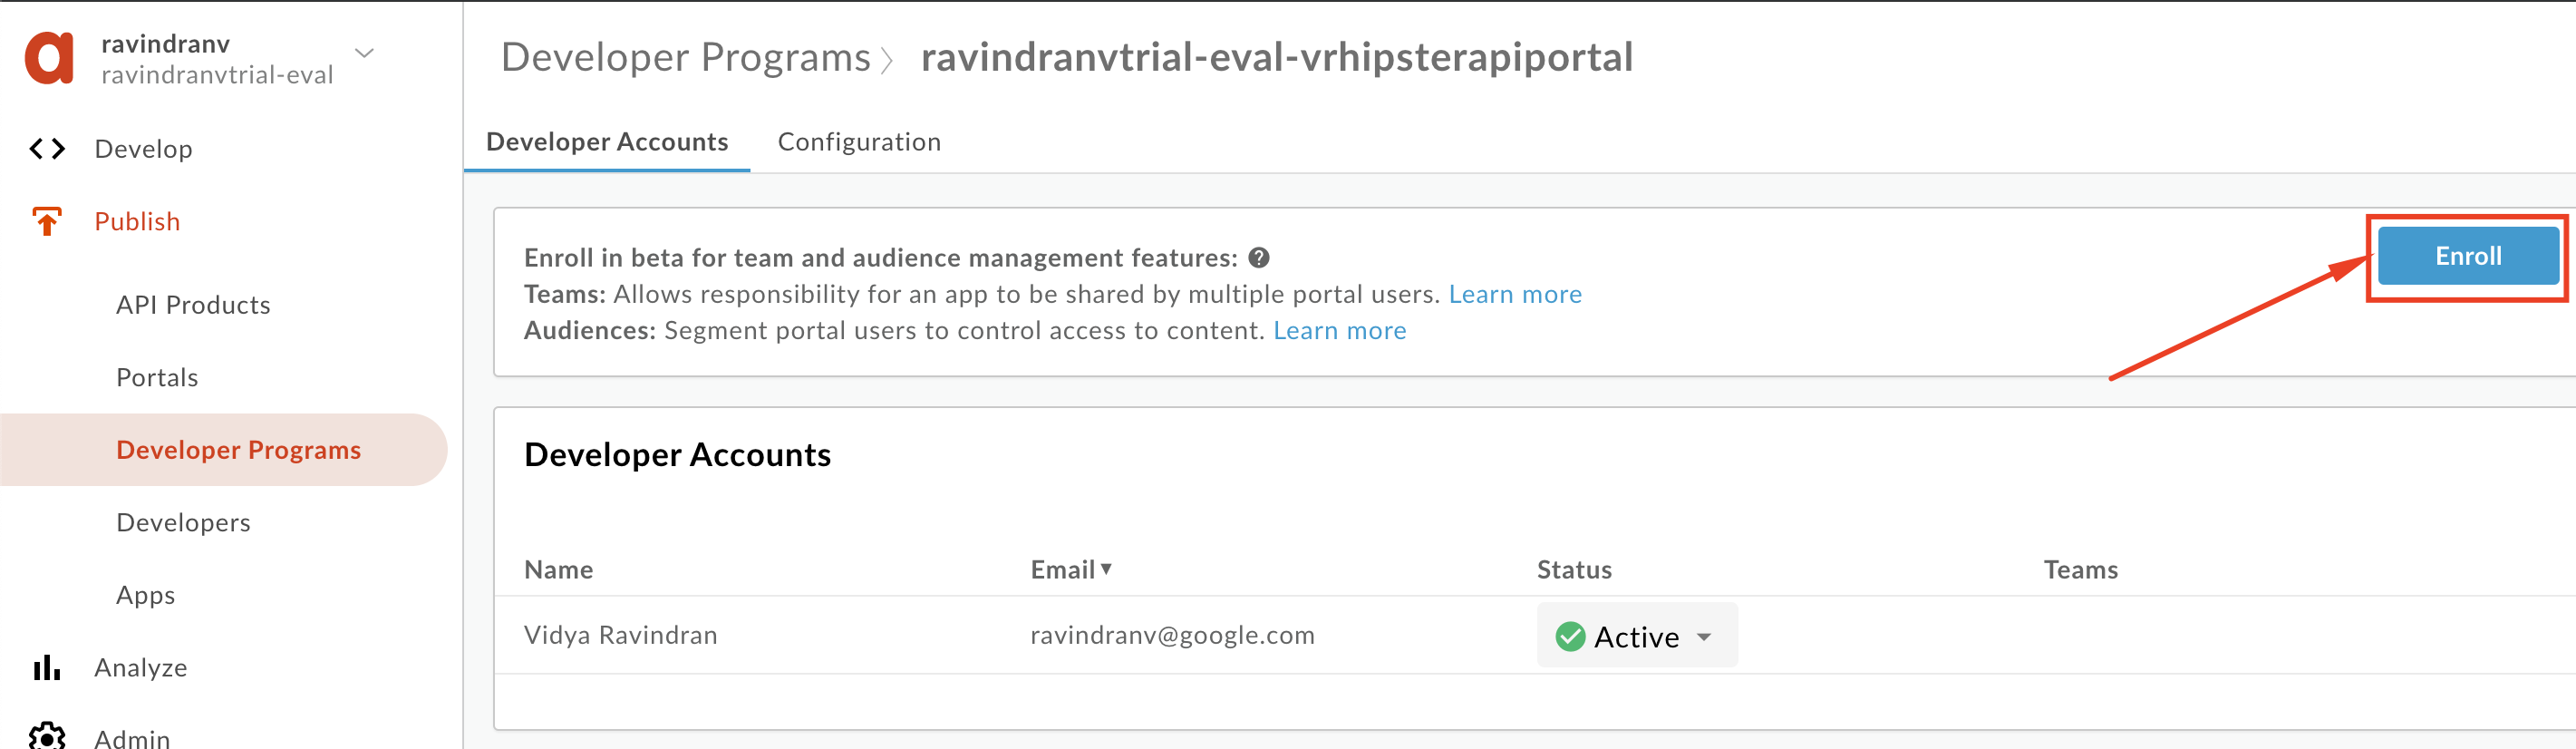
Click the Enroll button to “Enroll in beta for team and audience management”.
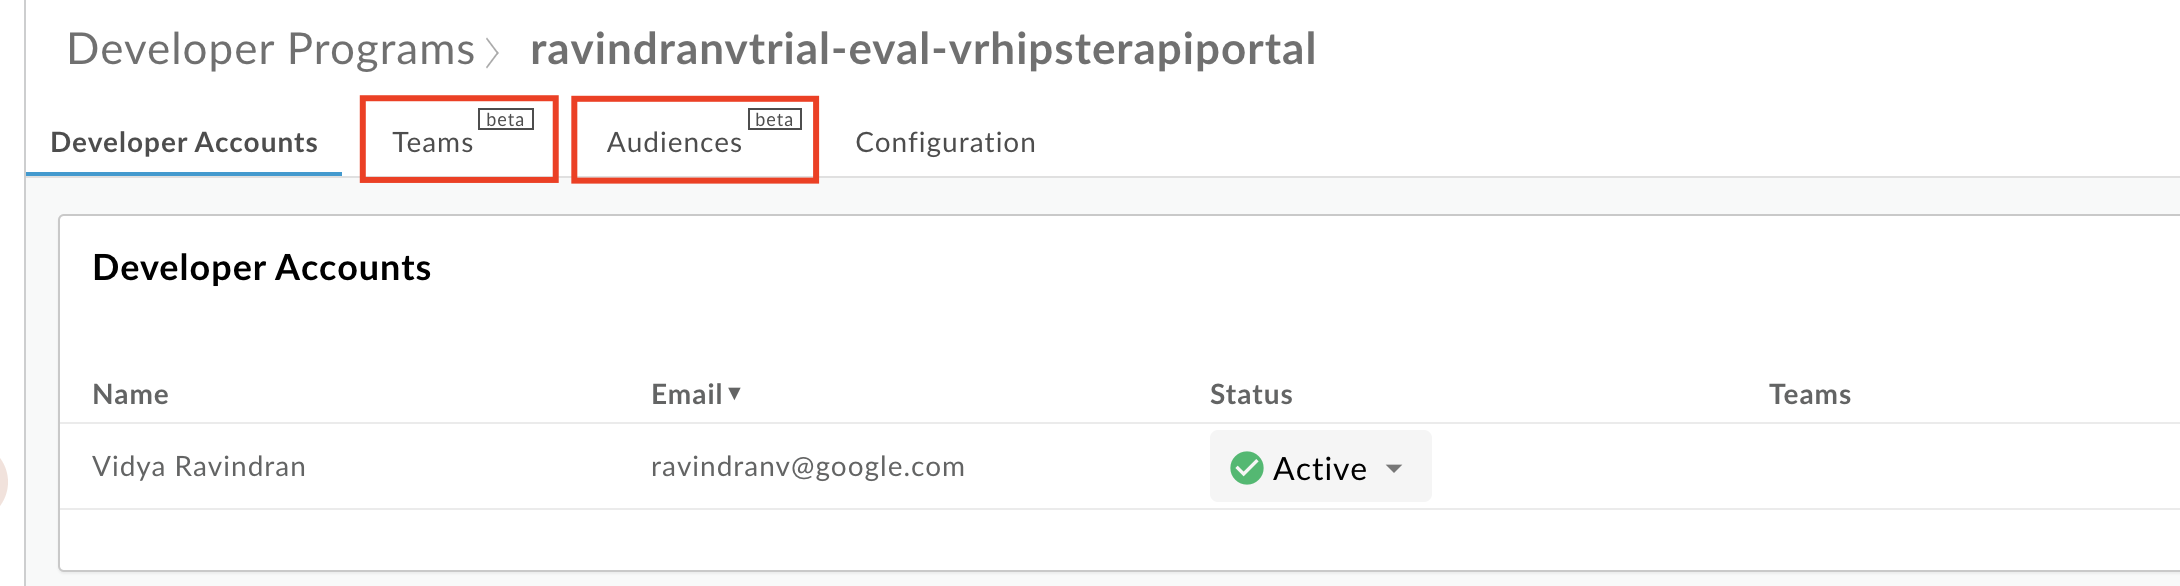
Once enrolled, you will see the Teams and Audience Management features enabled within your Developer Program.
Create Developer Team
- Ensure that you are logged into the Developer Portal with your App Developer credentials. Navigate to the Teams menu from your account drop-down.
- Click the + New Team button.

-
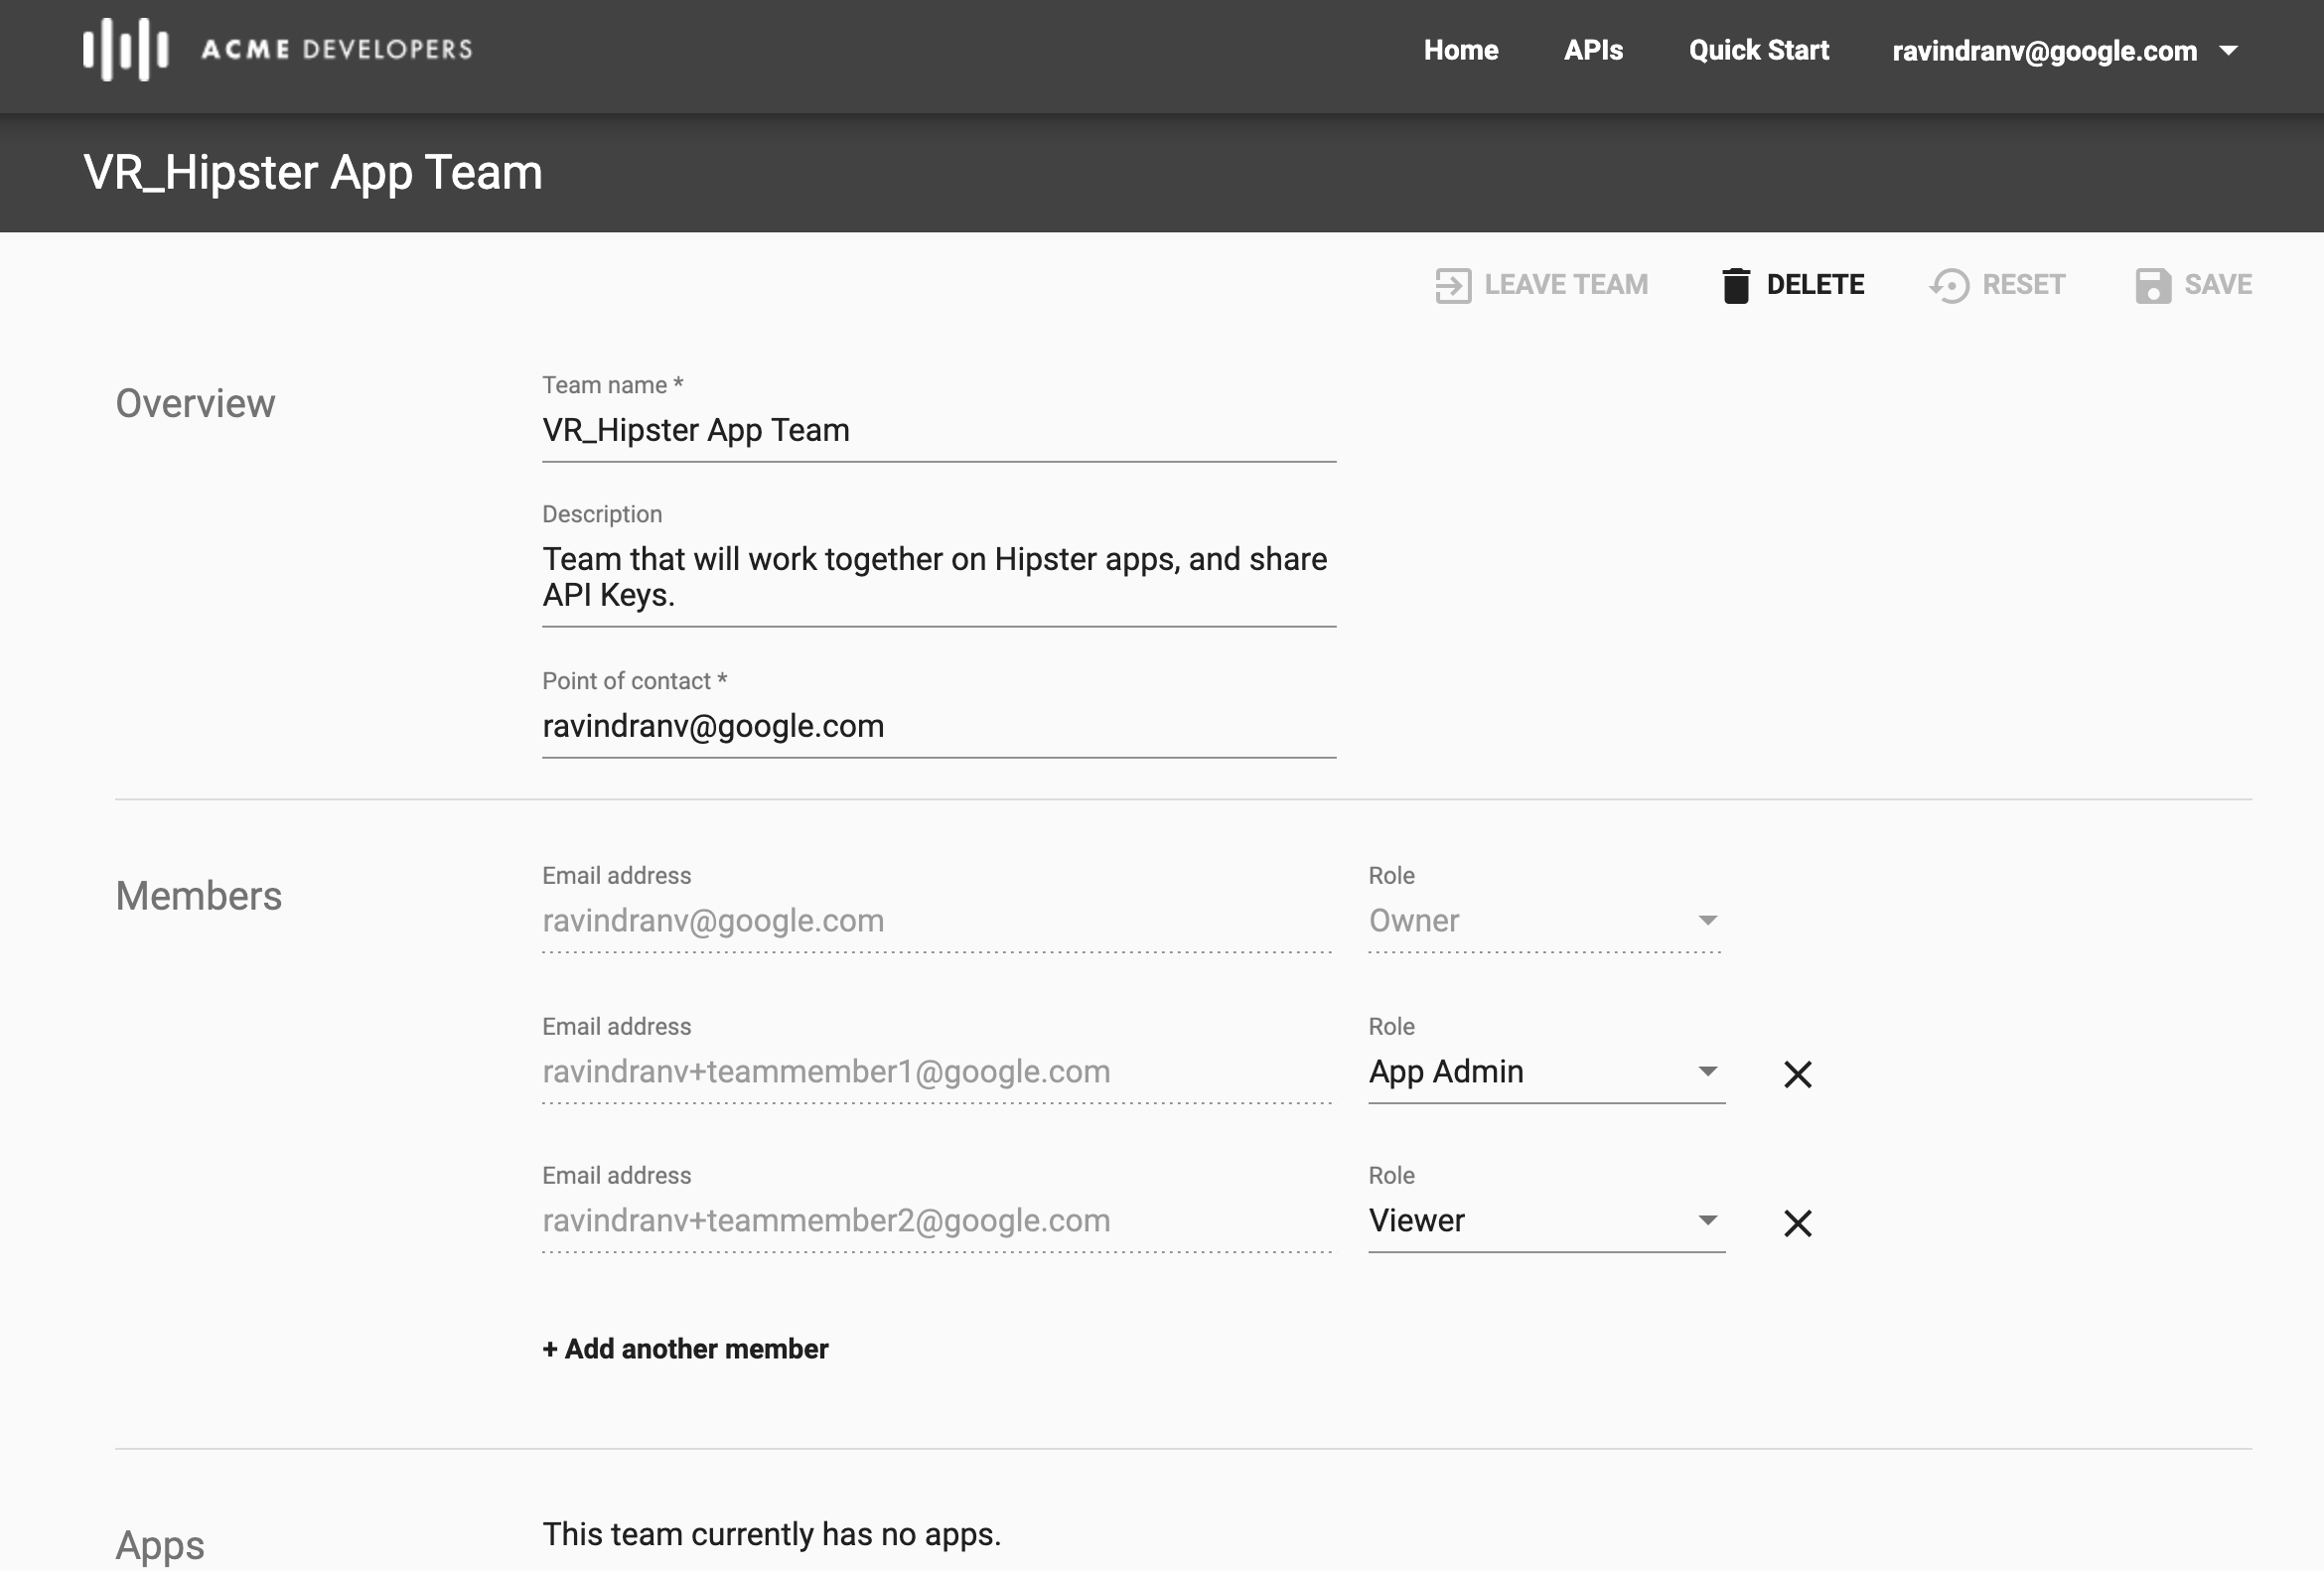
Fill in team details and click Create.
Overview section:
- Team name:
_Hipster App Team - Description:
Team that will work together on Hipster apps, and share API Keys. - Point of contact:
{your App Developer email address}
Memebers:
 Your App Developer email ID has already been added to the team with 'Owner' role.
 If required, you can add additional Developers with different roles.
- Team name:
-
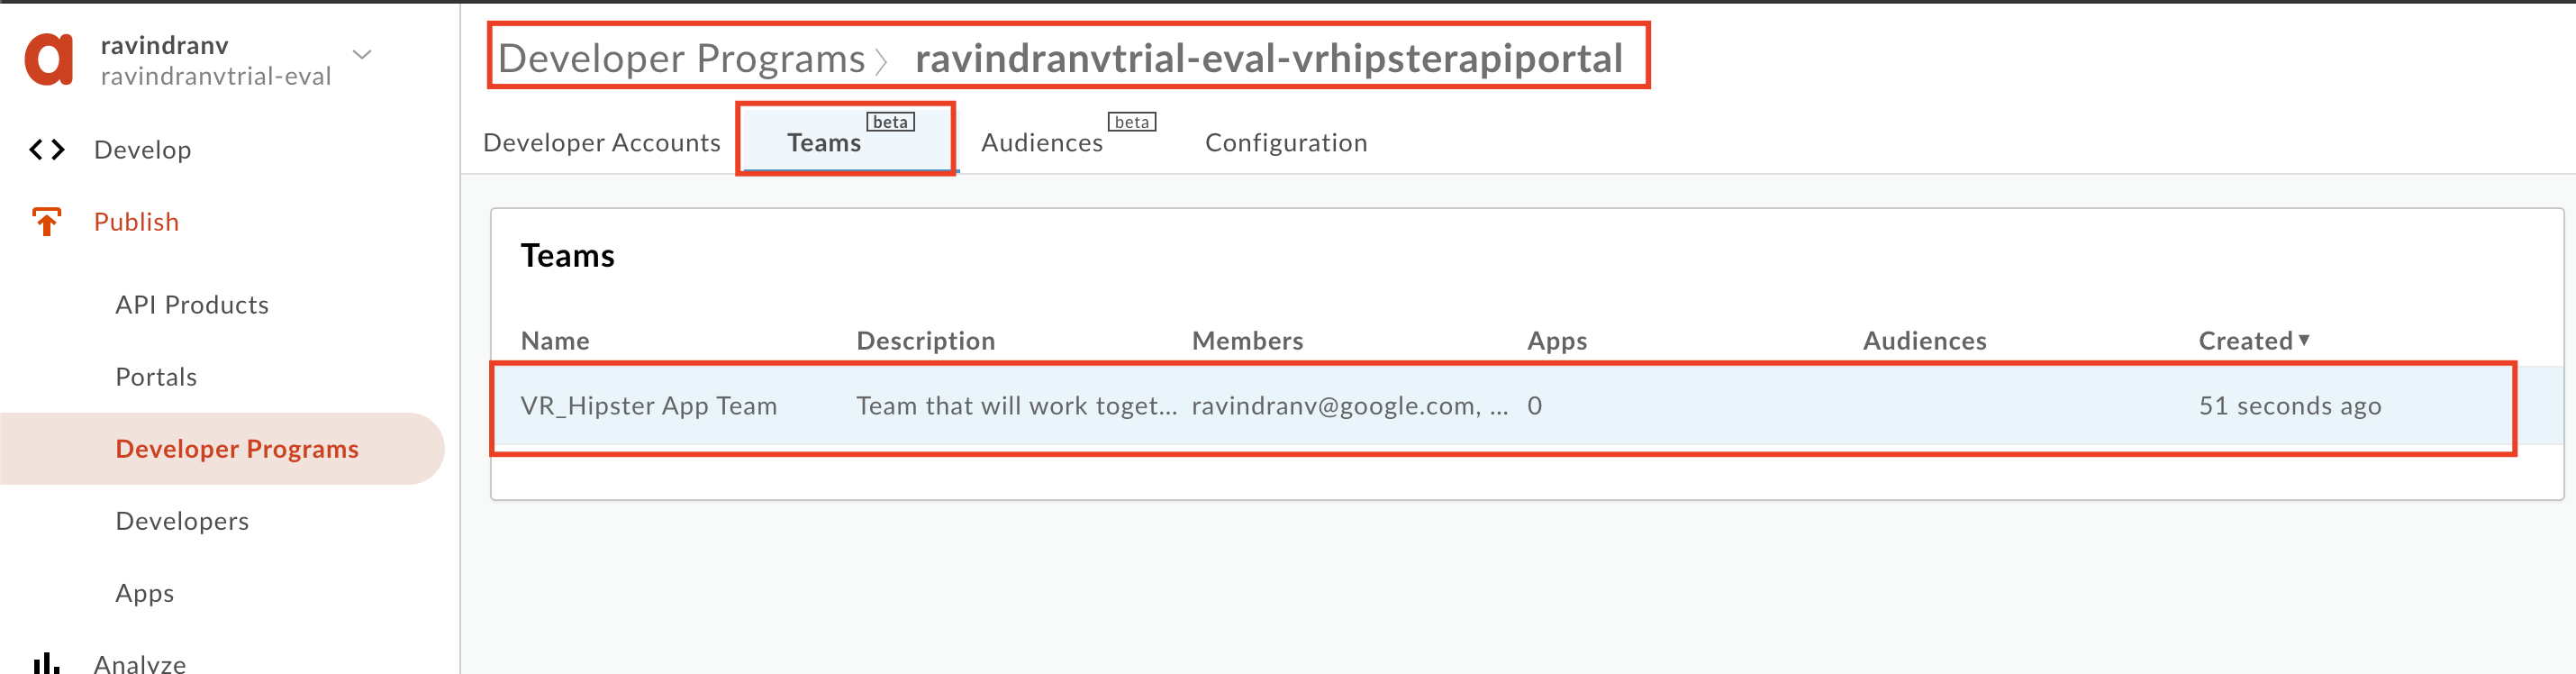
Once created, you will be able to access this team as a team member from the Developer Portal, and as an API producer, you can view teams created on the Developer Program within the Apigee Management UI as well.
Create Audience
We will now see how to publish API products on the Developer Portal, with only certain audiences that have entitlement to view and subscribe to those products.
-
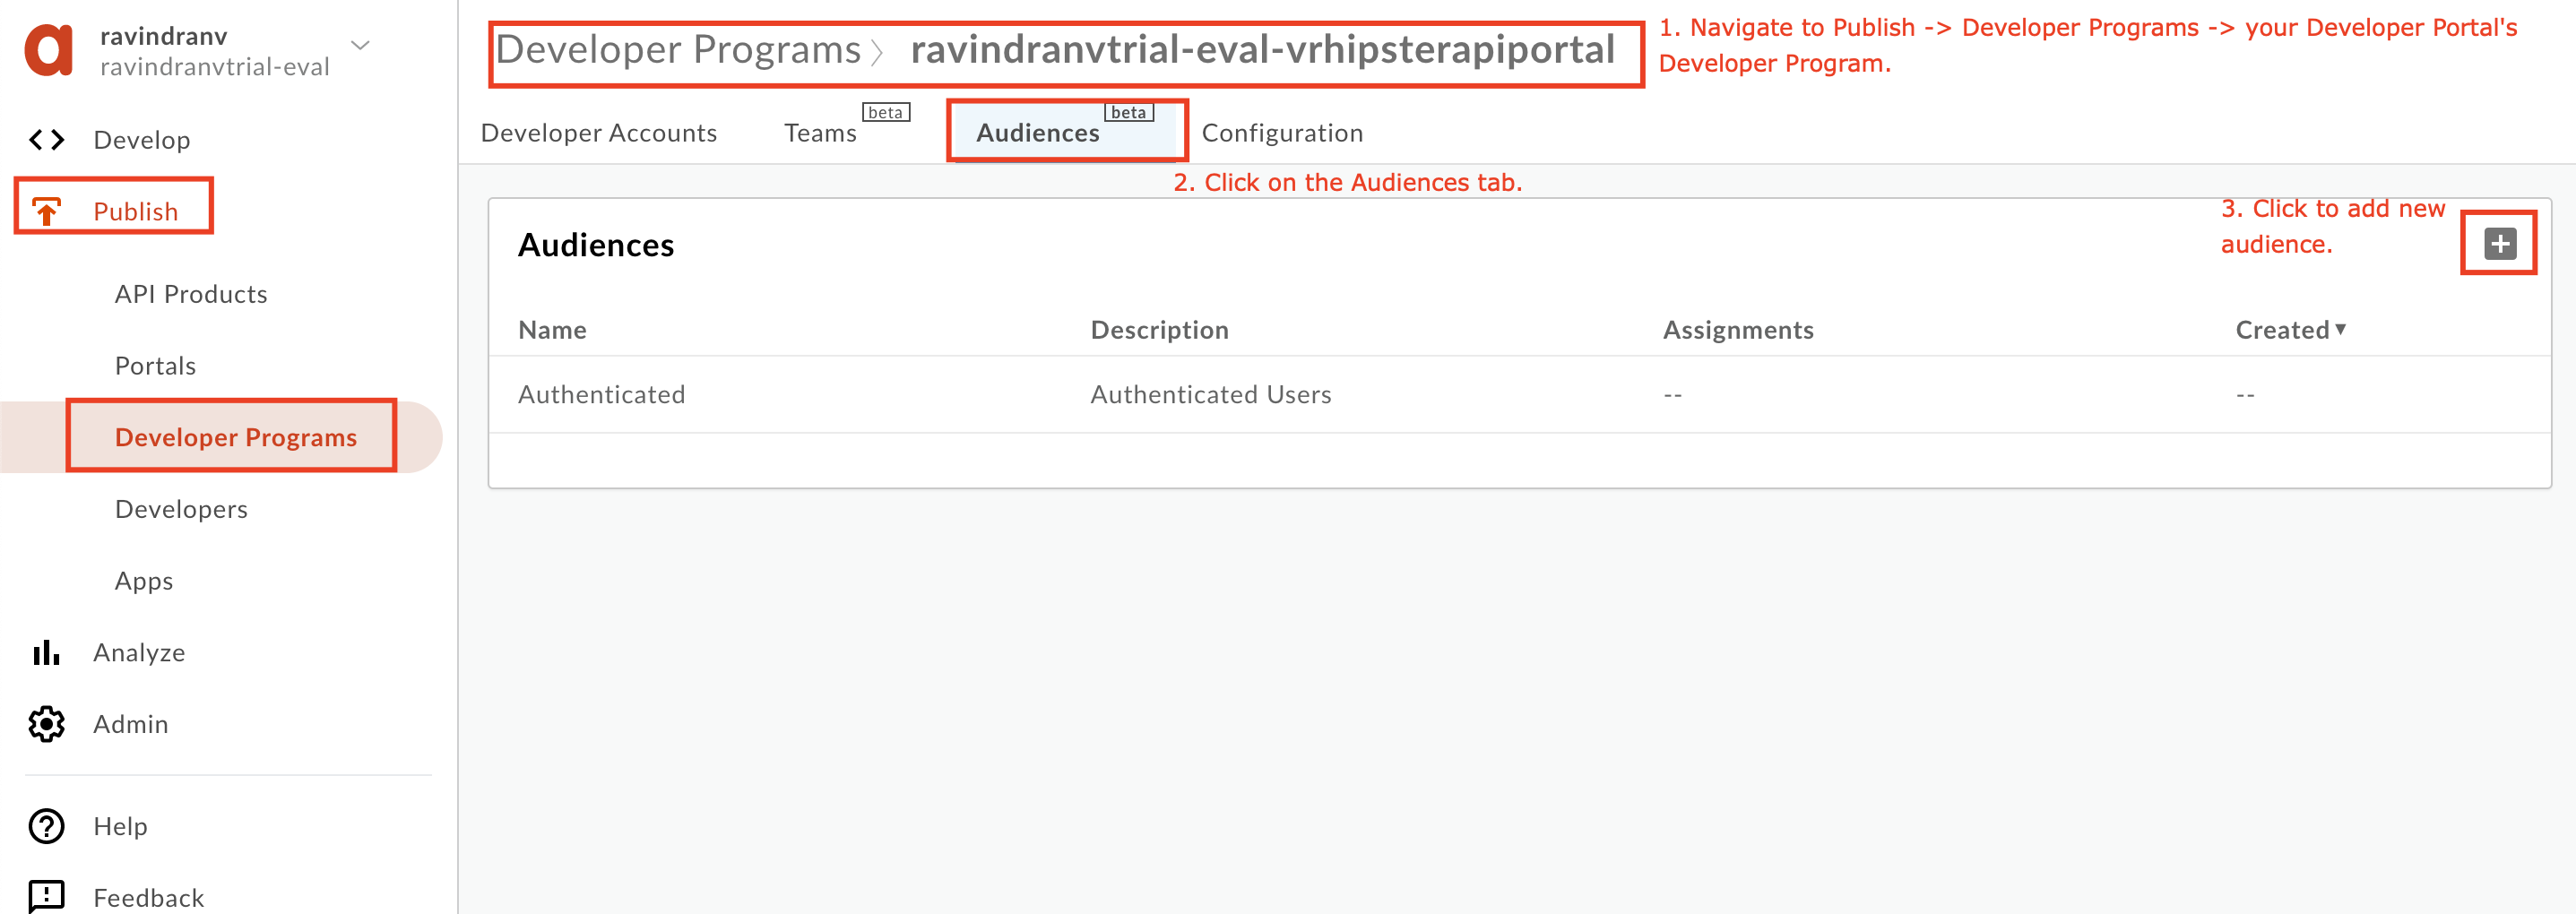
Navigate to Publish → Developer Programs → {the developer program associated to your Developer Portal}. Click the Audiences tab and click the ‘+’ button to add a new audience.
Enter the following details and click OK.
Name:
Hipster-API-Privileged-AudienceDescription:A privileged audience that is allowed access to the Hispter API Silver and Gold products.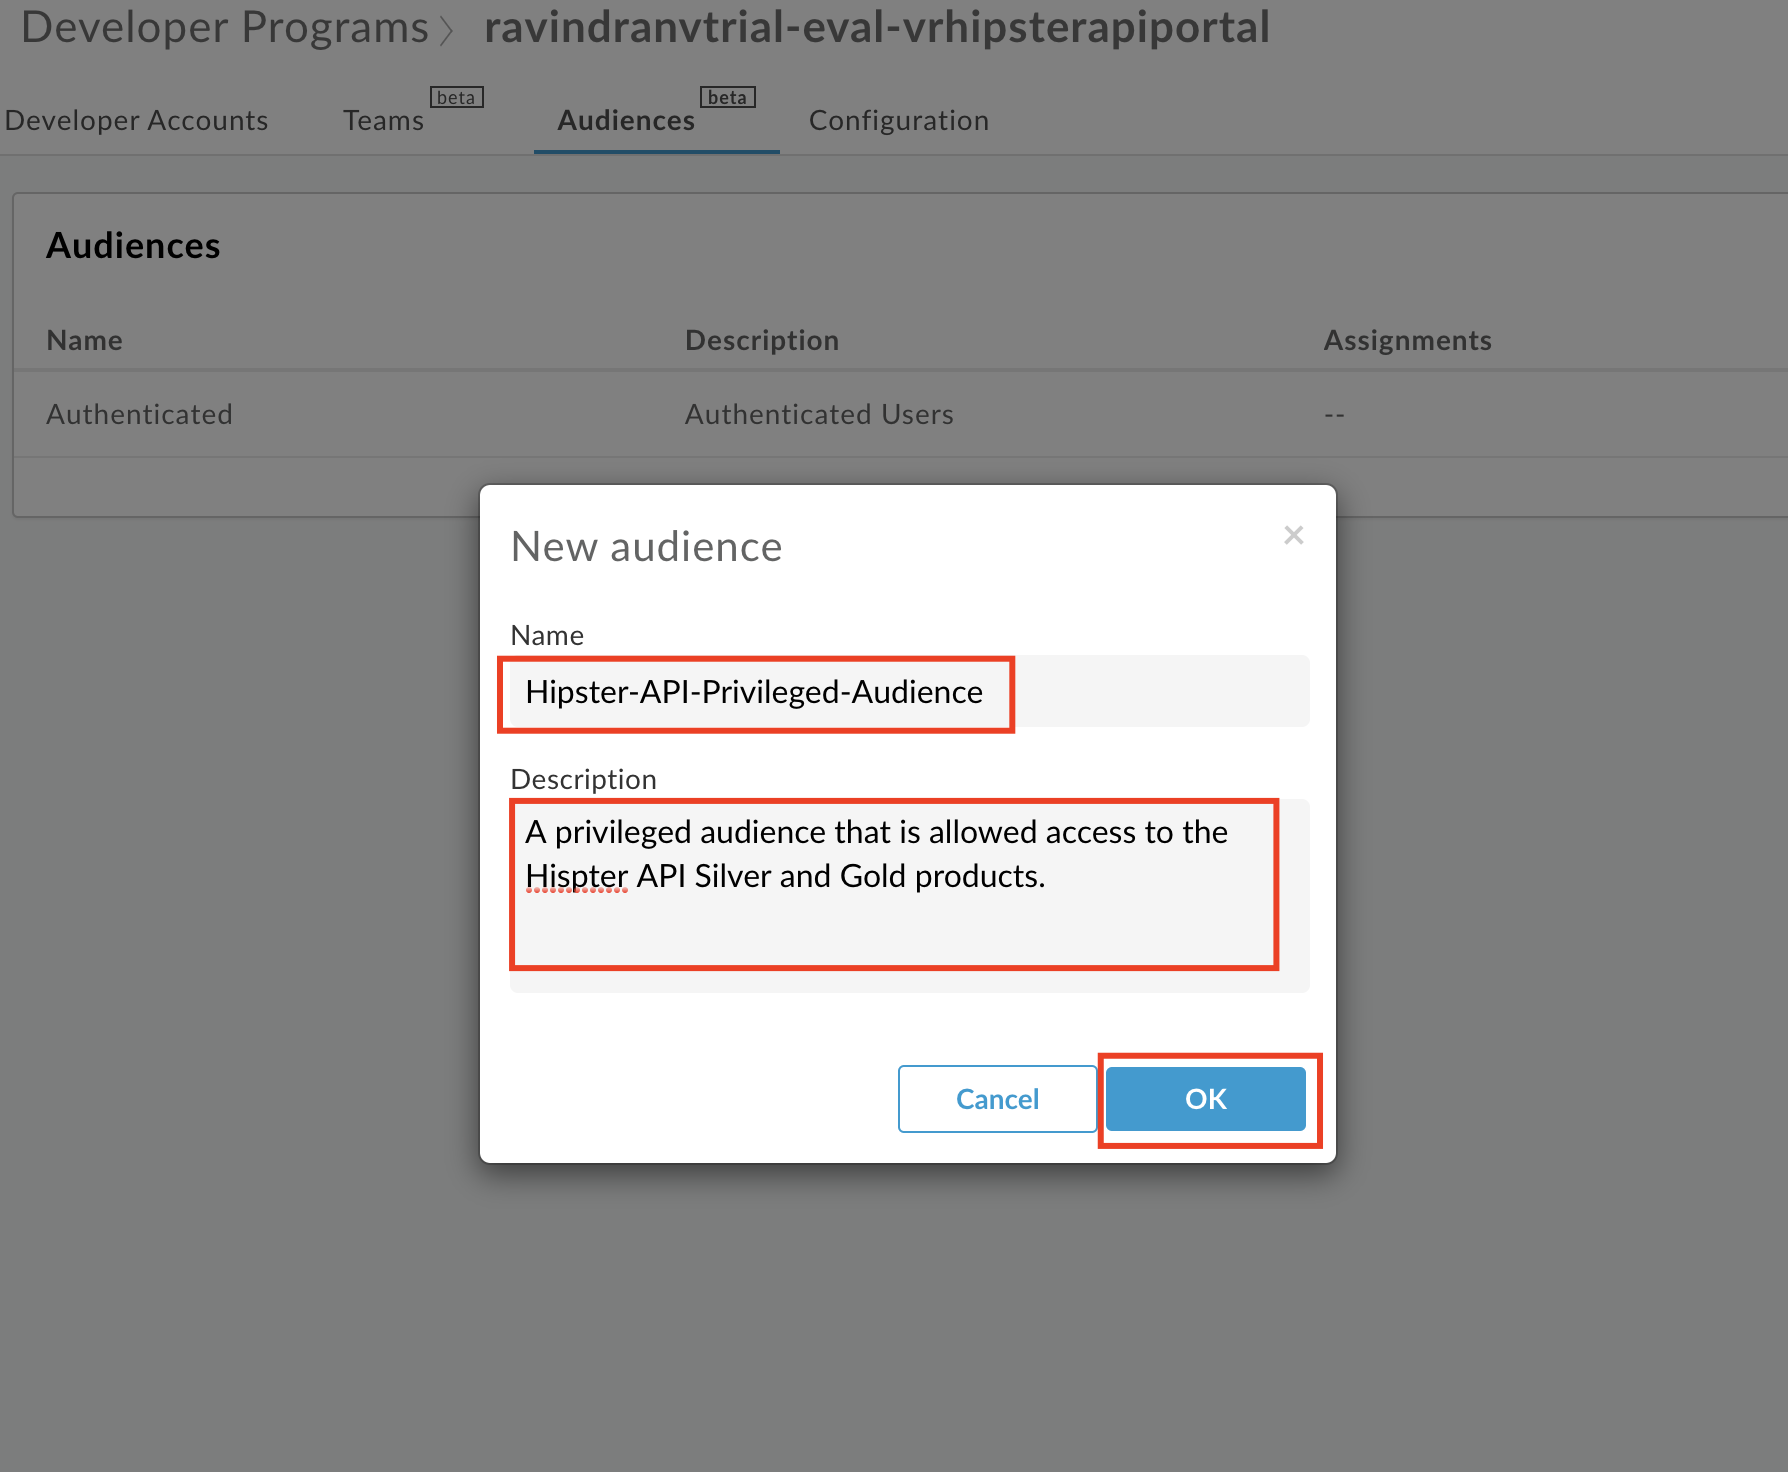
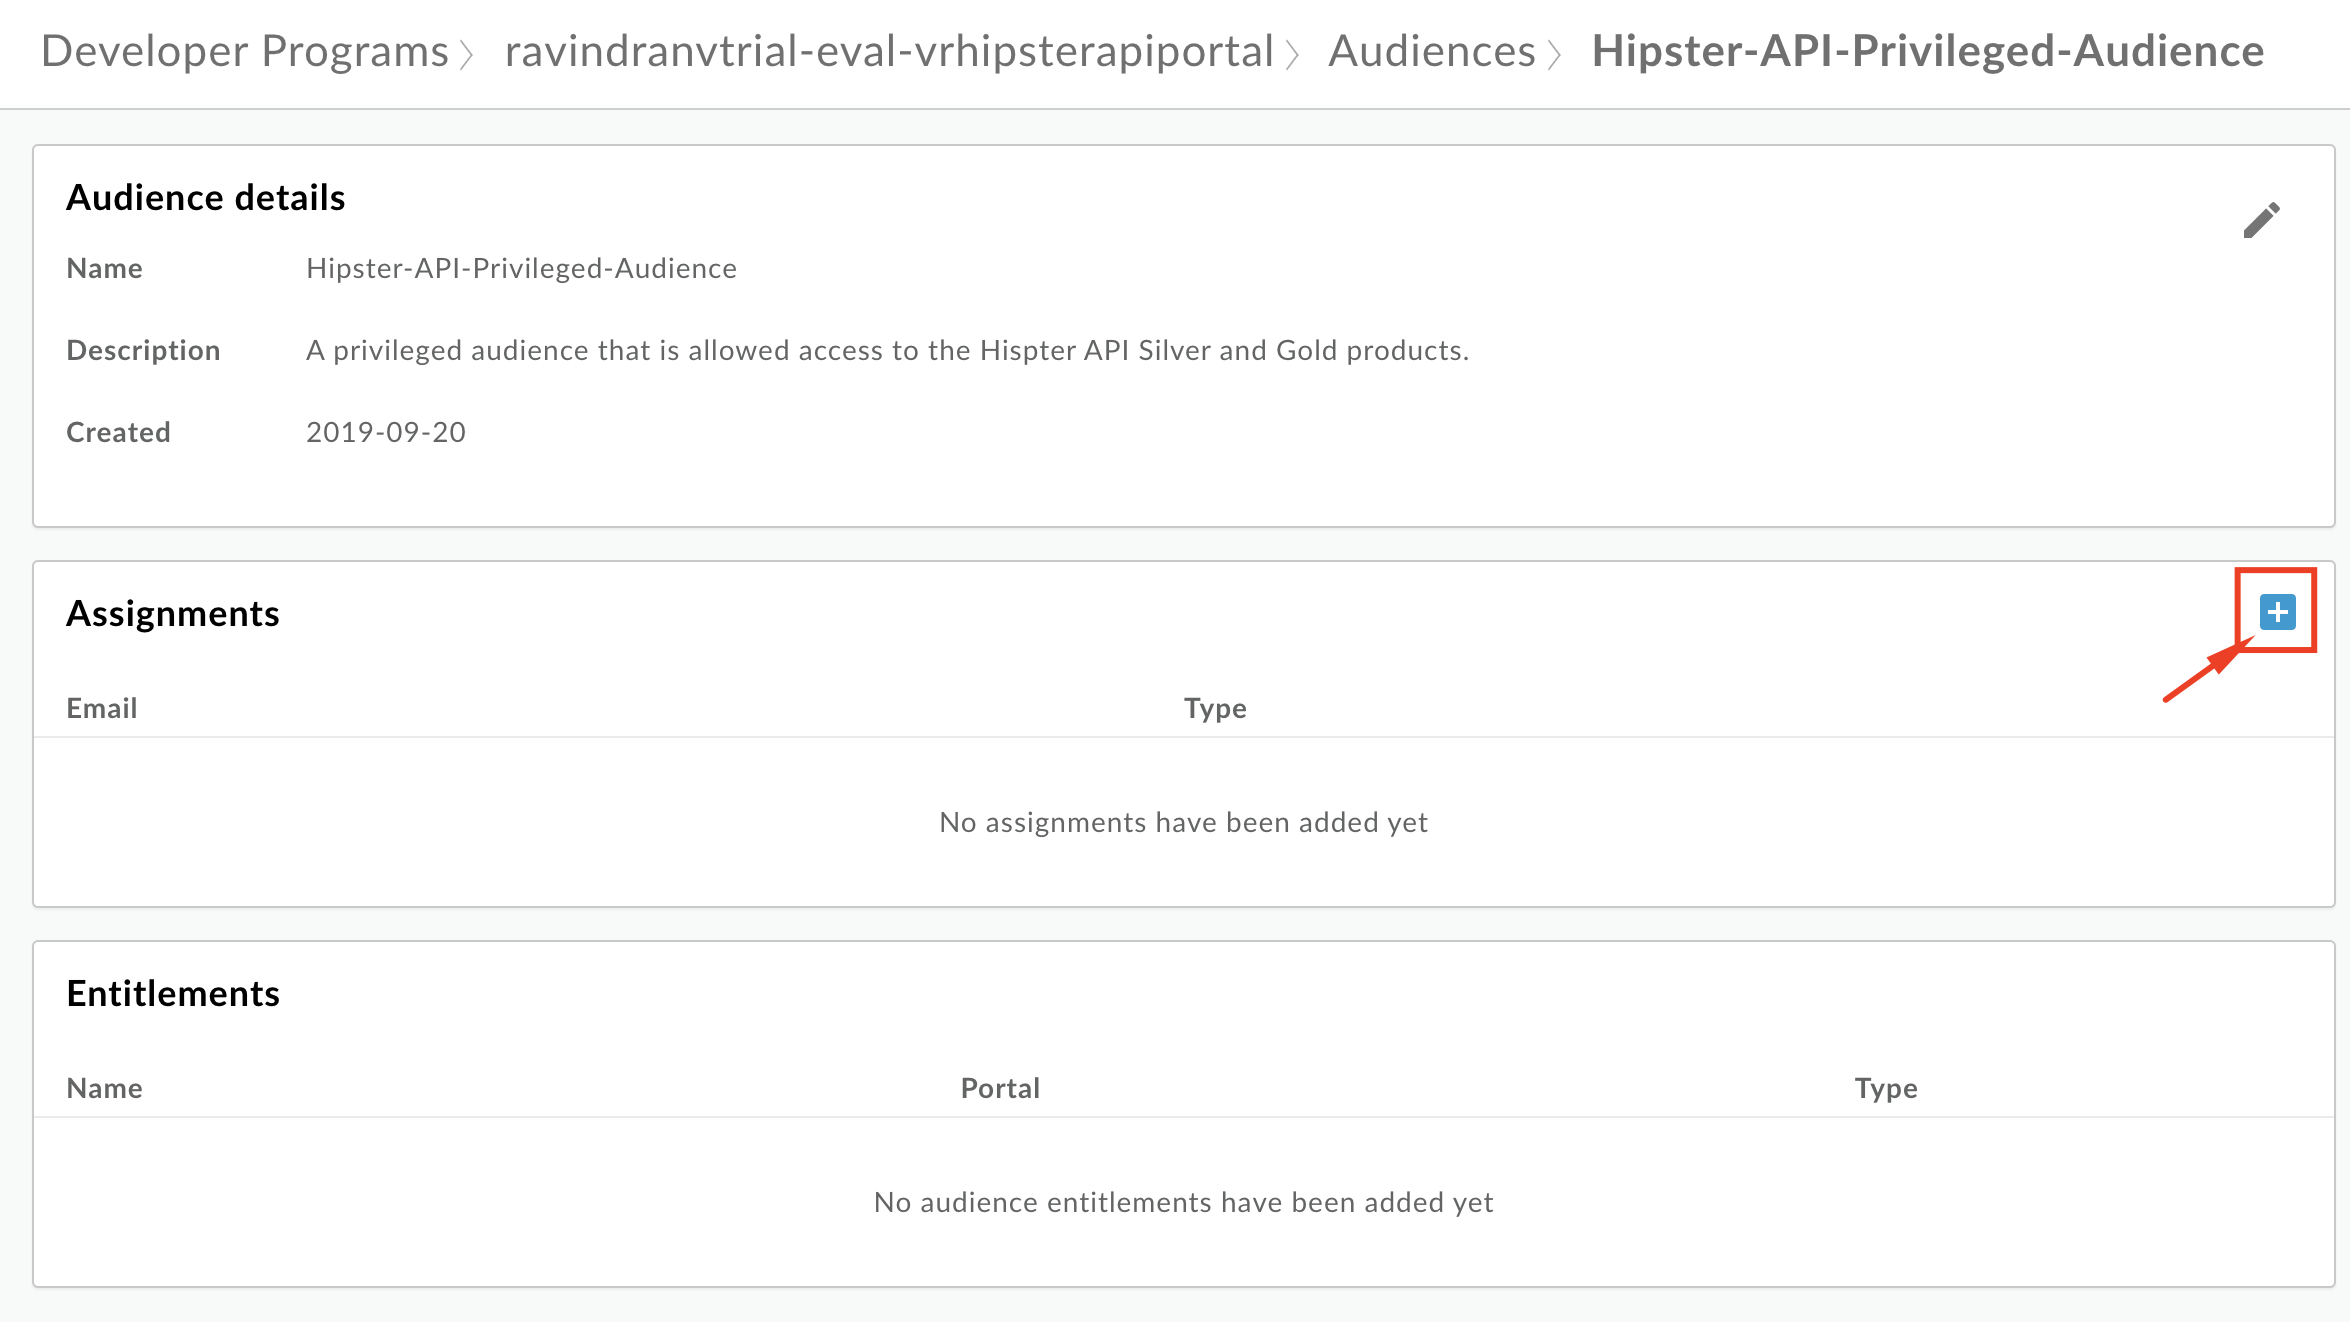
-
Once the Audience is created, you define who should be assigned to it. To do this, click the + button in the Assignments section of the Audience.
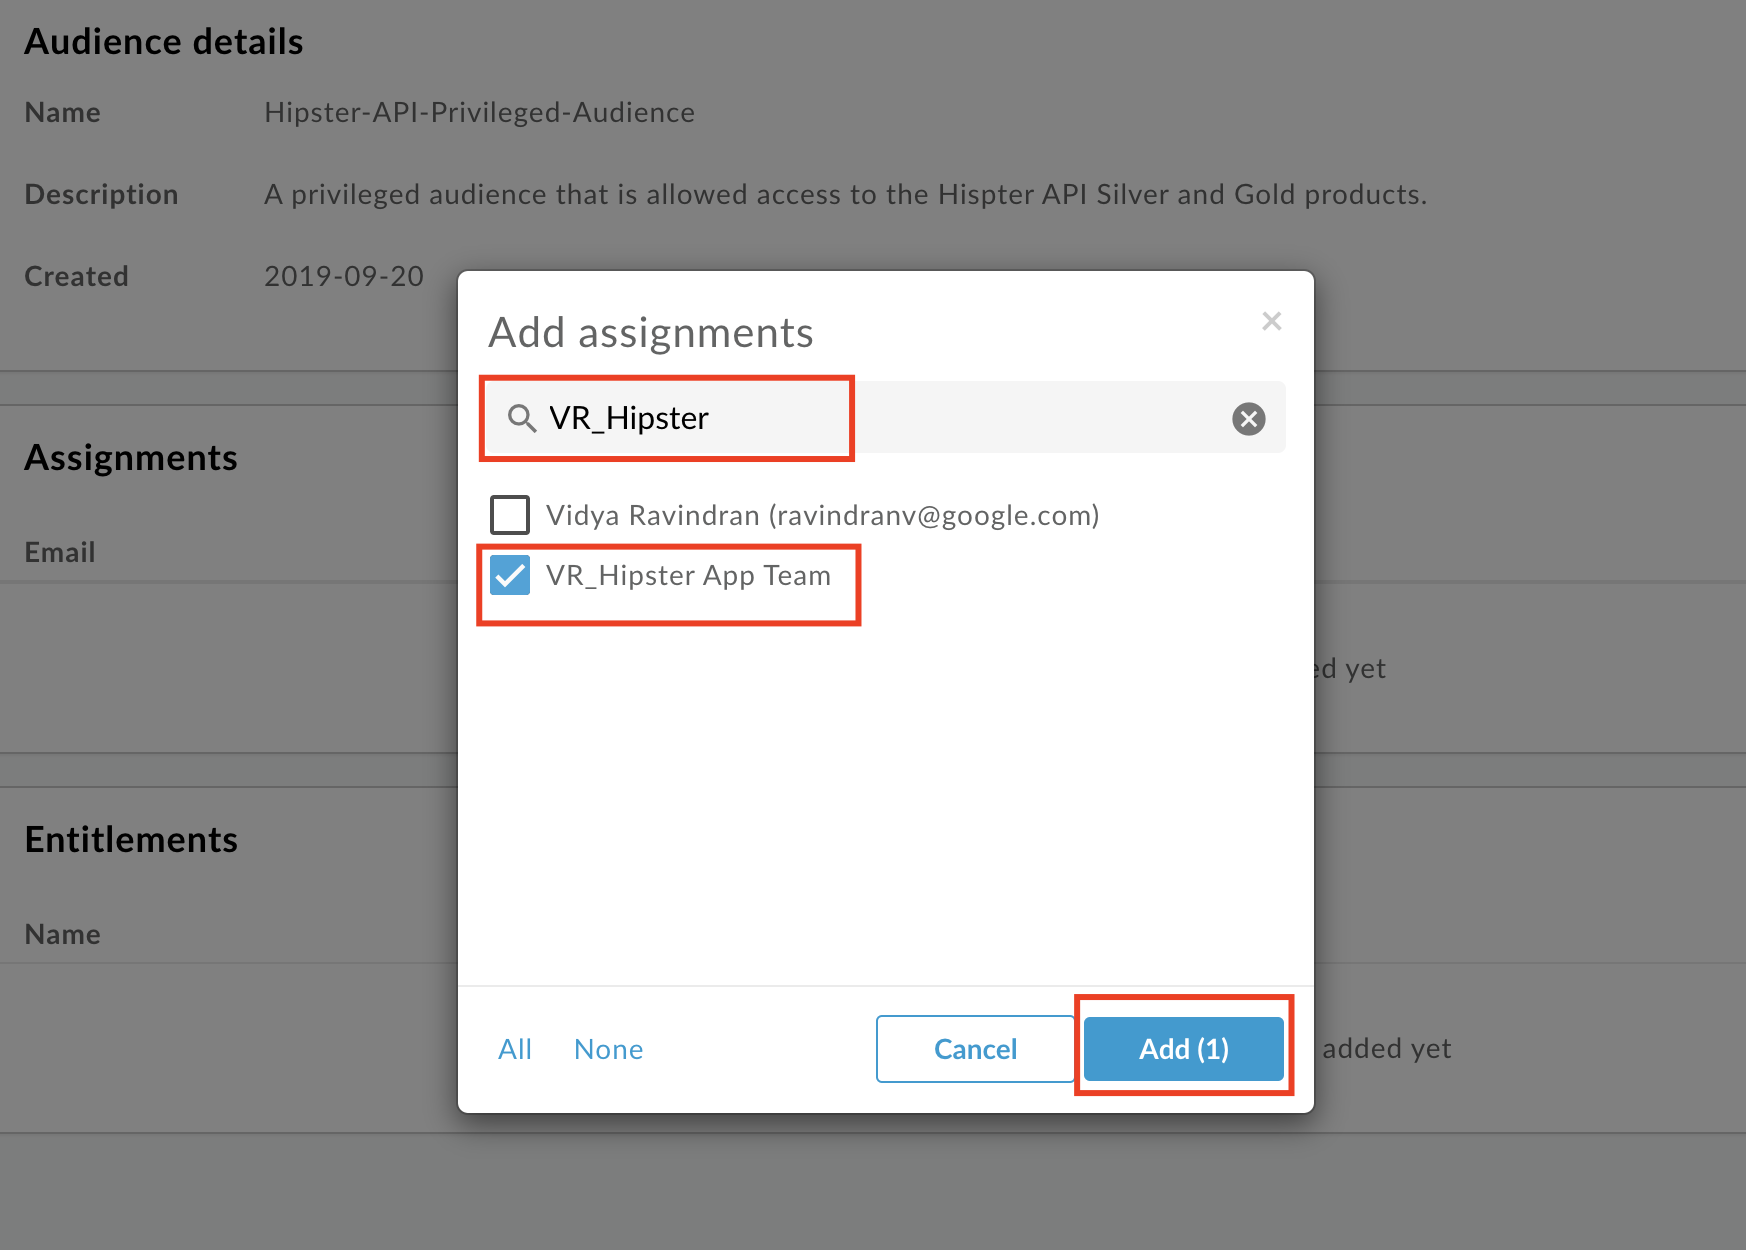
In the popup, type in the name of the team that you previously created. Select the team and click Add(1).
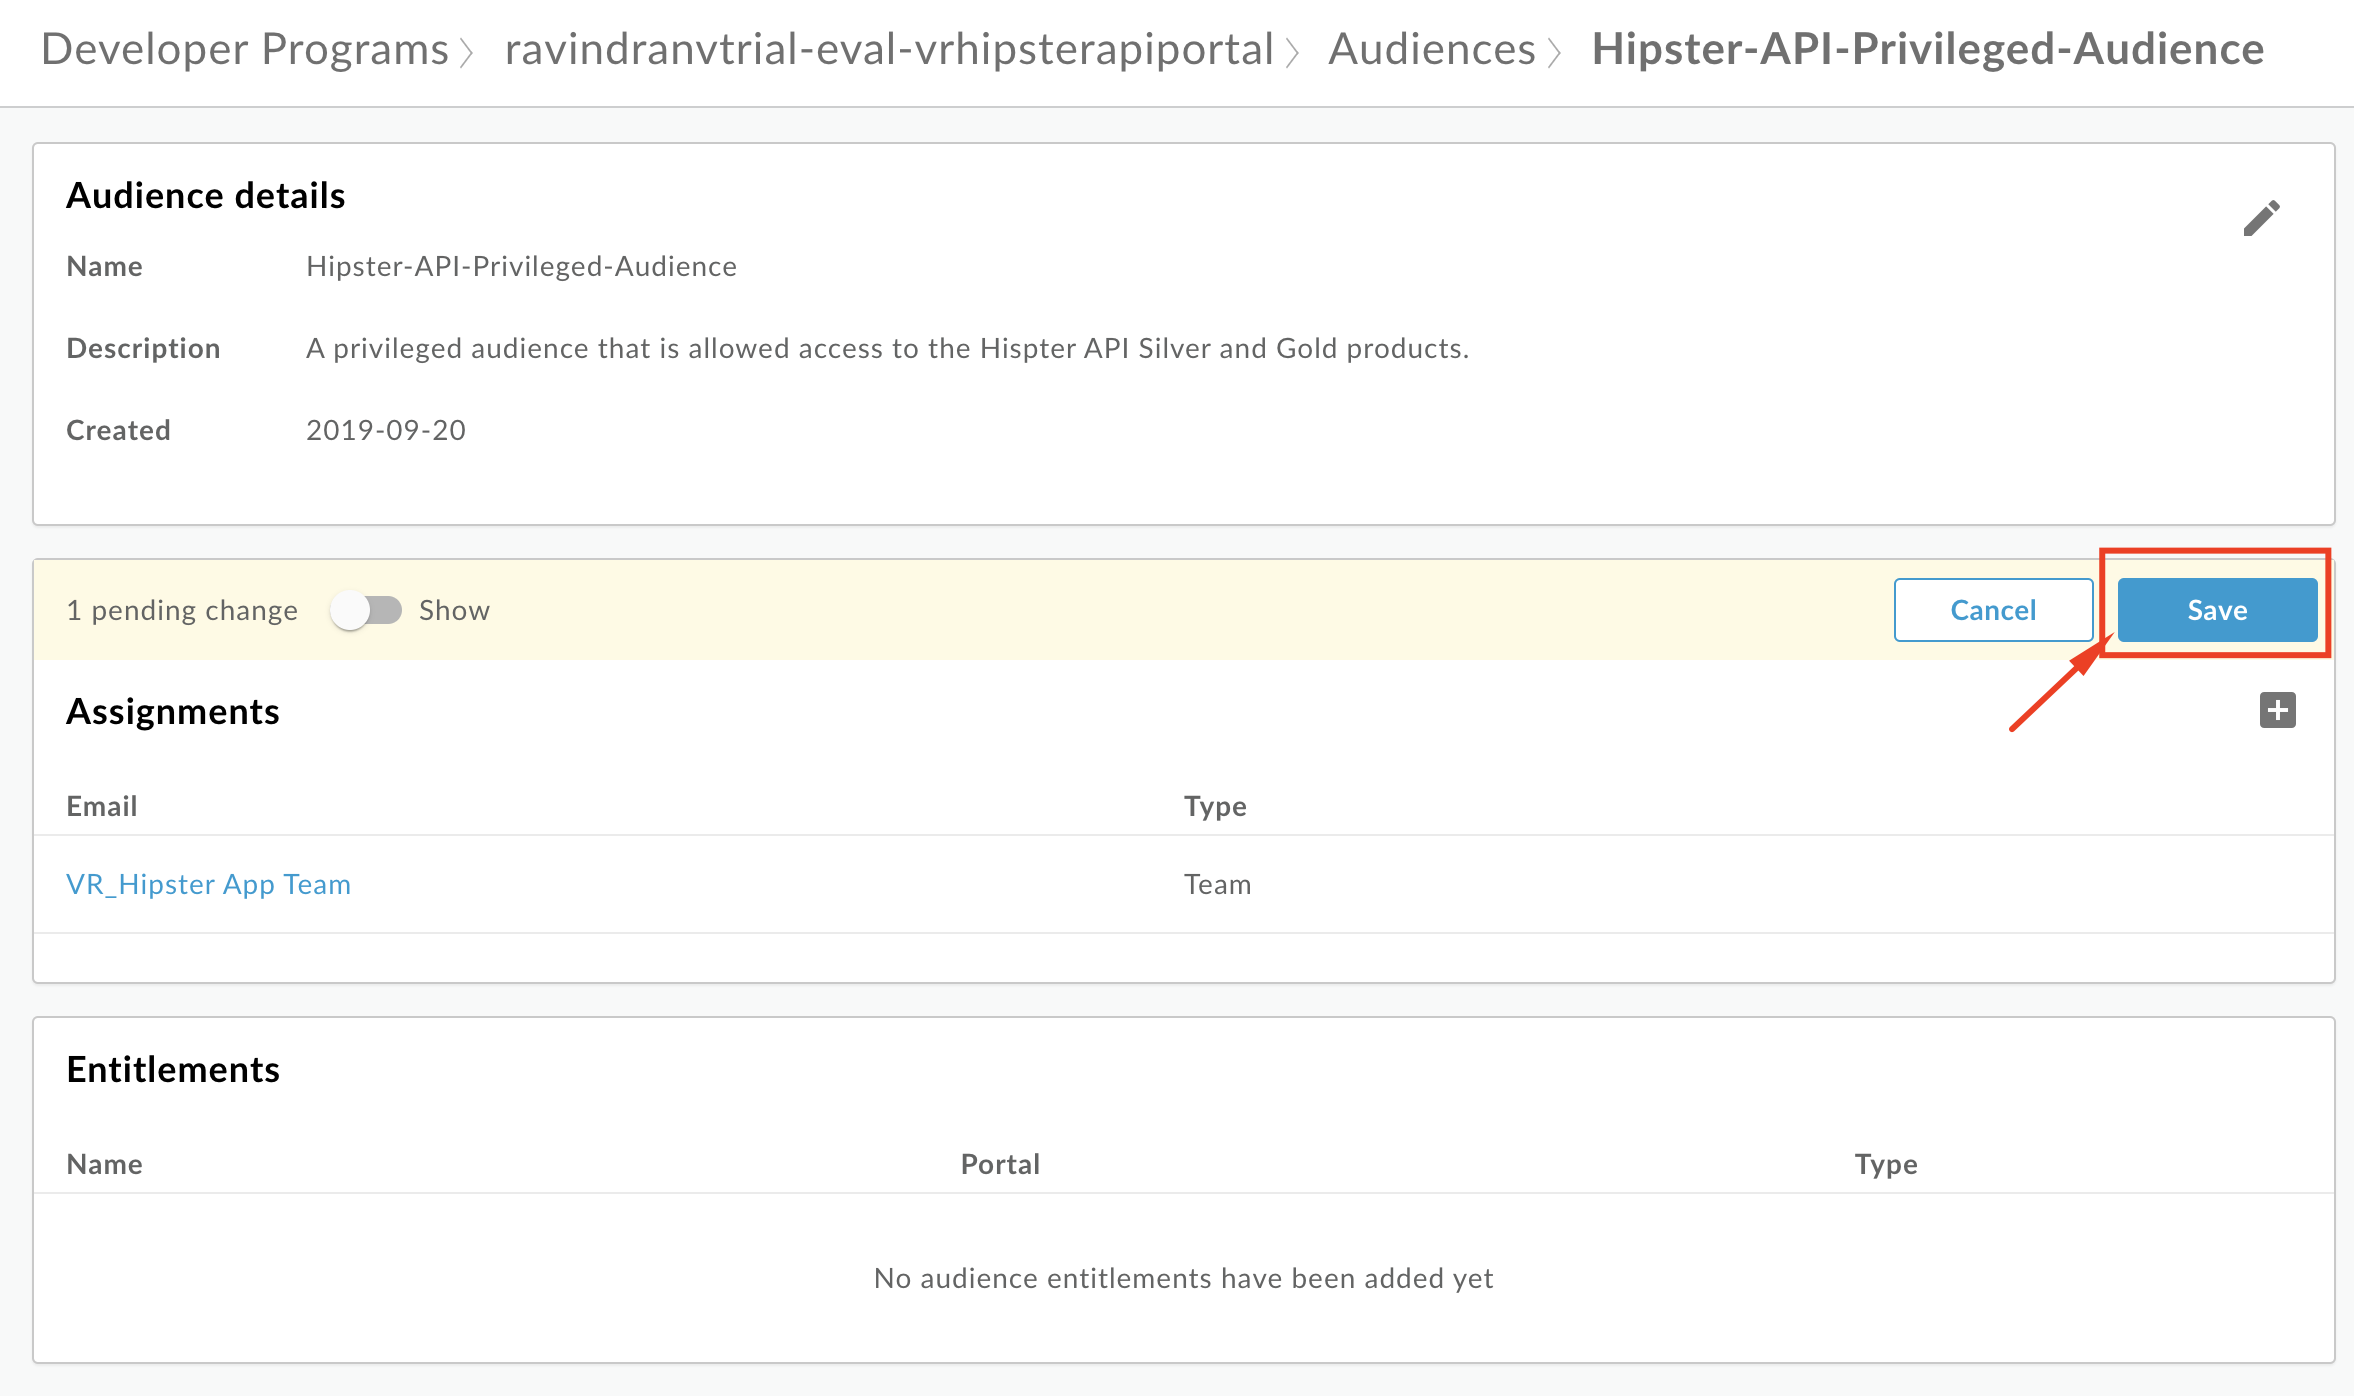
Click Save to save the audience assignment.
Publish Silver API Products with New Audience Entitlements
- Navigate to Publish → Portals → → API catalog and click the + button.
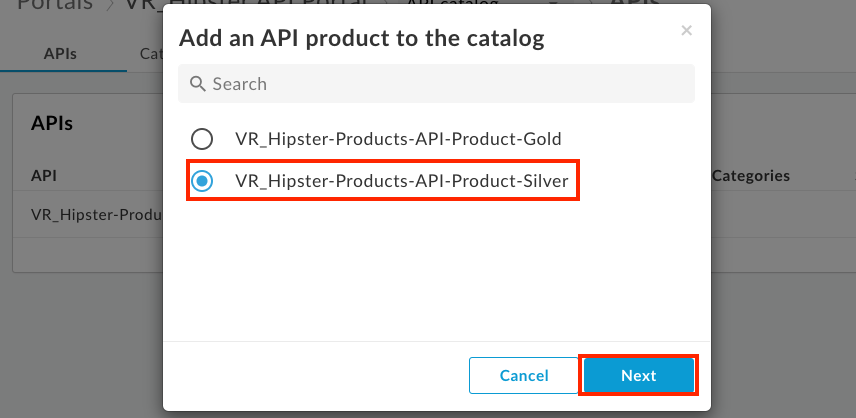
- Select the Silver API Product and click Next.
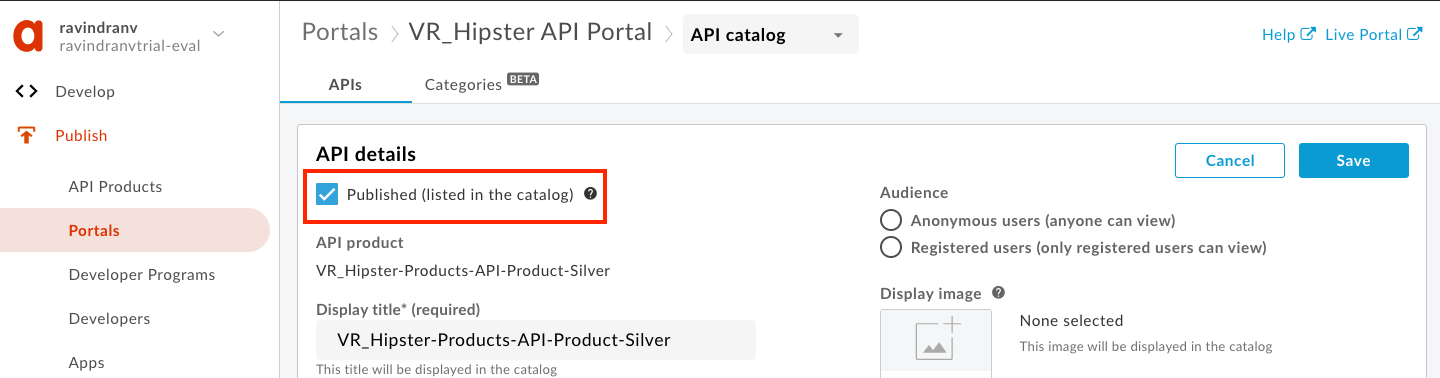
- Make sure that the Published checkbox is checked, so that the Silver API Product is visible to authorized App developers through the API catalog, during App creation.
- Click the Source API spec dropdown and select Choose a different spec….
- Select the recently updated OpenAPI Specification to use as a source. The current version (snapshot) of the selected OpenAPI Specification will be used to generate the documentation for this API product in the portal.
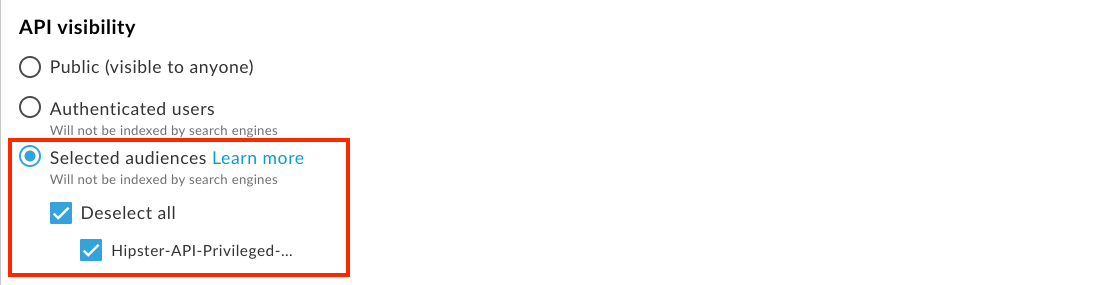
- Select the Selected audiences option in under API visibility, and check the box for the Audience you just created.
- Select the Image button to update the icon image associated with this API product.
- Then select Image URL and provide the following URL to import image.
Image URL: https://raw.githubusercontent.com/apigee/apijam/master/Module-1/Labs/Lab%204/media/HipsterAPIProductImage.png
- Click Save.
- Validate the API visibility setting for the Silver API Product.

Create Team App
-
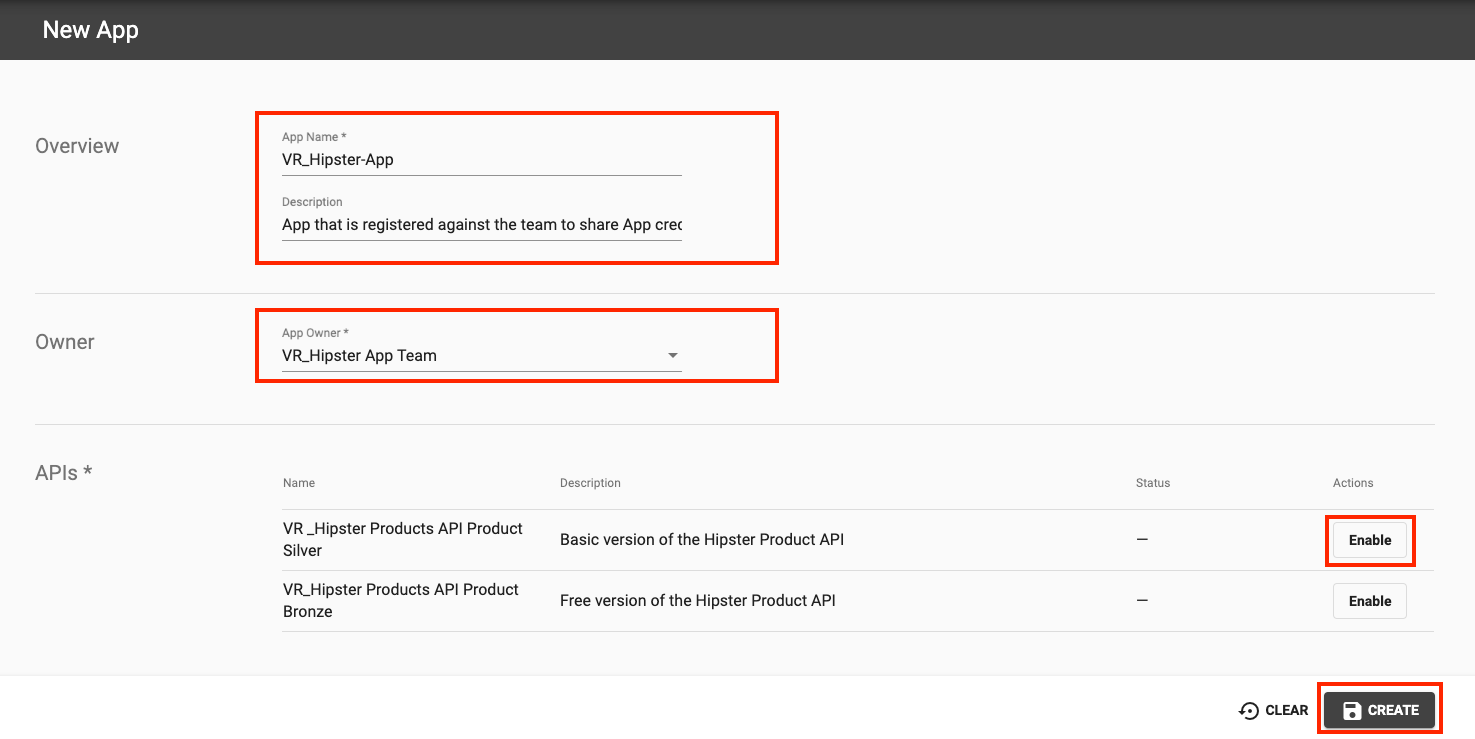
On the developer portal, navigate to the developer account drop down menu on the top right corner, and select the Apps link. Then click the New App button.
-
Enter the following App details and click Create: App Name:
_Hipster-AppDescription:App that is registered against the team to share App credentials and access Silver tier Hipster API product.Owner:_Hipster App TeamSelect the Silver (Basic) API Product that is available for subscription.
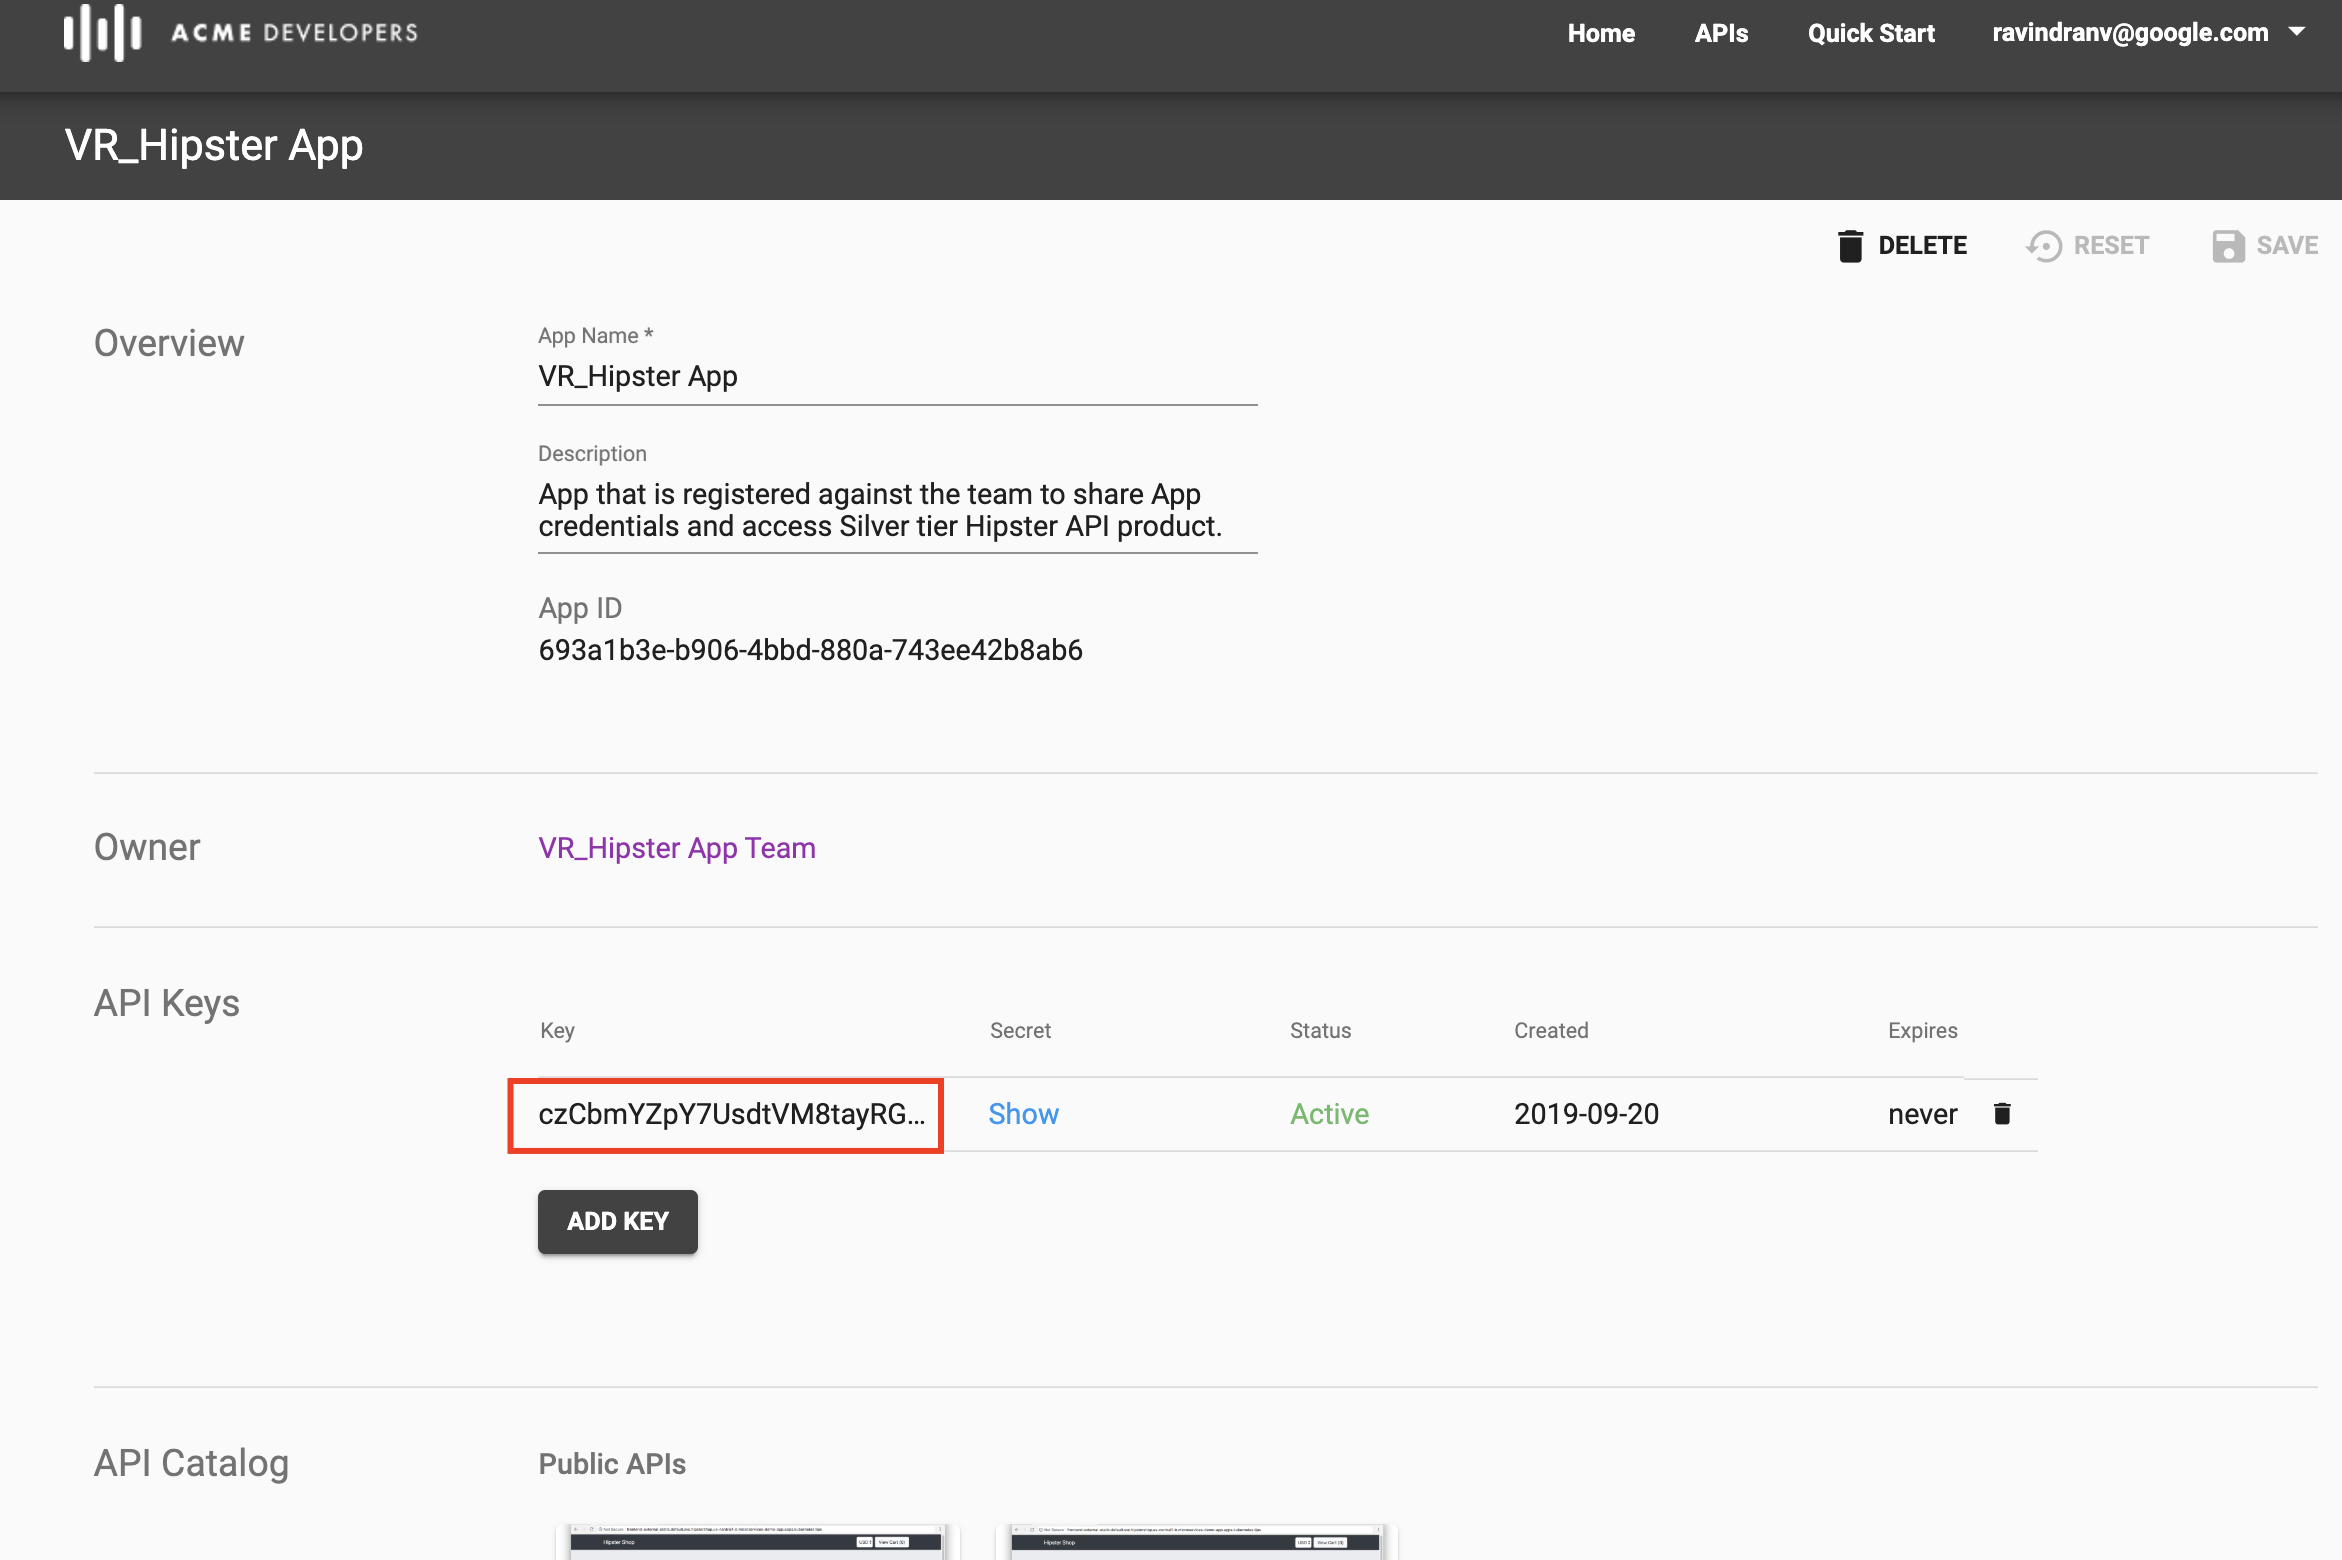
-
You will find that an API Key/Secret pair has been generated for your newly created App. You can now use this API Key to test the API.
-
Navigate to the API Catalog, select the Silver API Product docs.
-
Select the GET
/productsresource. Click on the Authorize button and select the newly created Team App’s credentials to set authorization information (API Key) for the API call. Then click Authorize within the popup.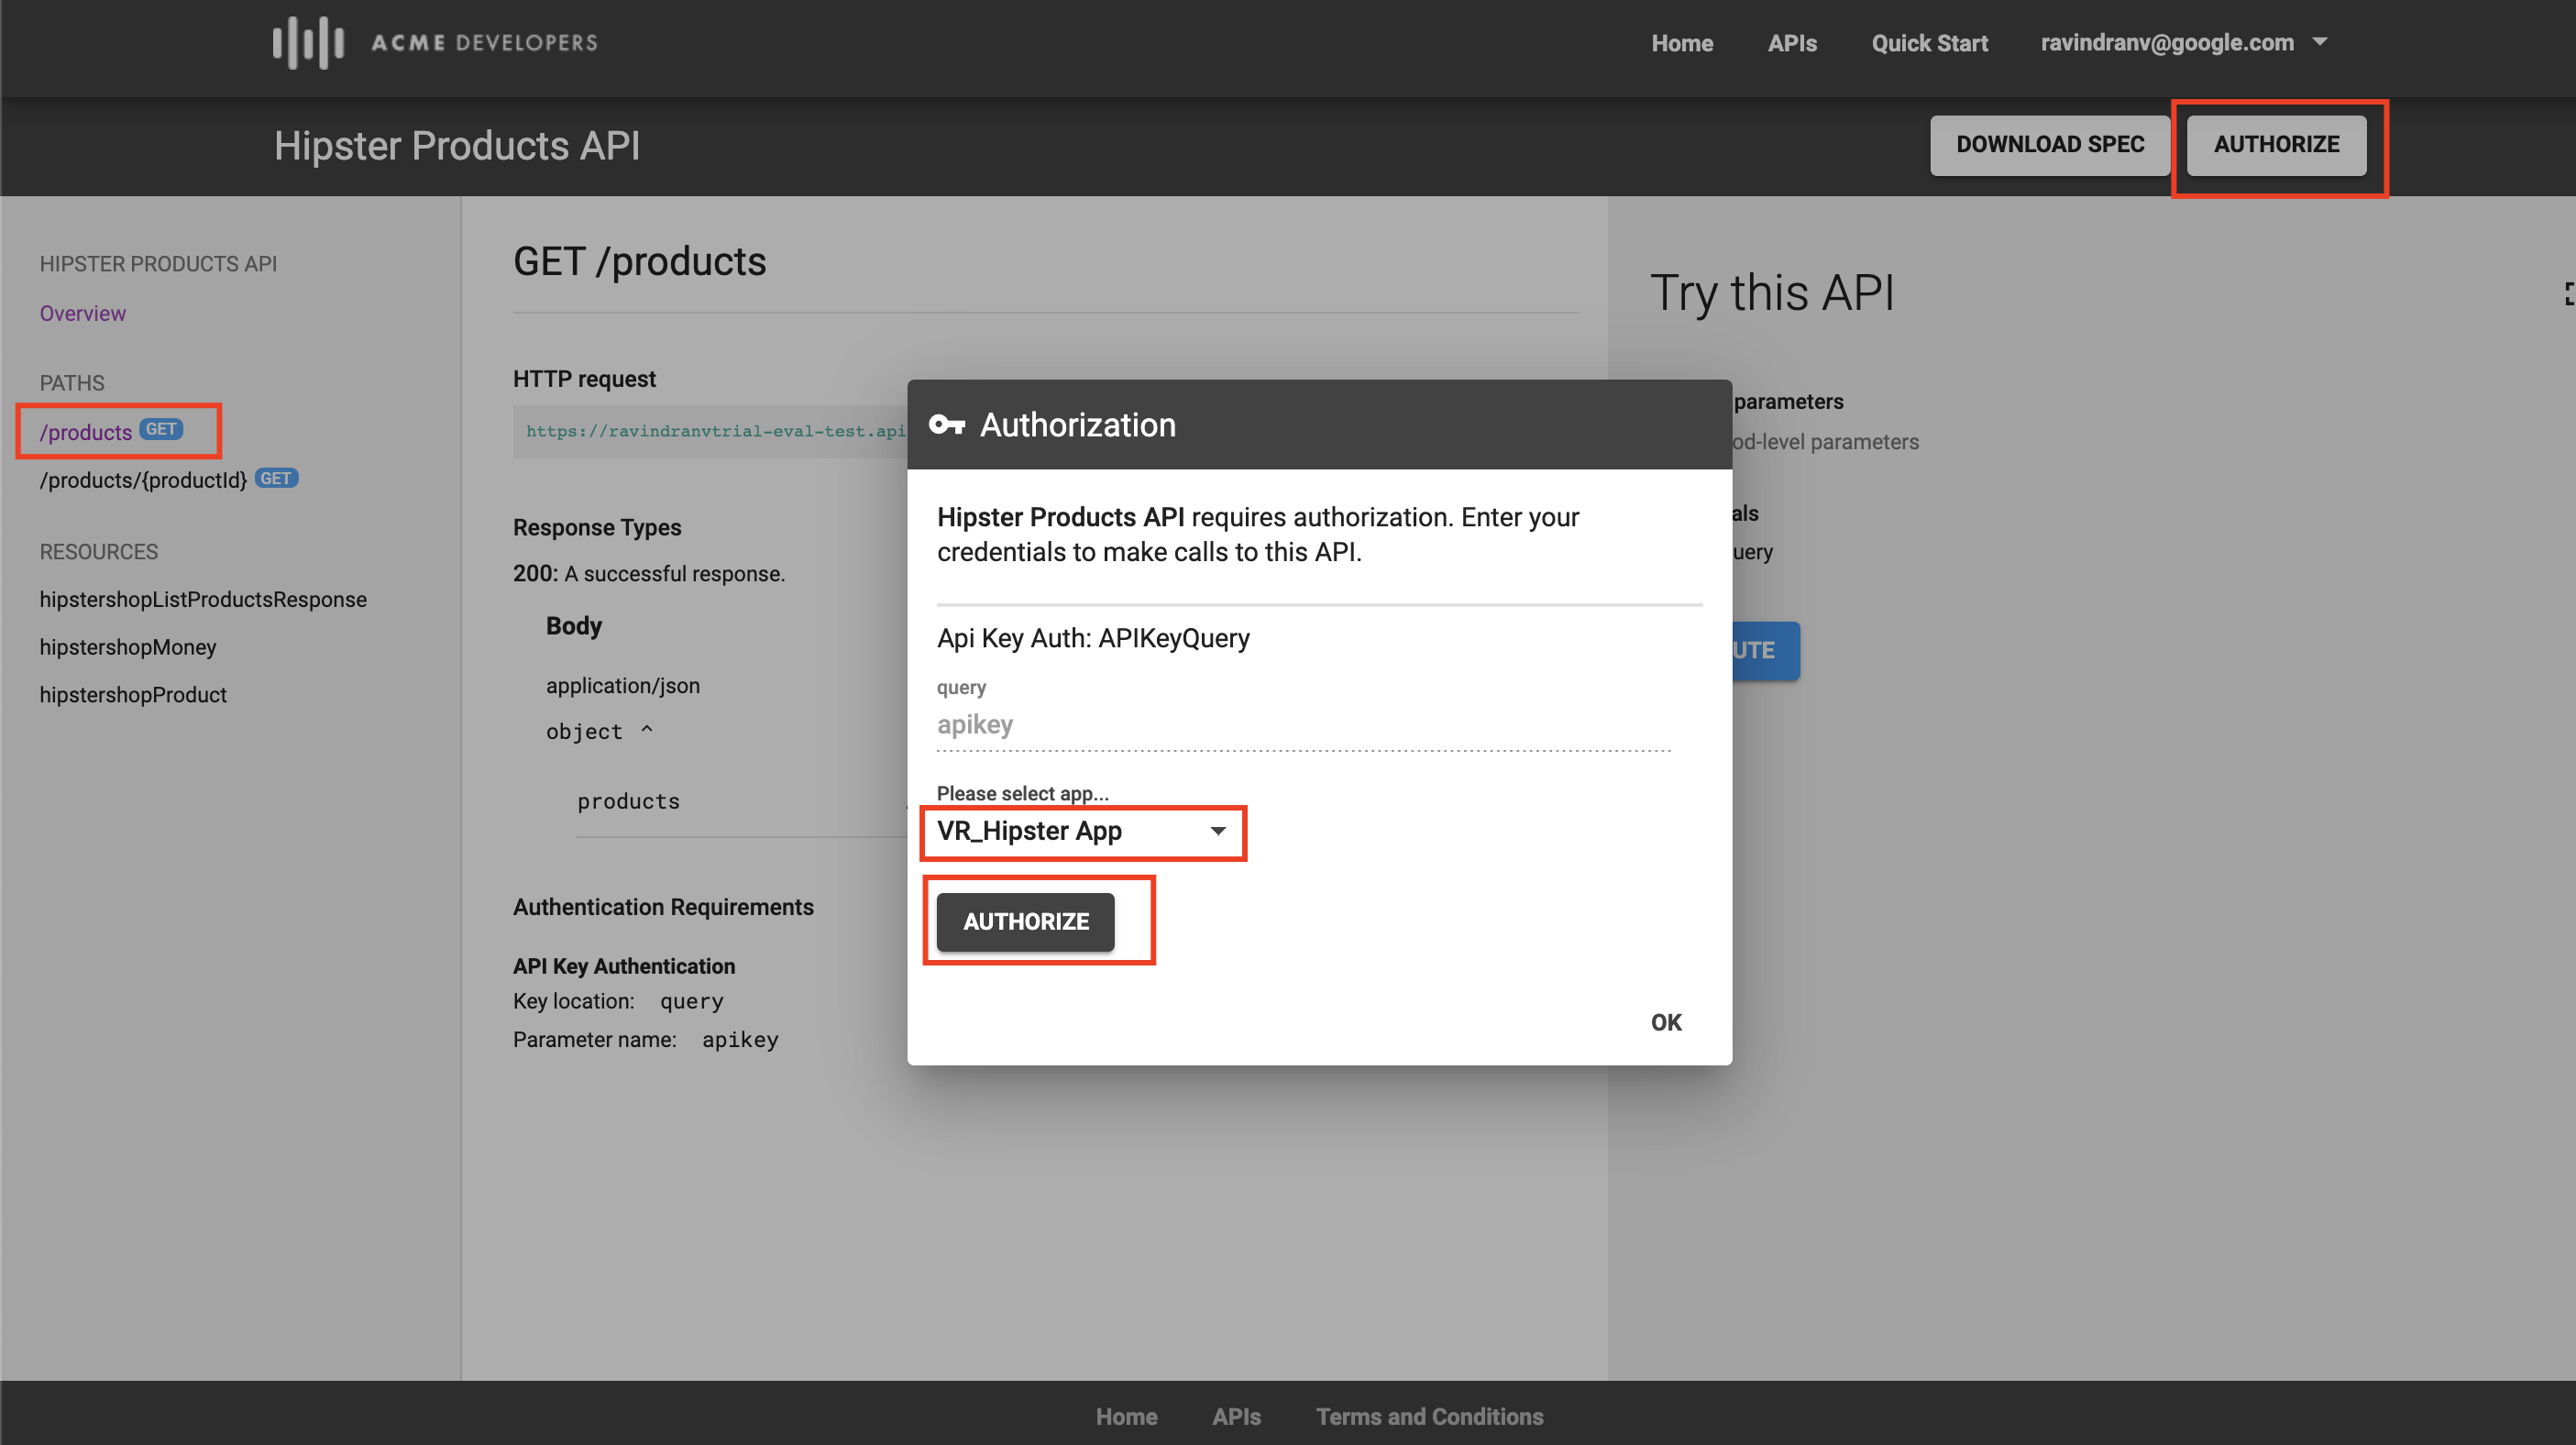
Click OK after authorization information is set.
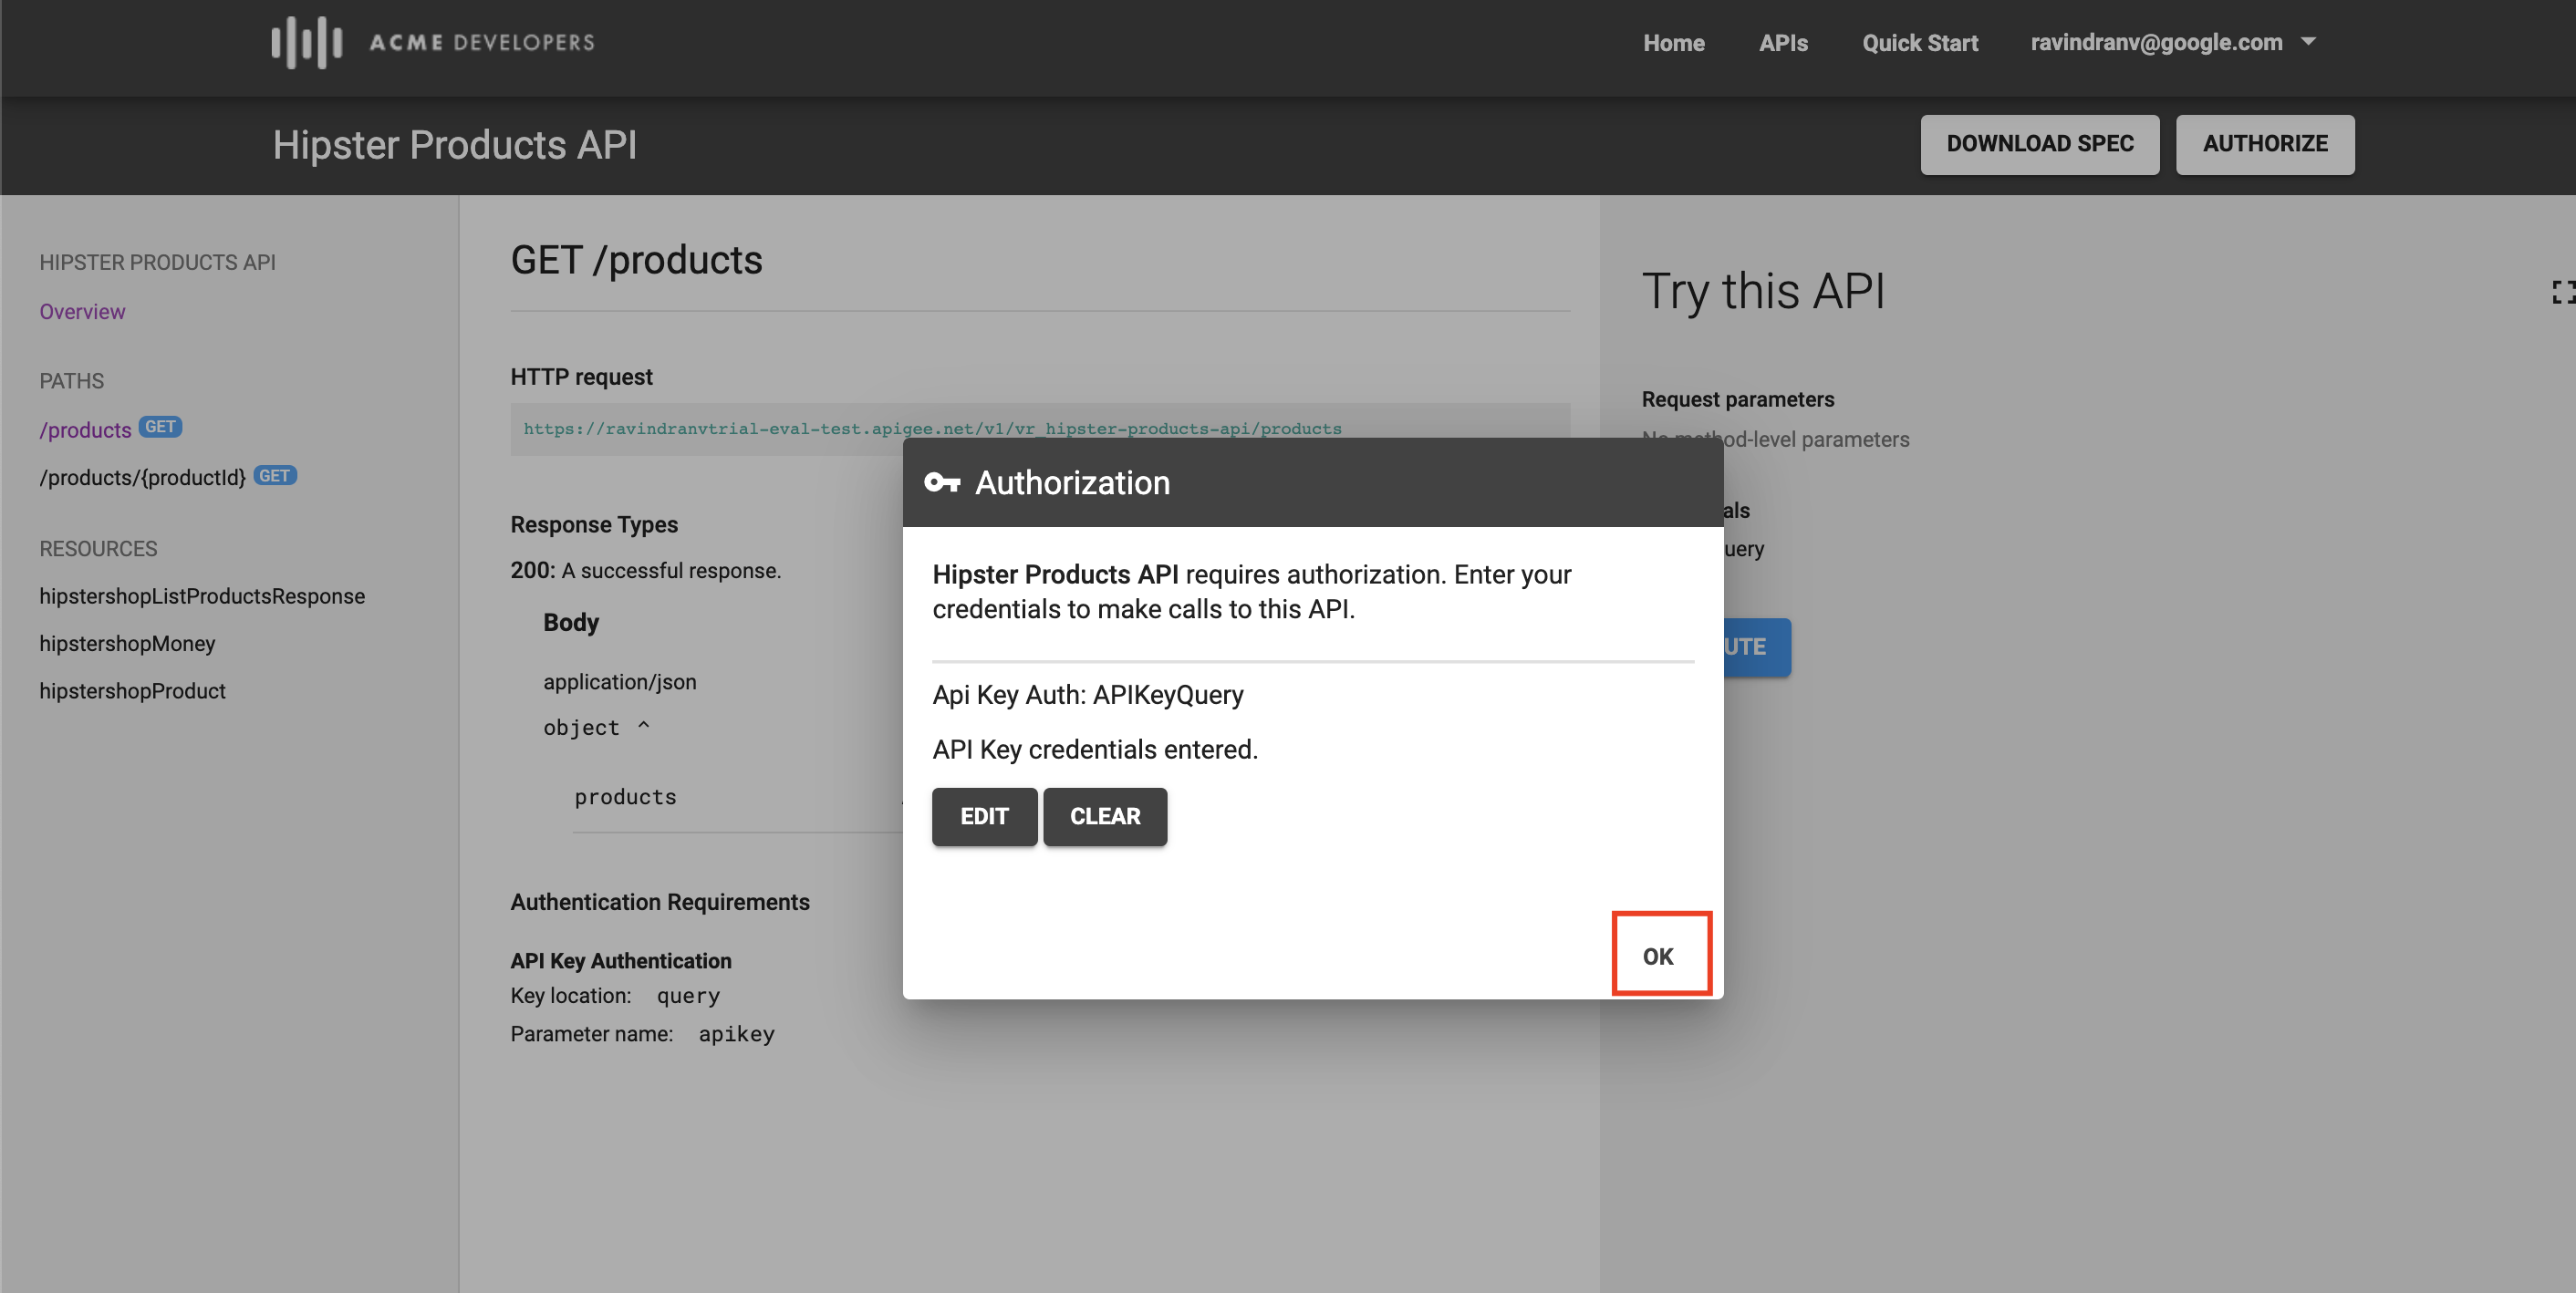
Now, click Execute. You will see that a valid 200 OK API response is received.
Lab Video
If you would rather watch a video that covers this topic, point your browser here.
Earn Extra-points
-
Add a second product to the portal and test it by launching the Live Portal.
-
Update your API specification, and then take a snapshot of the specification to update the portal documentation.
Quiz
-
What are two reasons why you might publish multiple API products to the Developer Portal?
-
Changes made to OpenAPI Specification are made available in the Developer Portal automatically. True or False?
Summary
You’ve learned how to do the following:
-
Deploy the Apigee Lightweight Developer Portal
-
Publish an API Product with an OpenAPI Specification
-
Use the Developer Portal UI to browse the OpenApi Specification Snapshot as a developer.
Rate this lab
How did you link this lab? Rate here.
Now go to Lab-5